Managing Workspaces & Folders
Creately is built to be your complete work management solution and comes with advanced features to keep all your work organized and easily accessible.
Workspace Controls
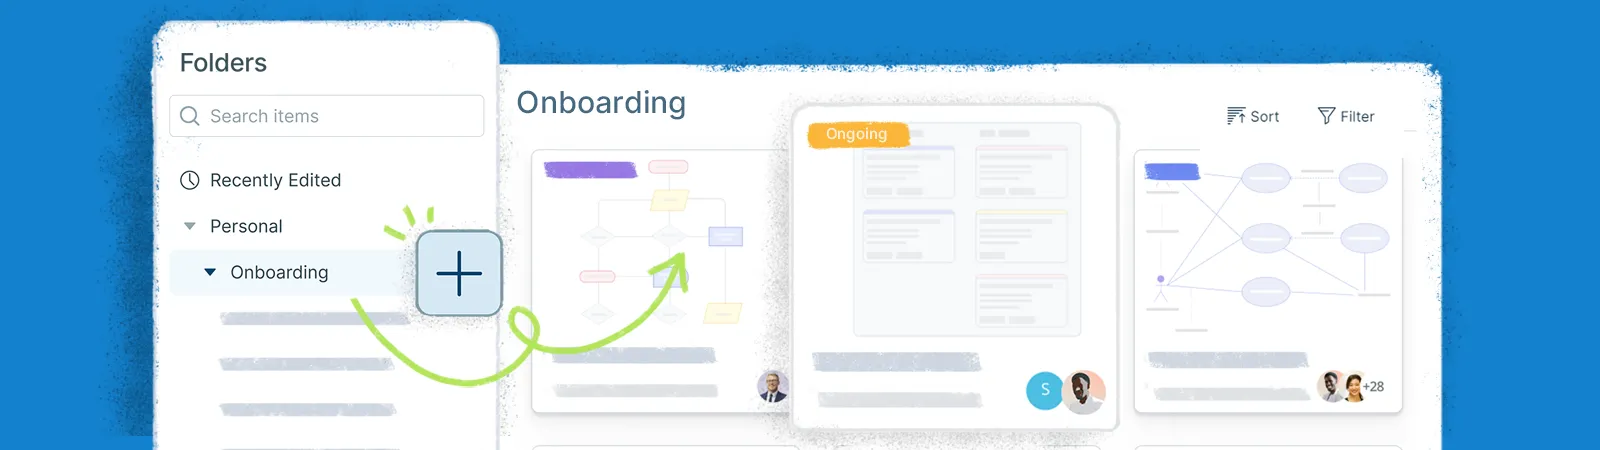
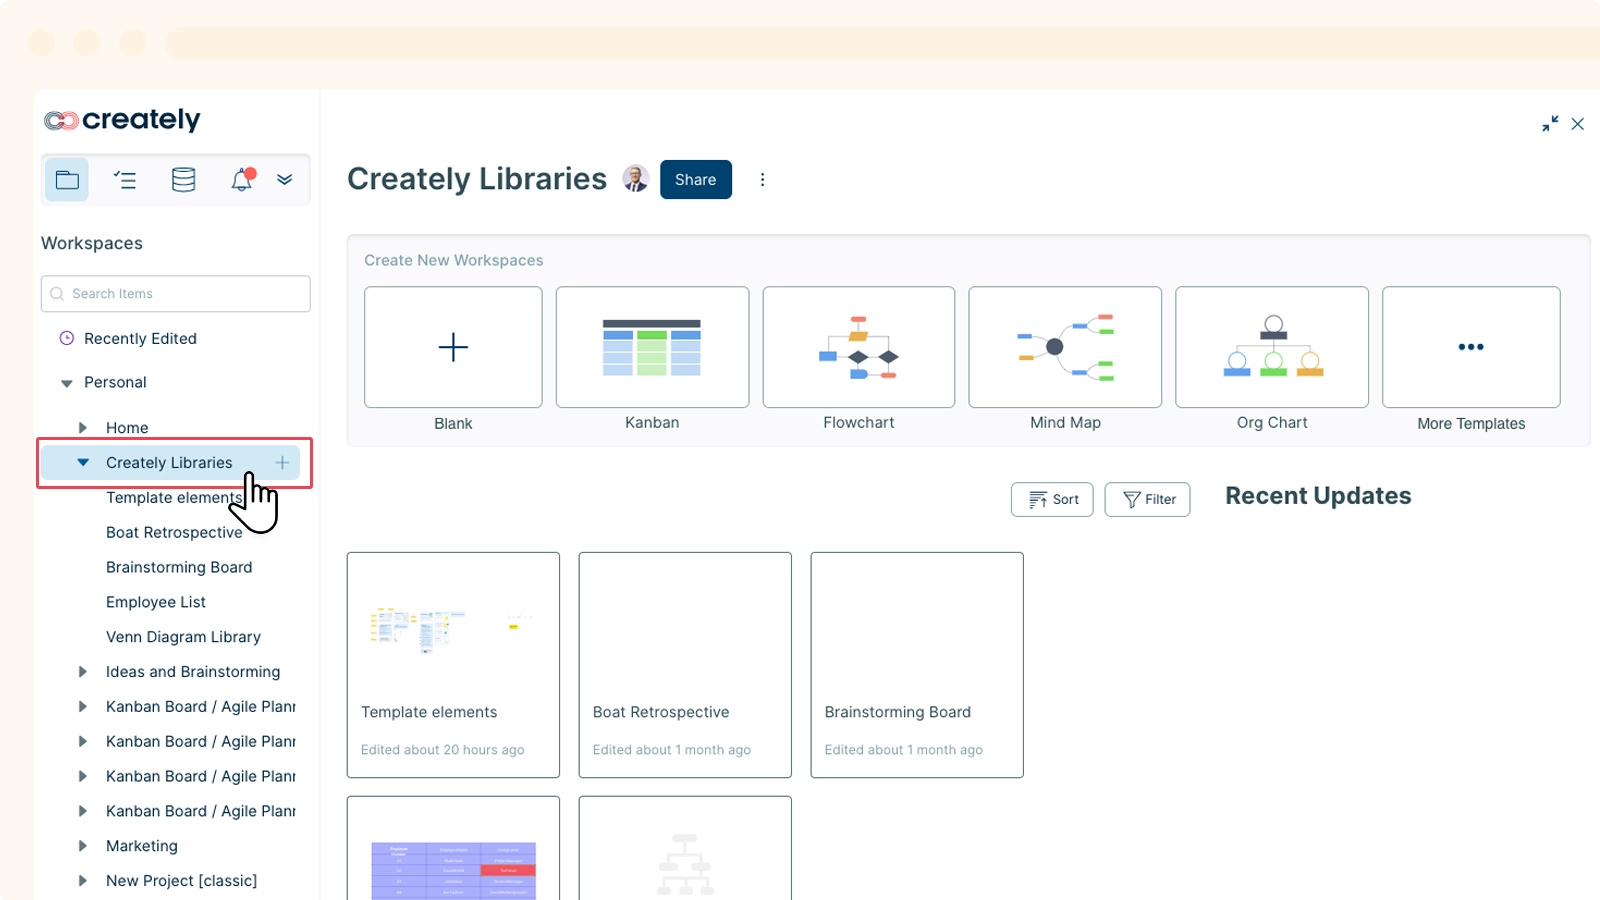
Creating a Folder
You can create folders with multiple workspaces, do this in 3 simple steps:
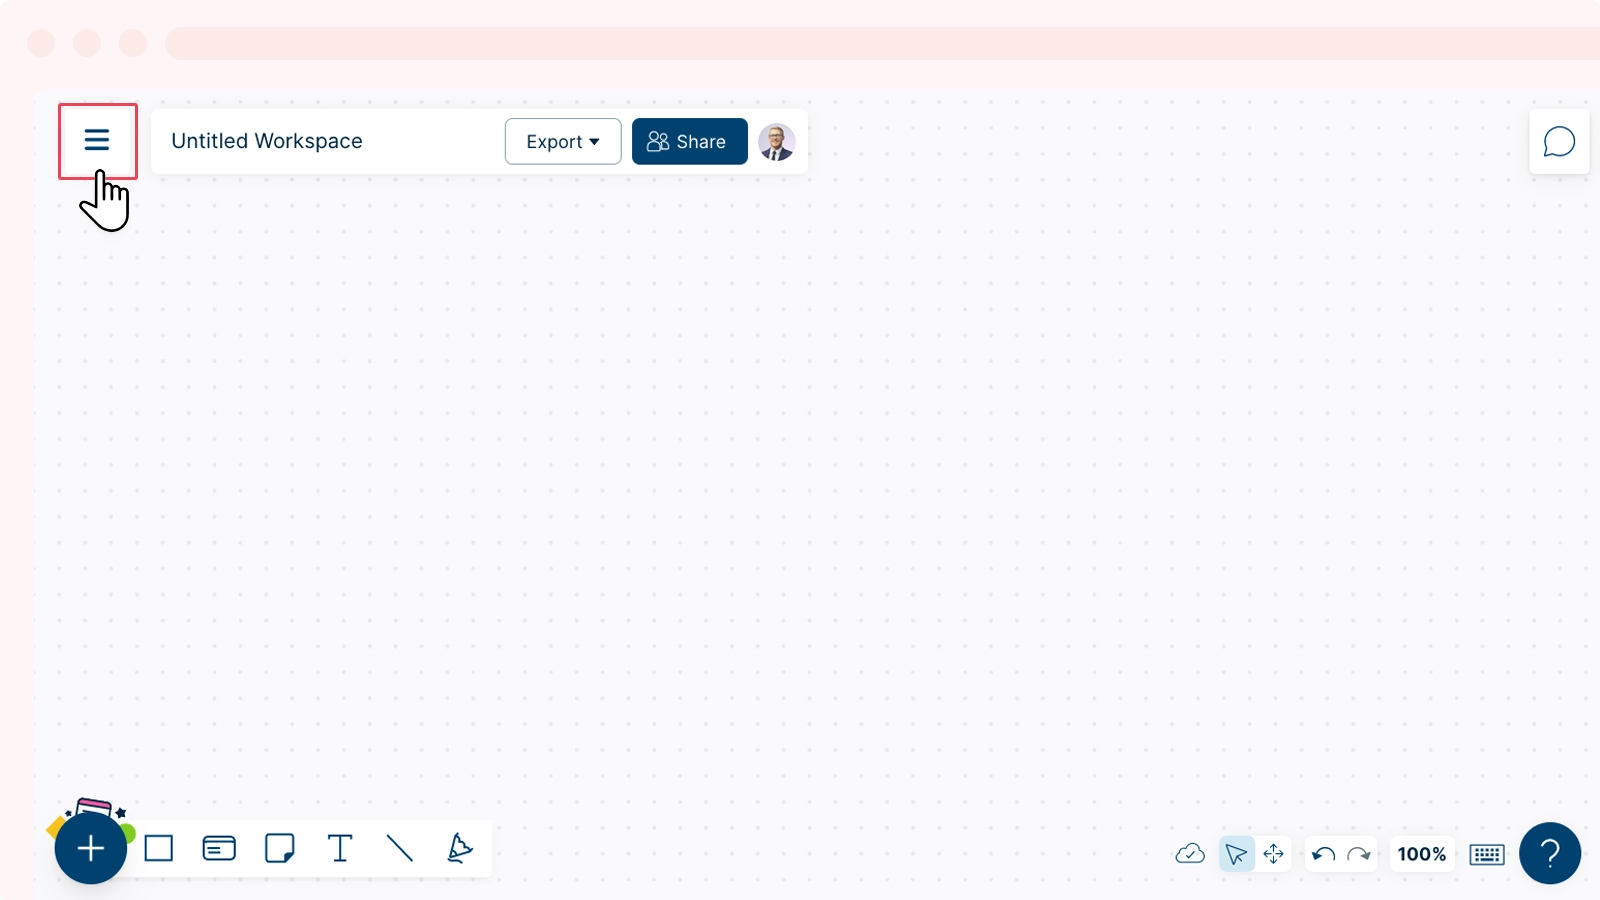
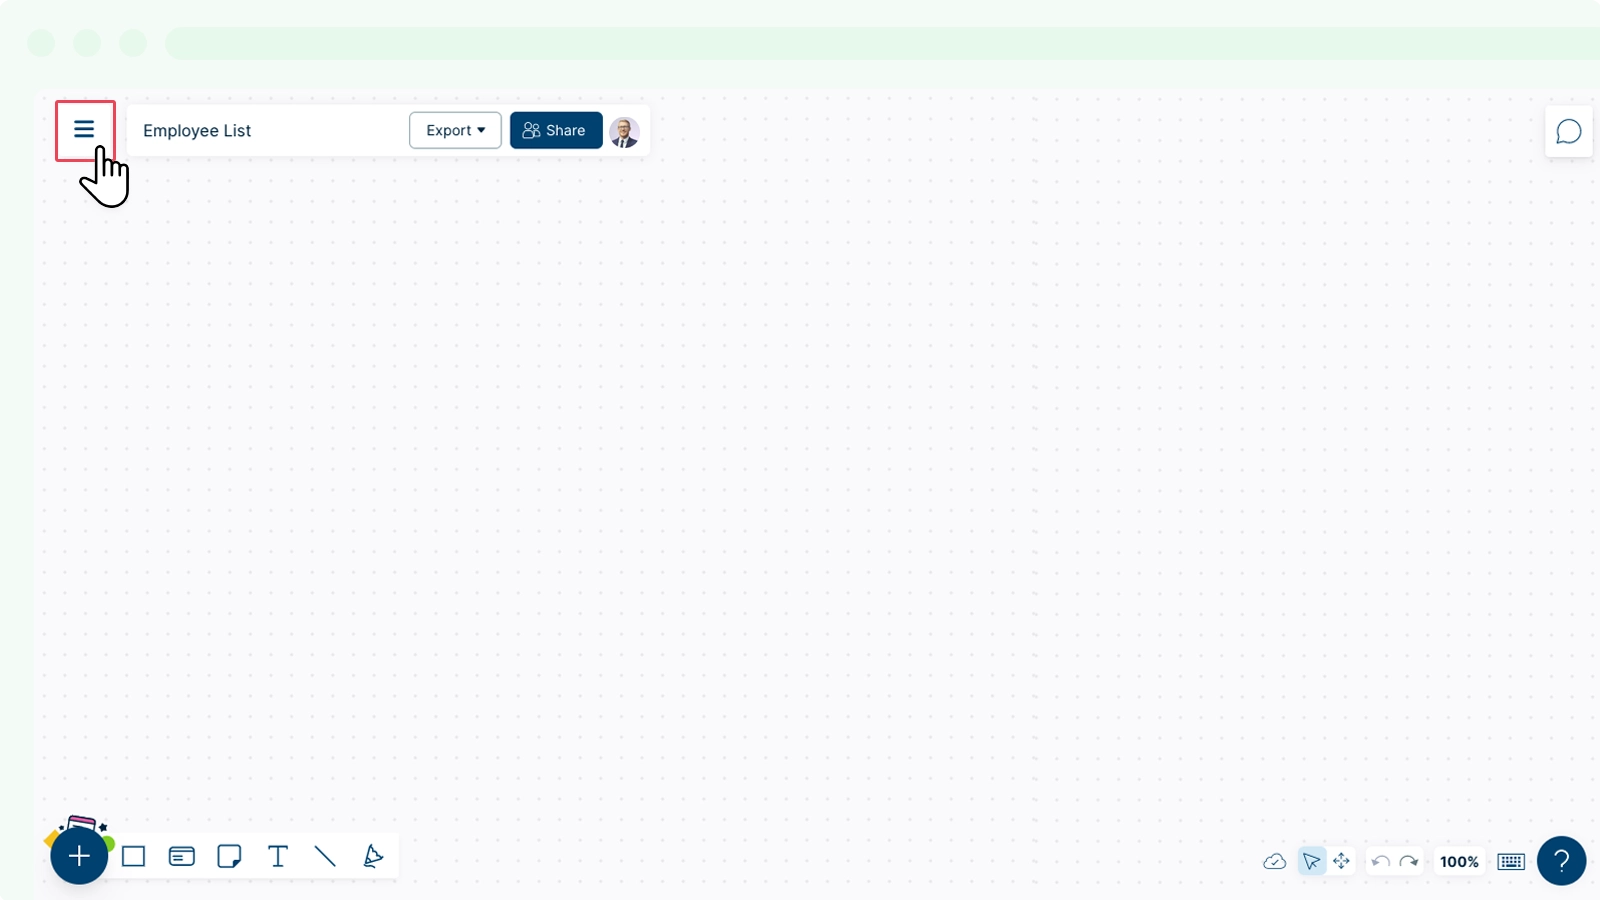
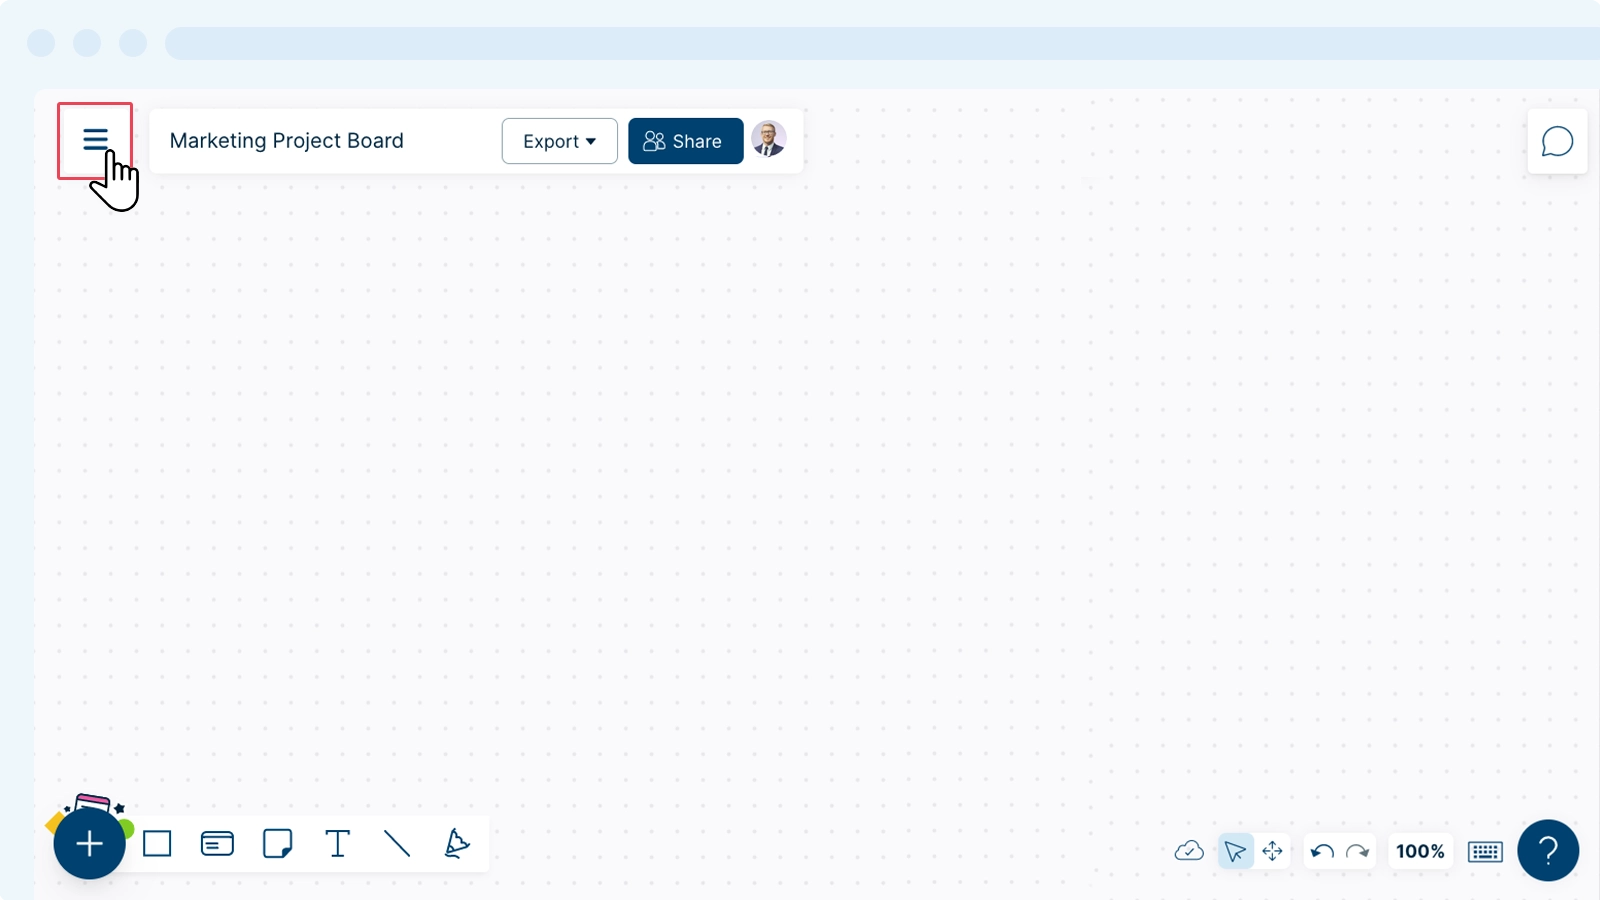
- Click on
 Main Menu.
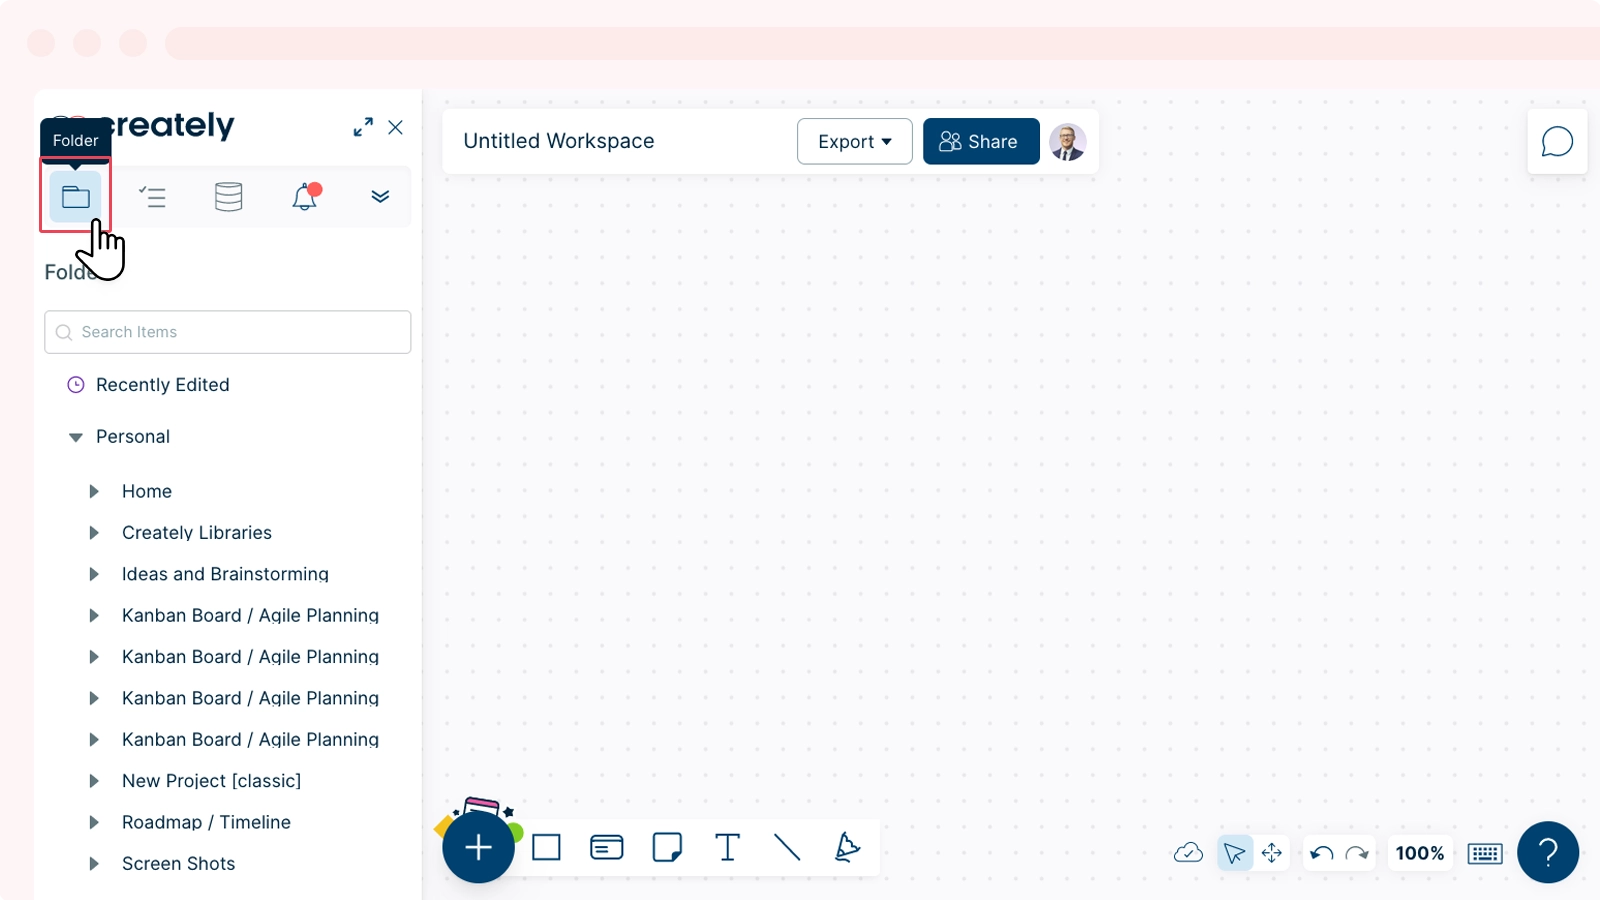
 - Select the
 Workspaces tab.
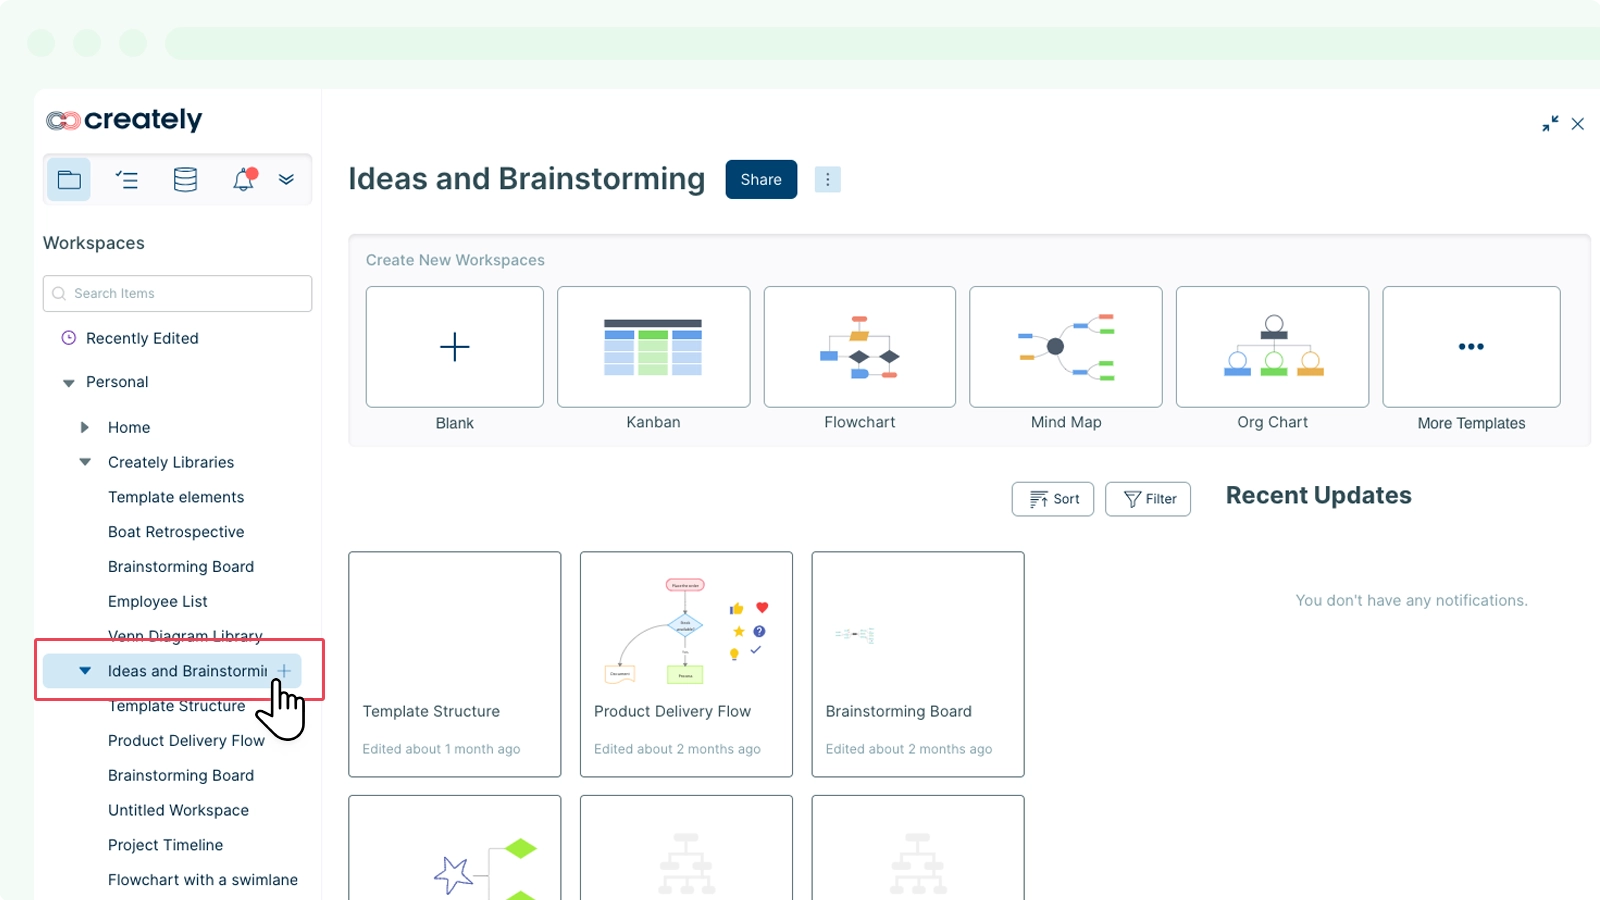
 - Click on the + icon.
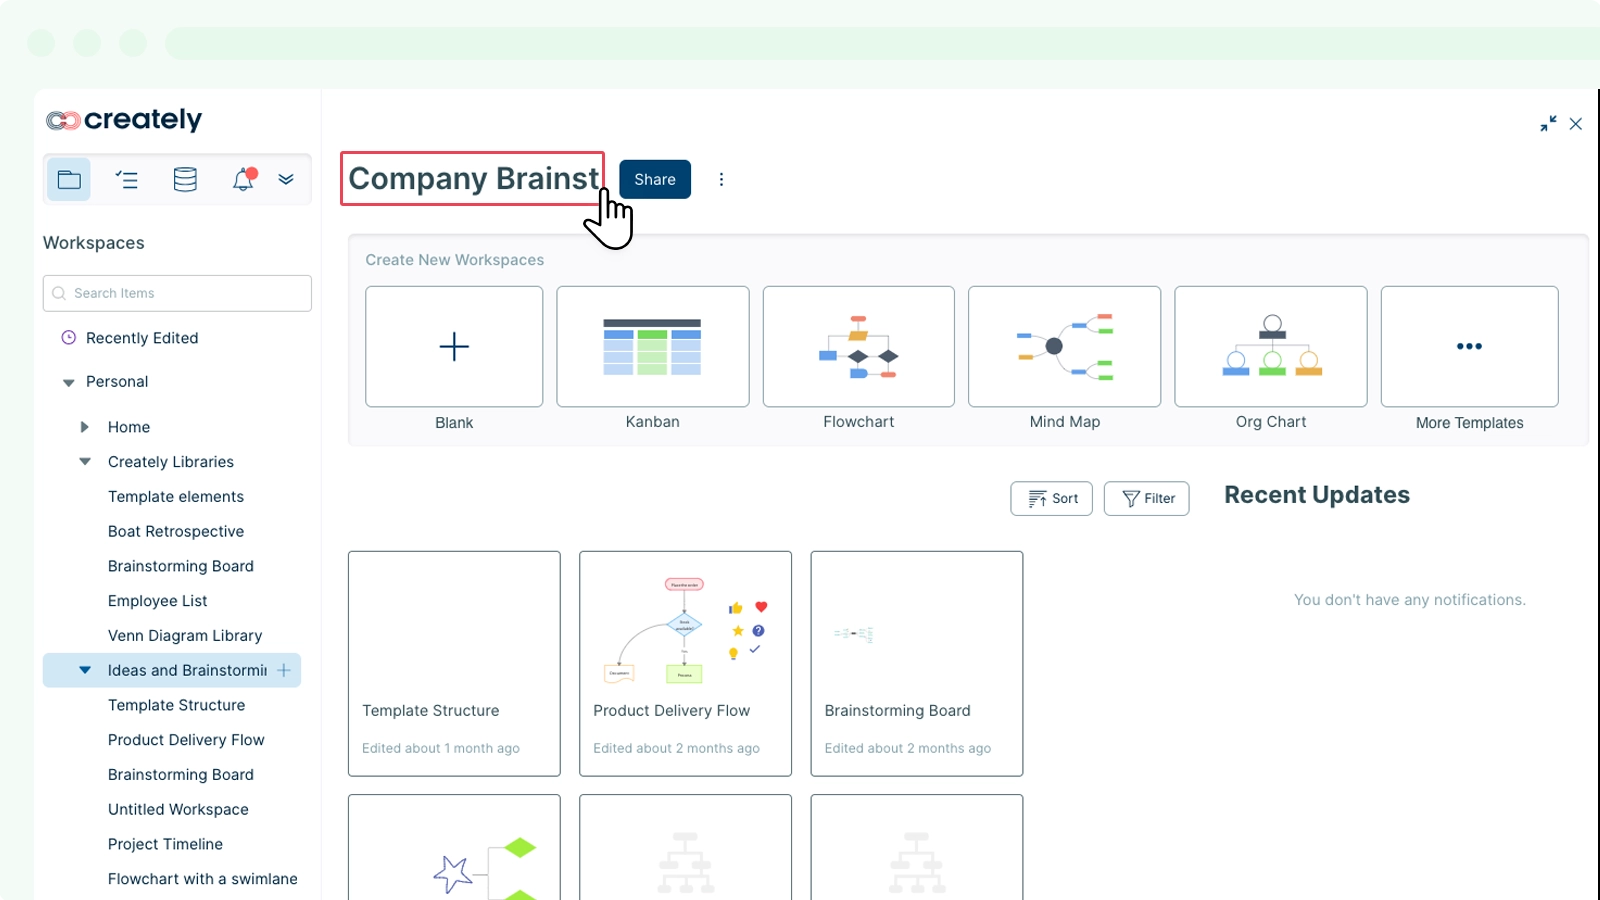
- Double click on the folder name and rename your folder.

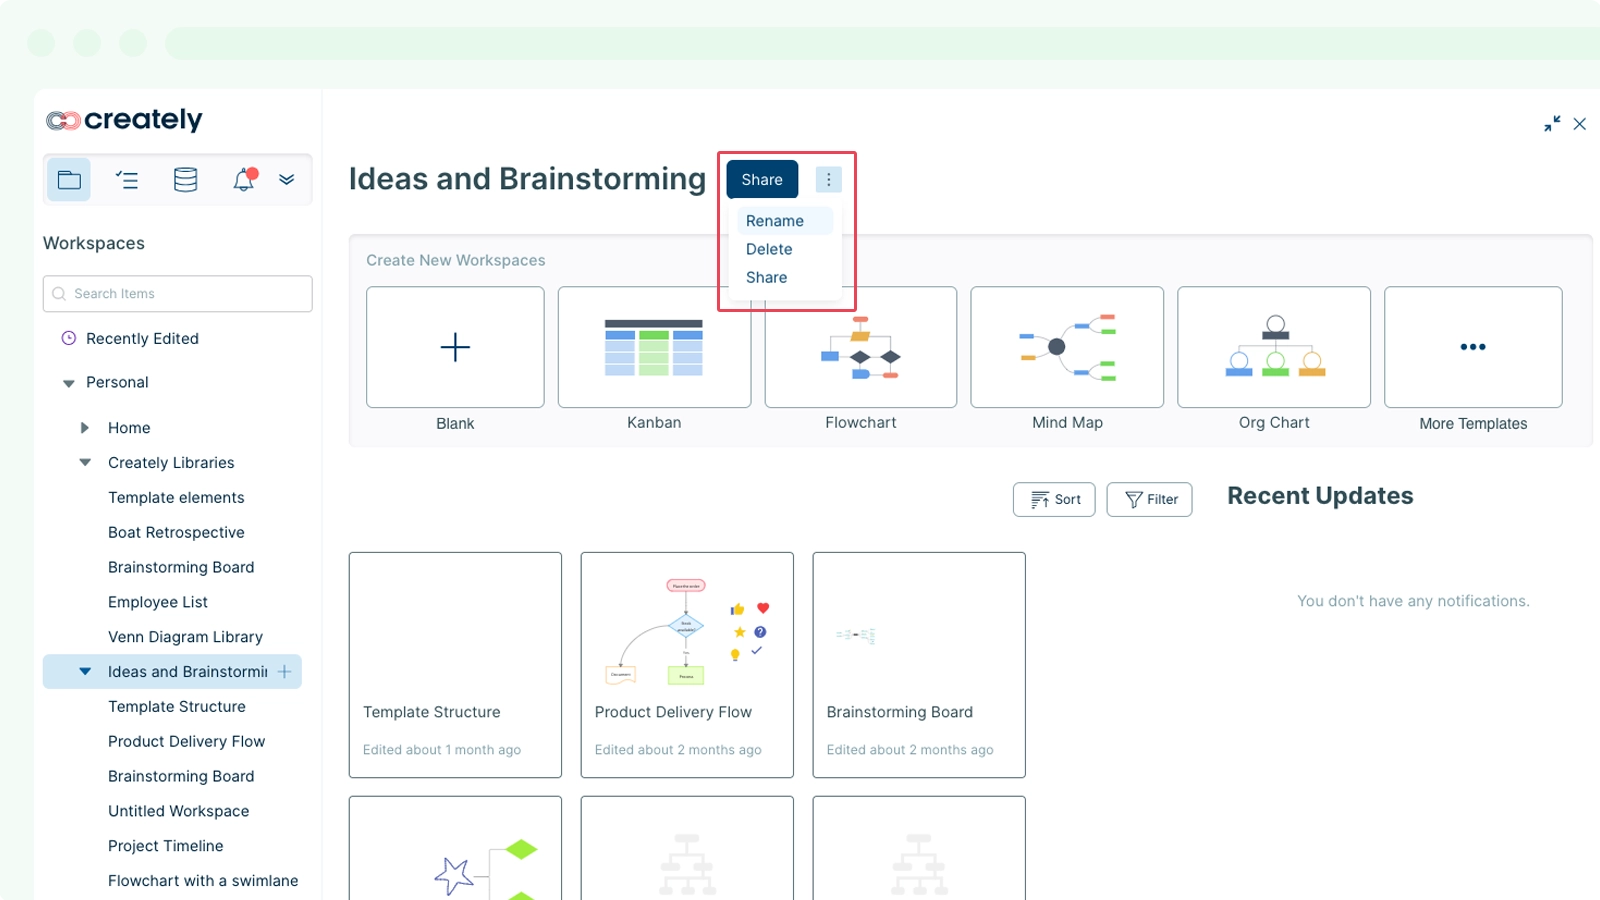
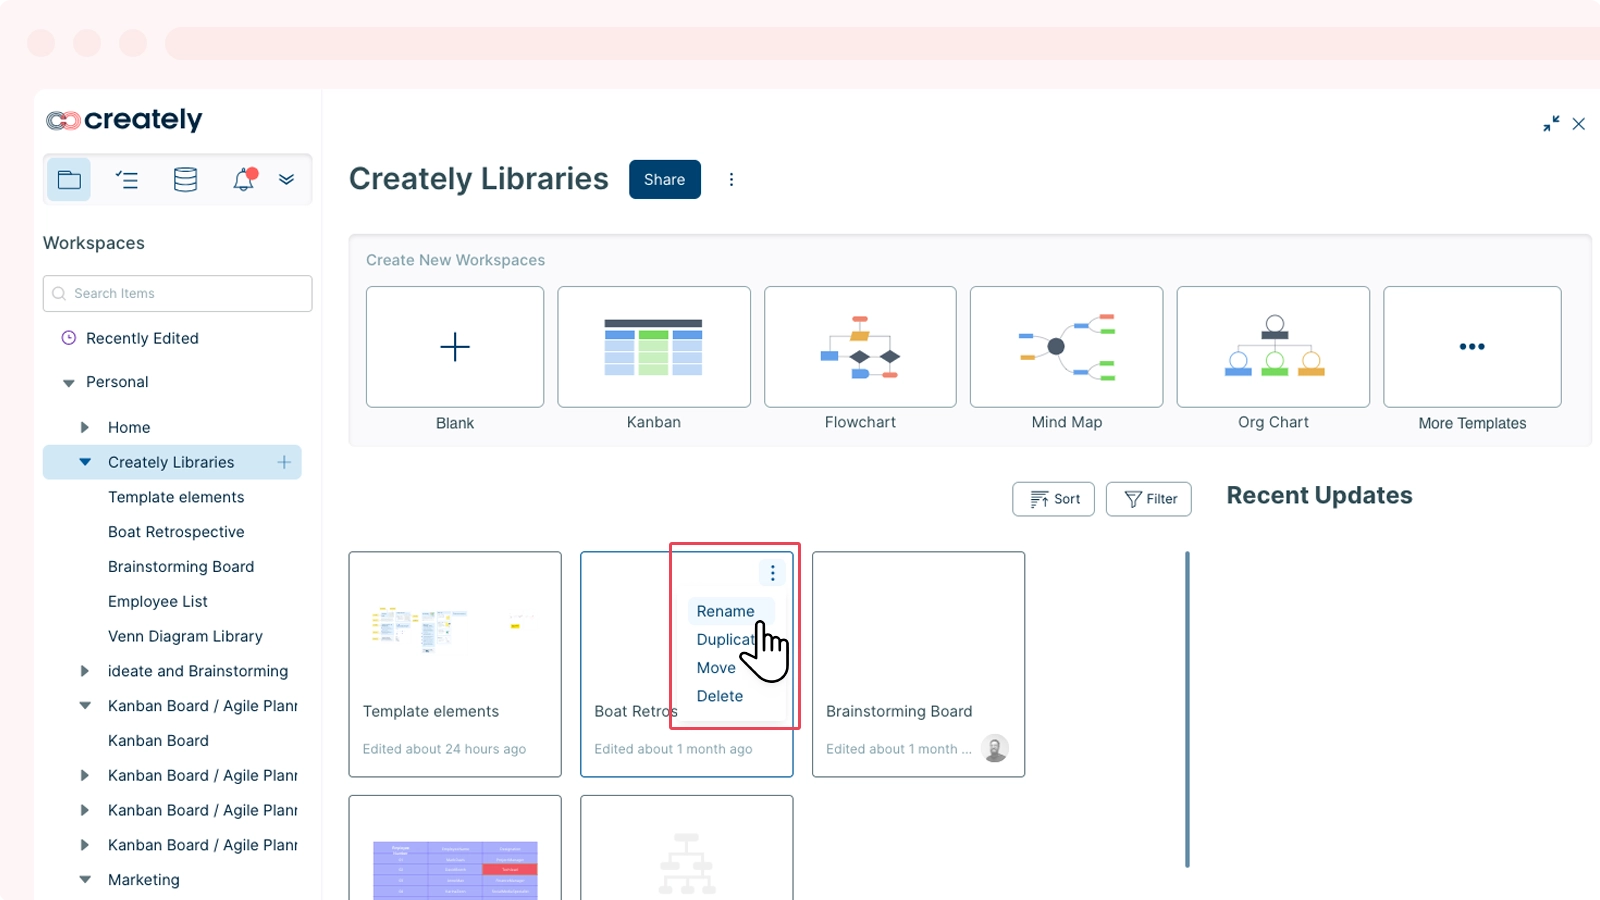
Renaming a Folder
Customize your folder name and make your work easy to locate. Here is how you rename a folder:
- Select the folder you would like to rename.
- Hover over the
 icon next to the folder name.
 - Select Rename.
Deleting a Folder
You can delete a folder whenever you like, but be careful when you do, because once deleted, a folder cannot be retrieved.
- Select the folder you would like to delete.
- Hover over the icon next to the name of the folder name.
- Click on the Delete option.

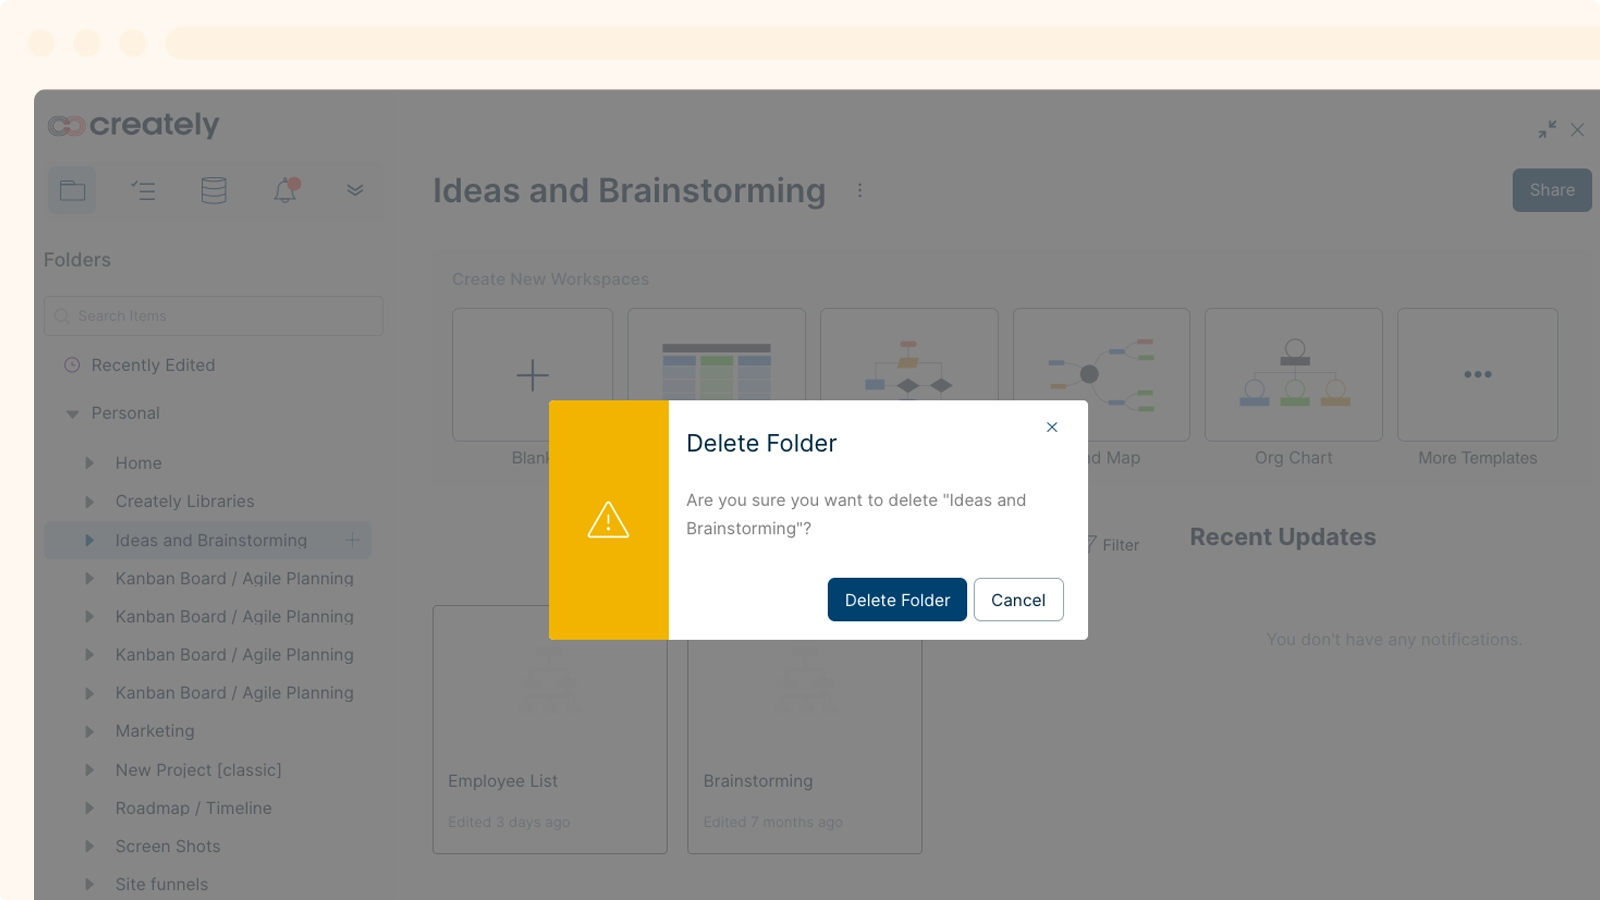
Note: Only the owner of the folder will be able to delete folders they have created. Collaborators cannot delete folders.
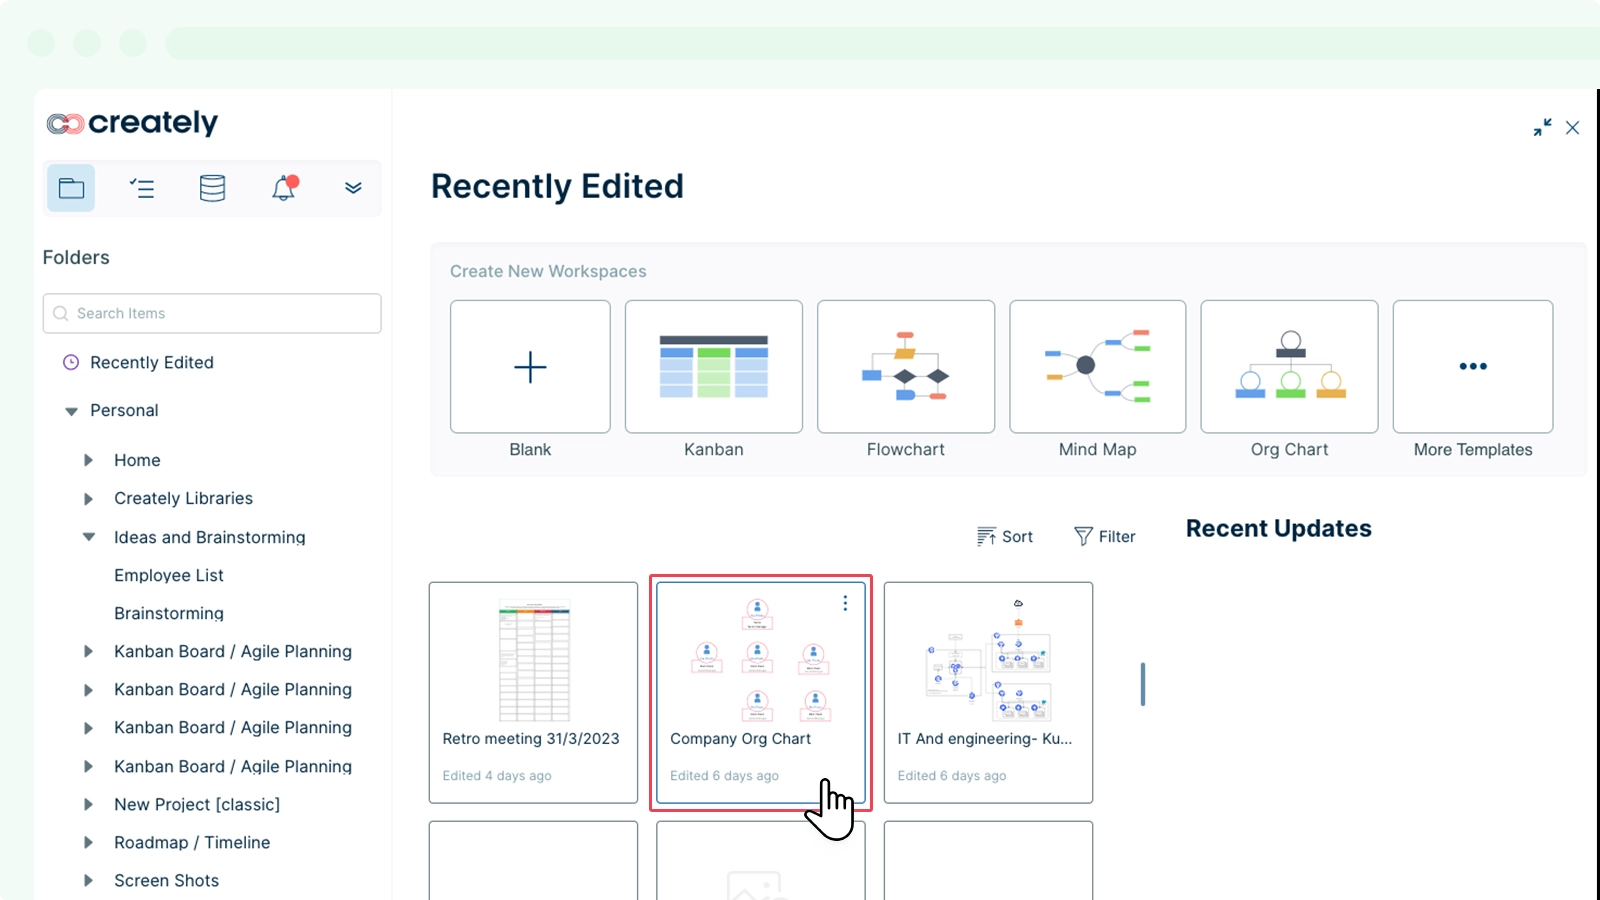
Accessing Recent Workspaces
Finding and accessing your workspaces is super easy on Creately. If you are looking for one of your recently accessed workspaces, simply follow these steps:
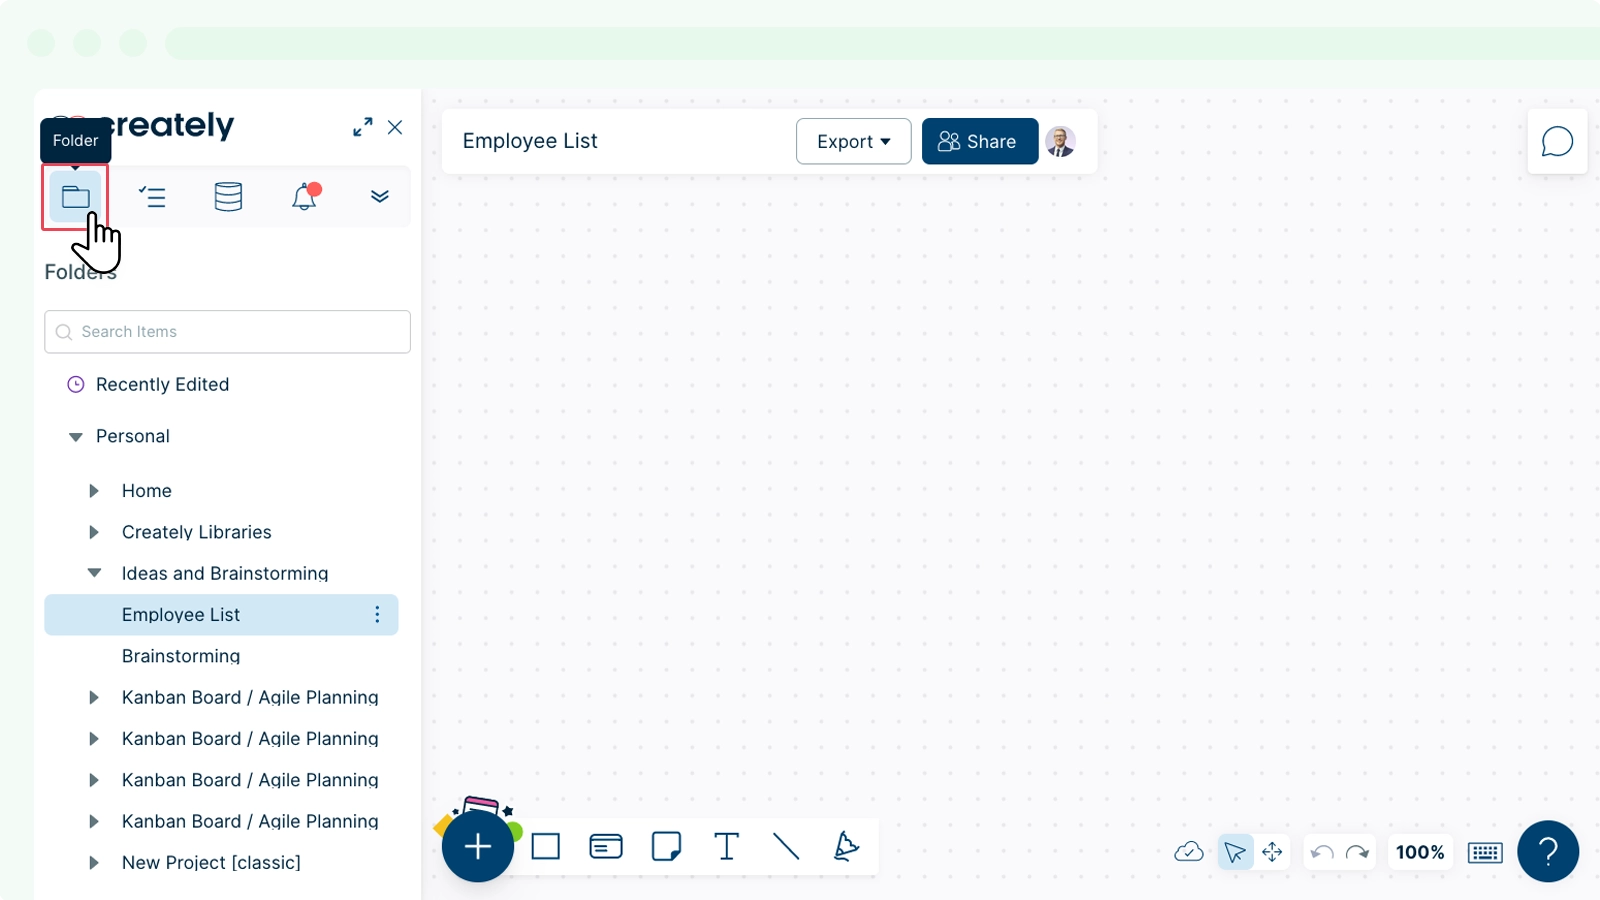
- Go to Main Menu.
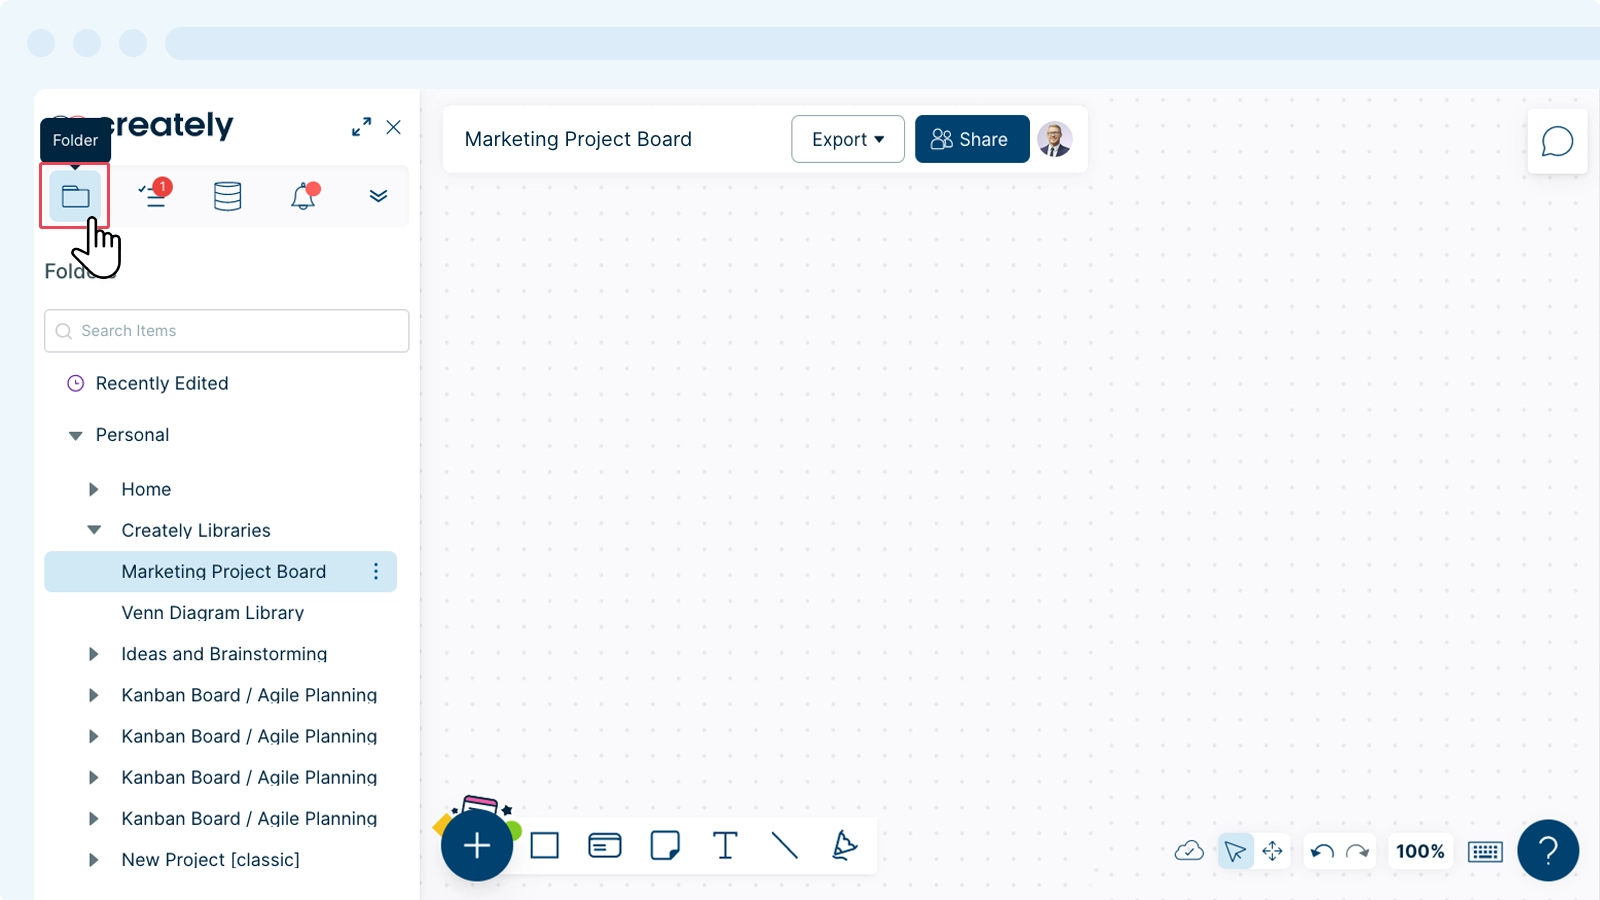
- Click on the Folder icon to open the folder panel.
- Open the Recently Edited tab at the top of the panel. All the workspaces you have accessed recently will be listed here.
- Select the workspace you were looking for and it will open on the canvas.

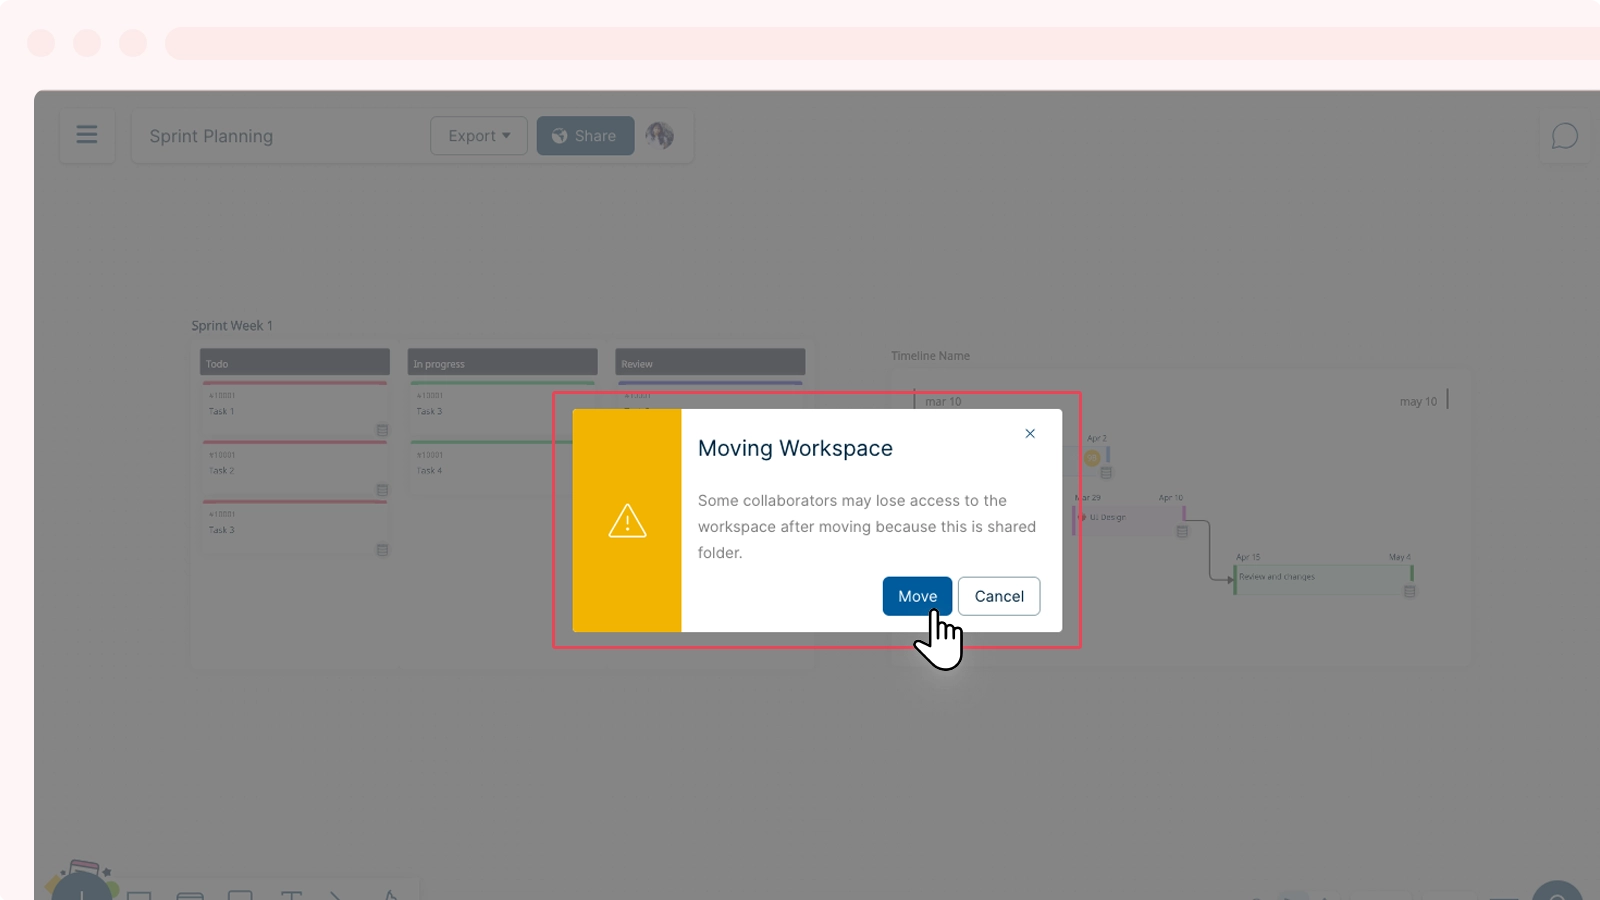
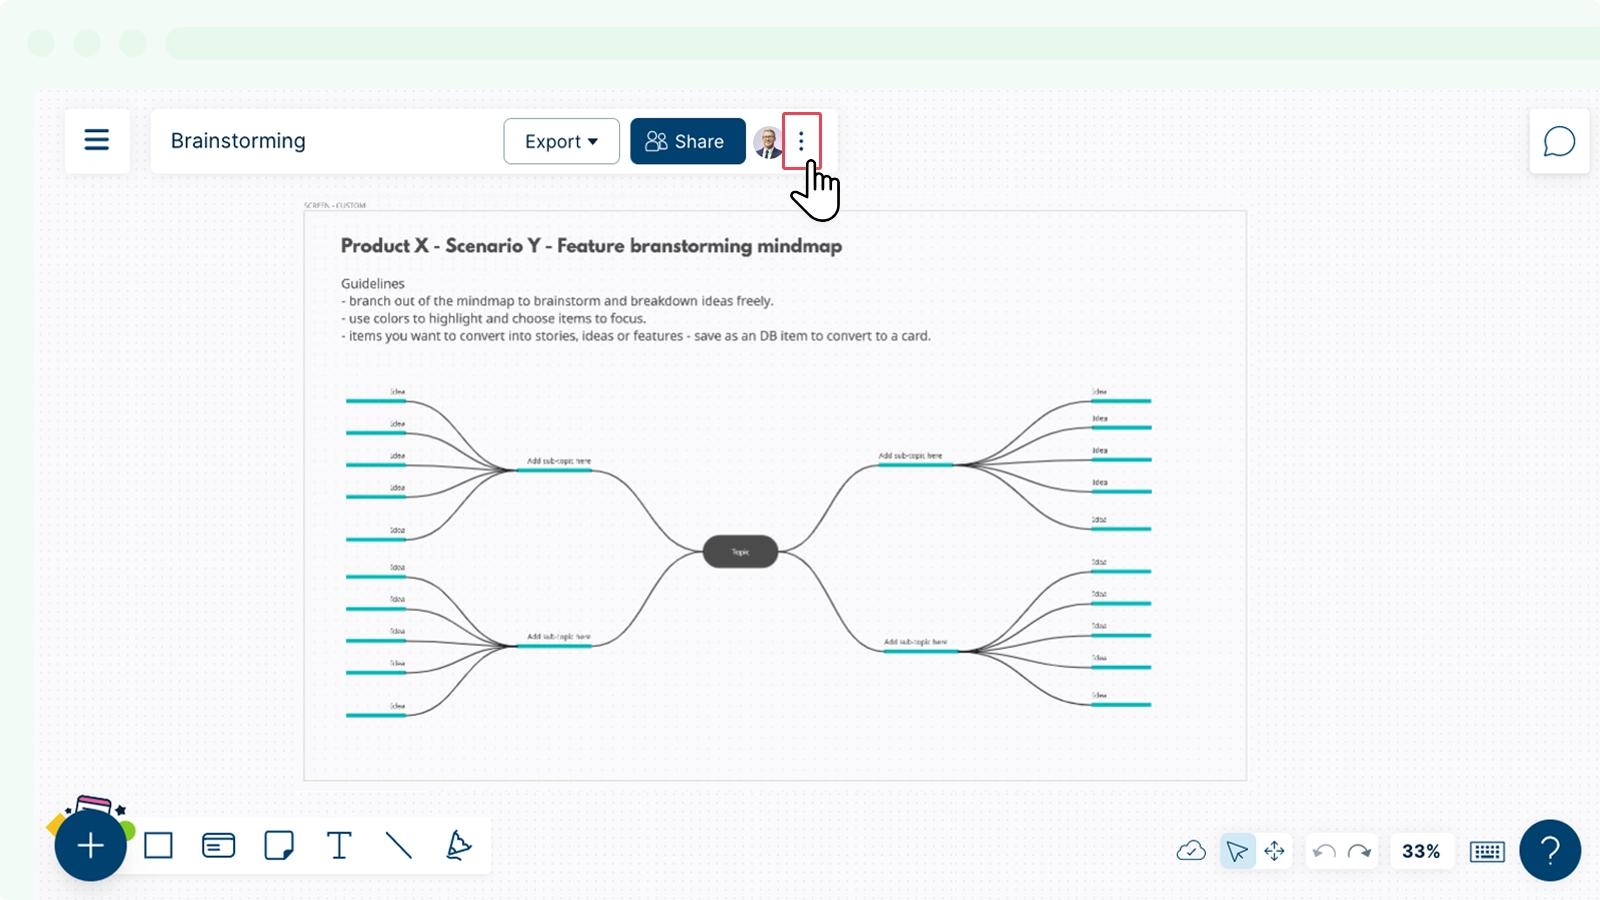
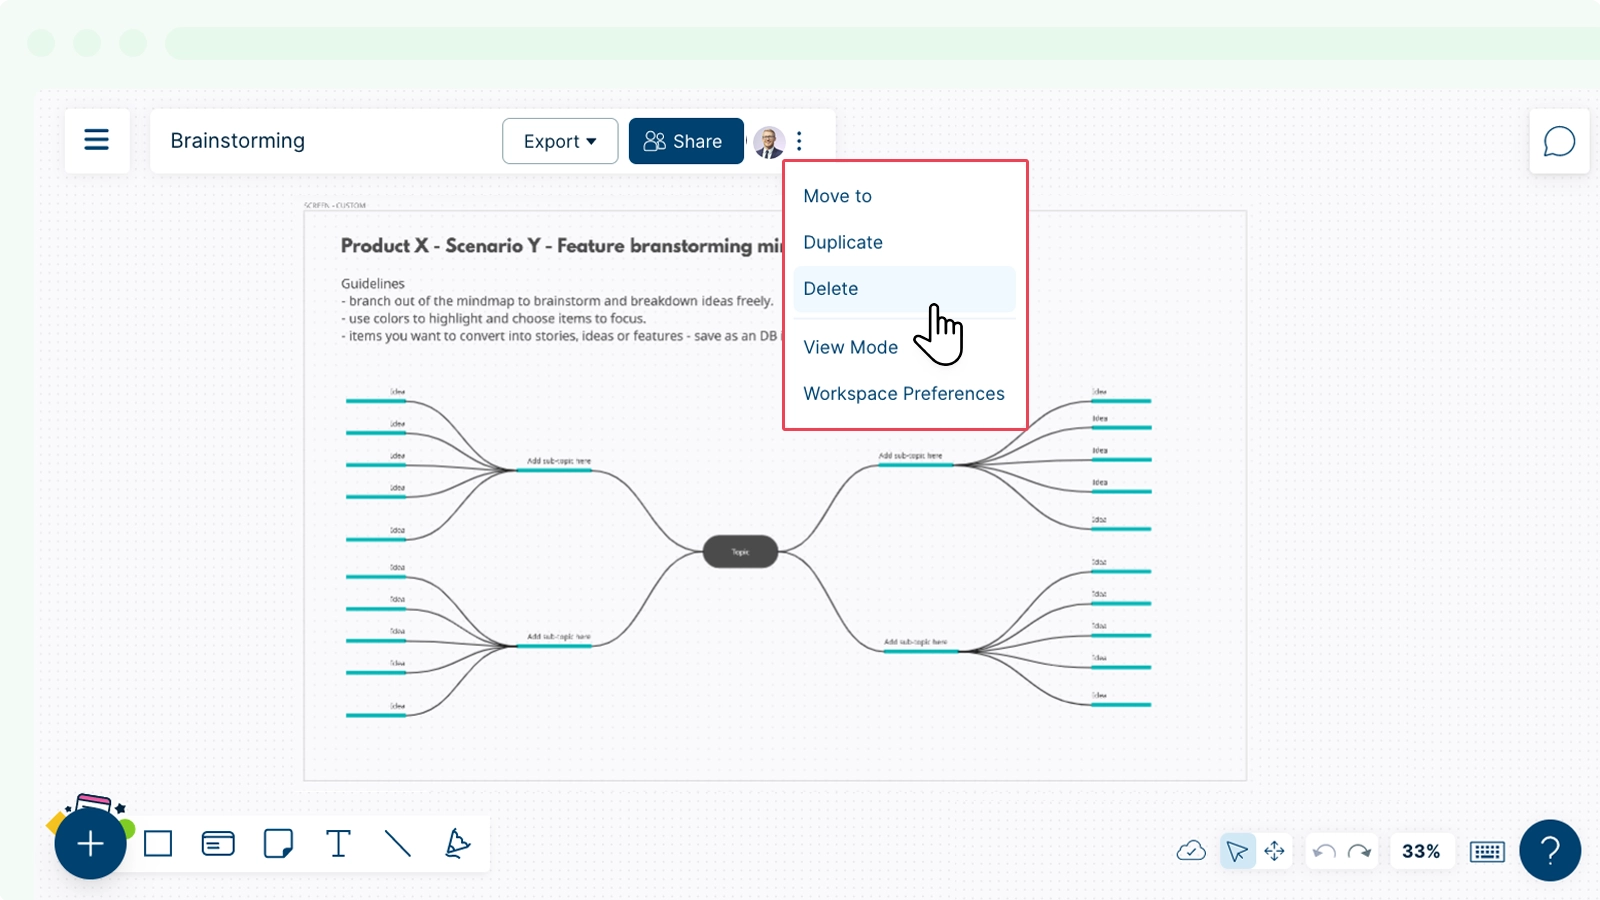
Moving Workspaces Between Folders
You can move and rearrange workspace and assign them to different folders whenever you want.
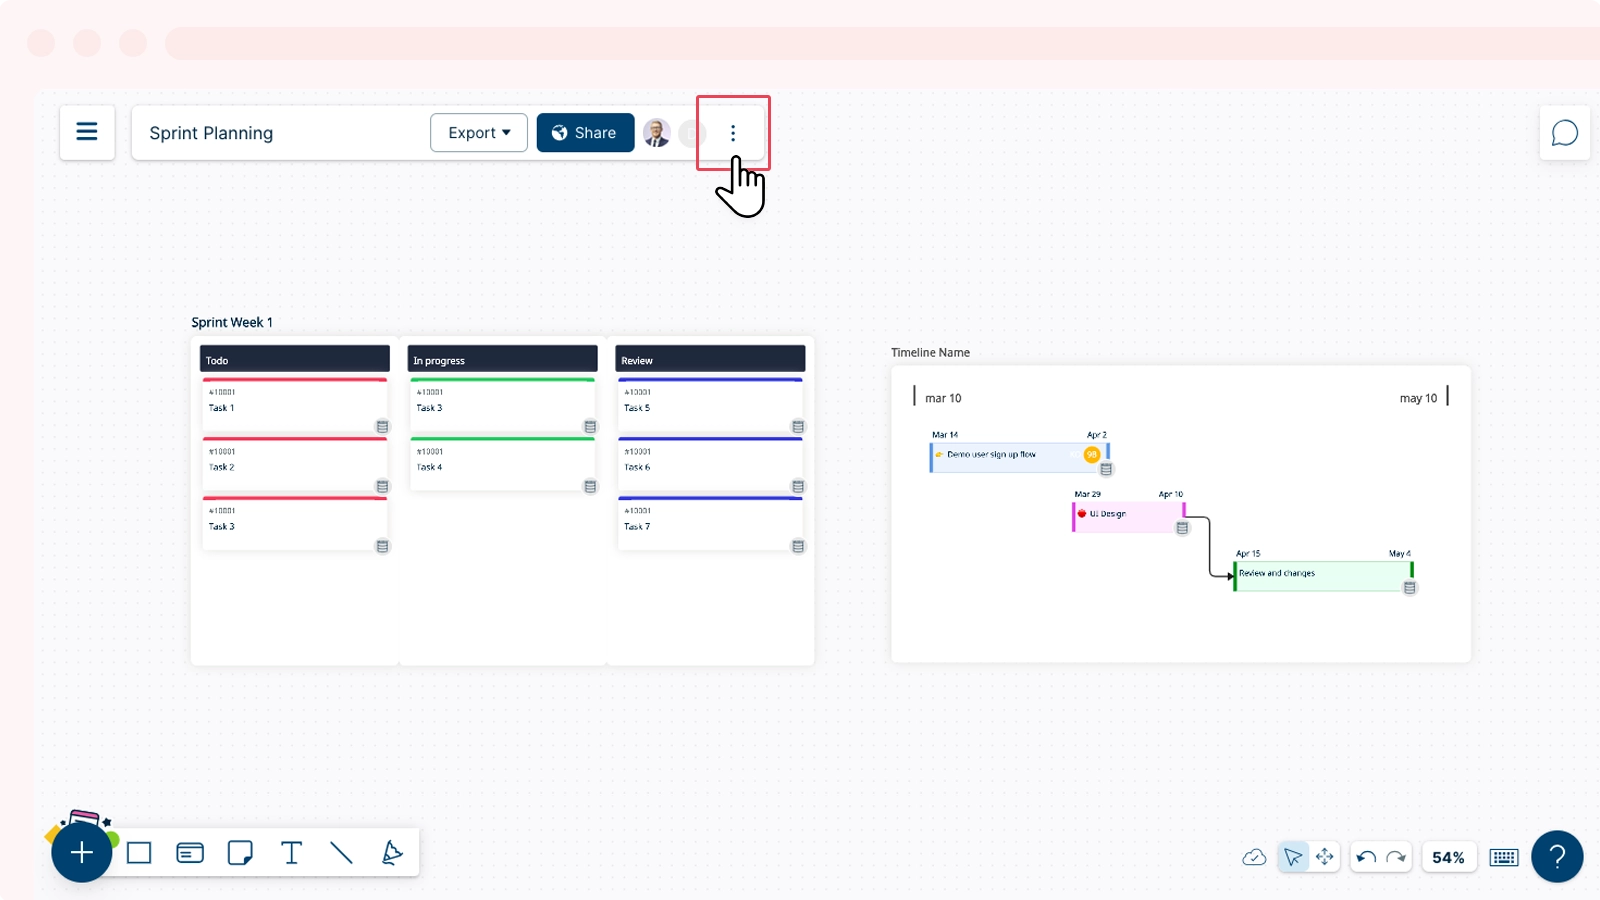
To move a workspace:
- Click the icon.
- Select the Move to option.
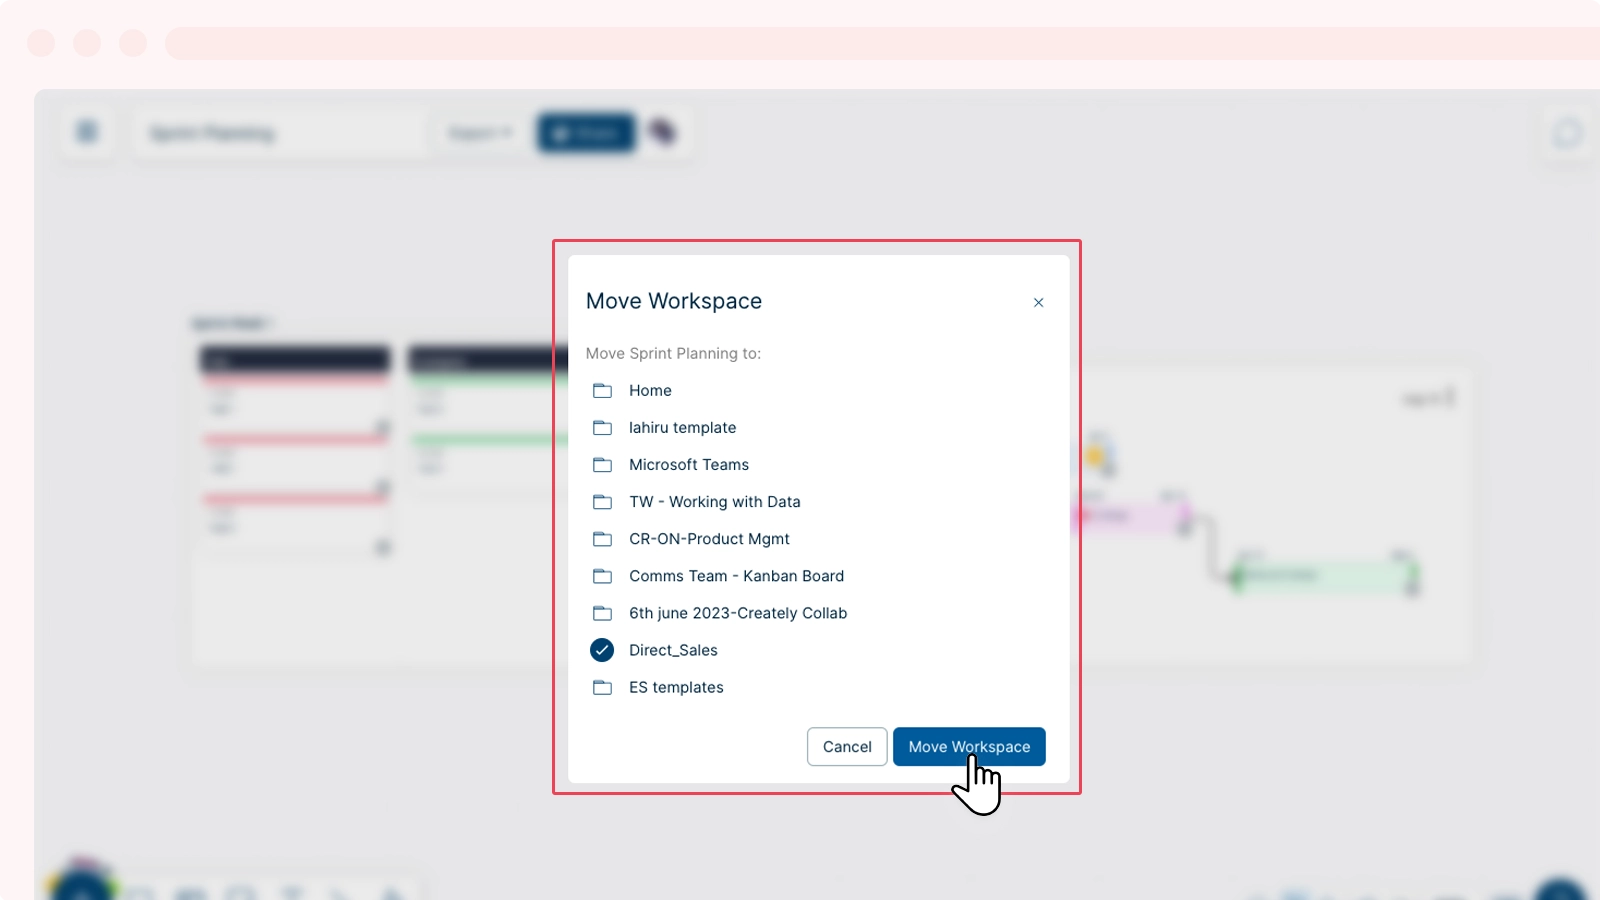
- Now select the folder you want to move your workspace to.
- Click the Move to button.


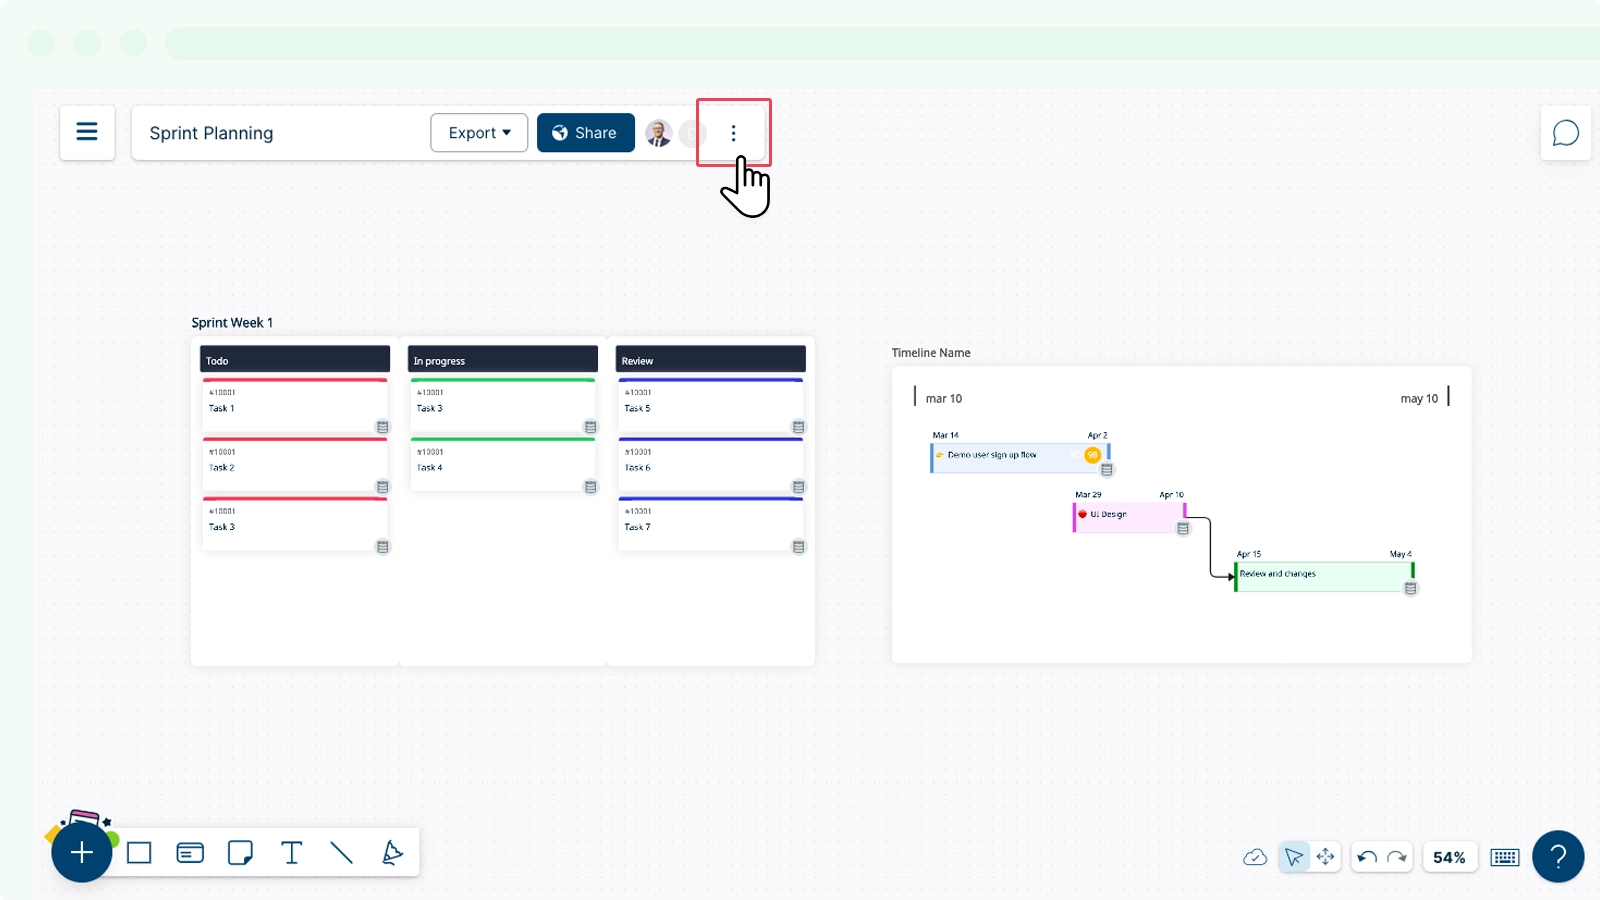
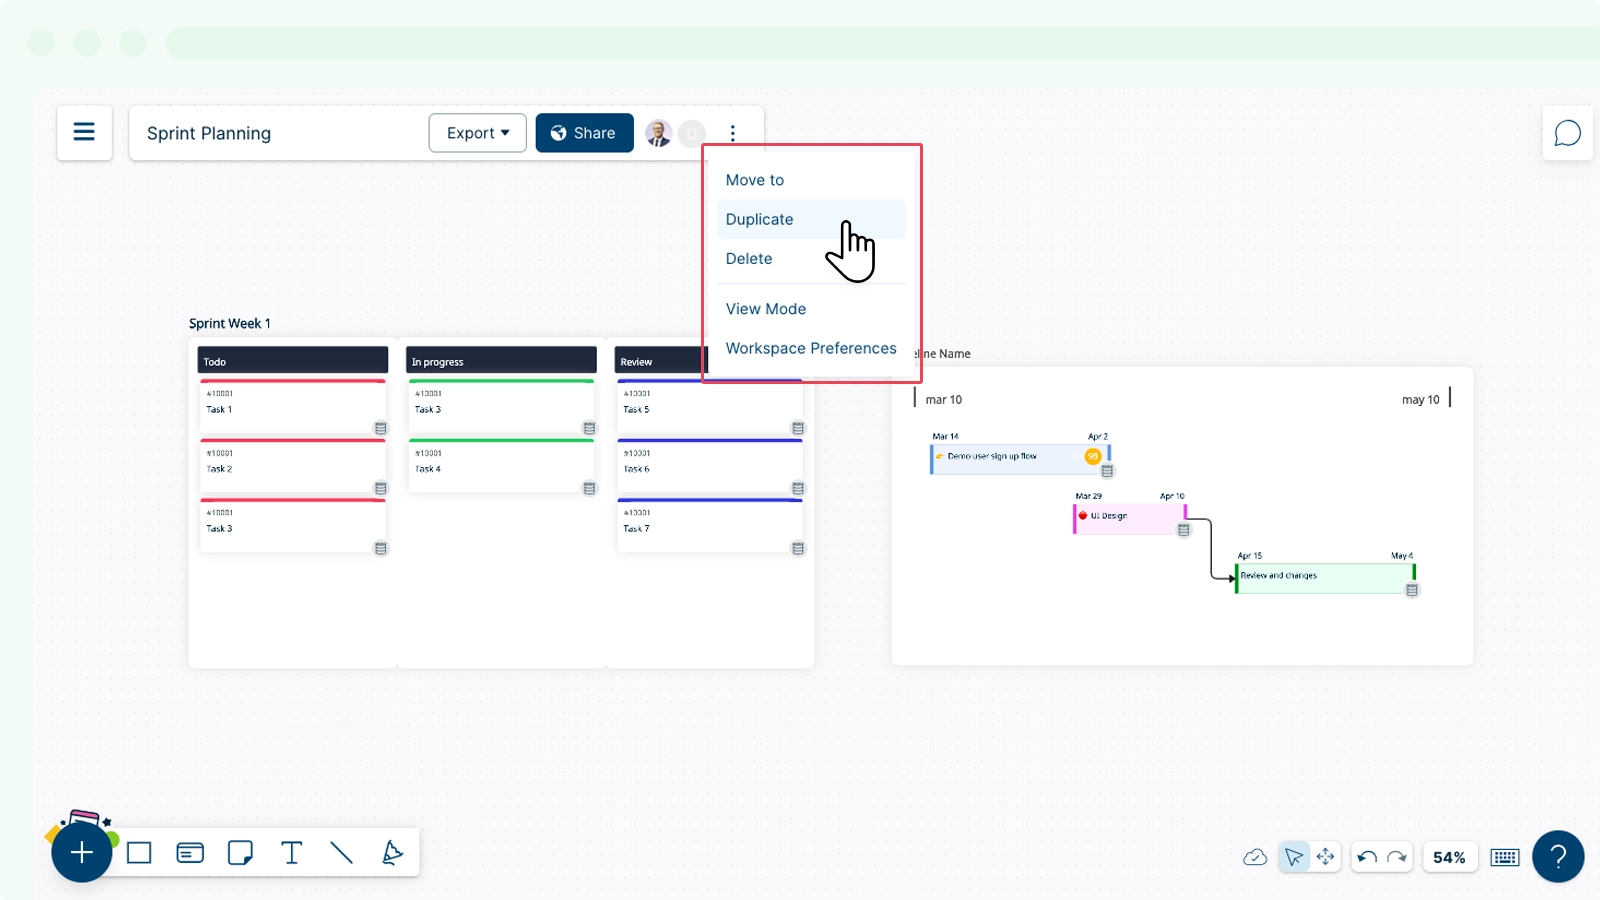
Duplicating a Workspace
You can create multiple versions of a workspace by duplicating them and adding changes as you please.
- Click the icon.
- Select the Duplicate option.
This will create a copy of your workspace inside the current folder. Your workspace will have the title of the original workspace with the word copy attached. You could rename the folder as you please and change its folder location.
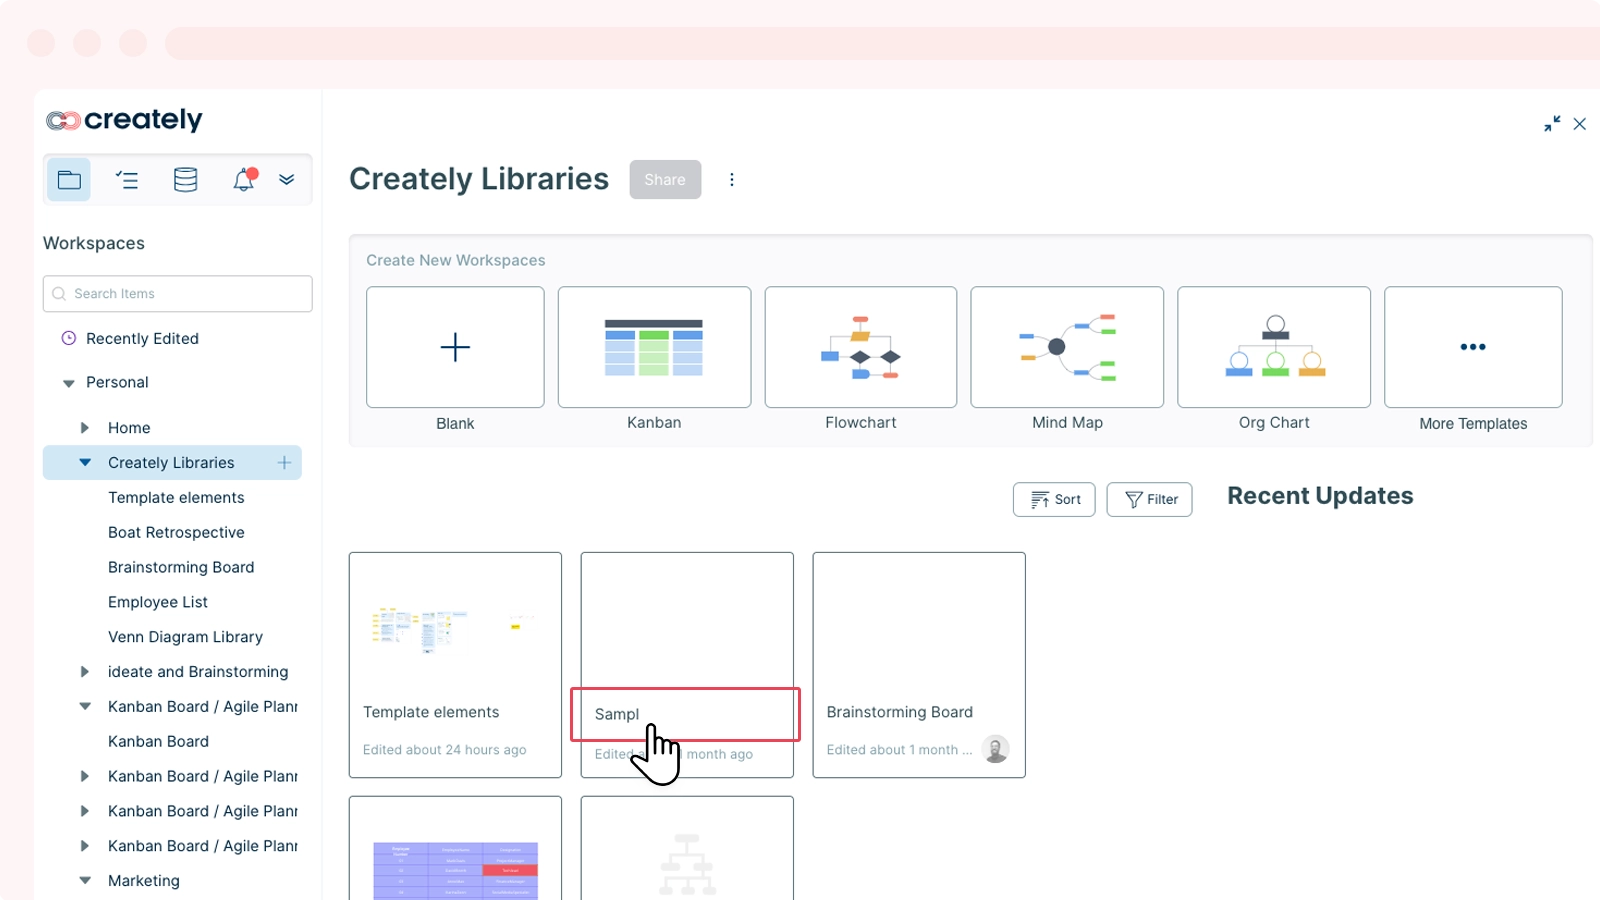
Renaming a Workspace
To rename a workspace, simply double-click on the header bar and type in what you want to call your workspace.
You can also rename your workspace from the folder panel:
- Select the workspace you would like to rename.
- Hover over the icon.
- Select the Rename option.
- Enter the new name for the workspace.
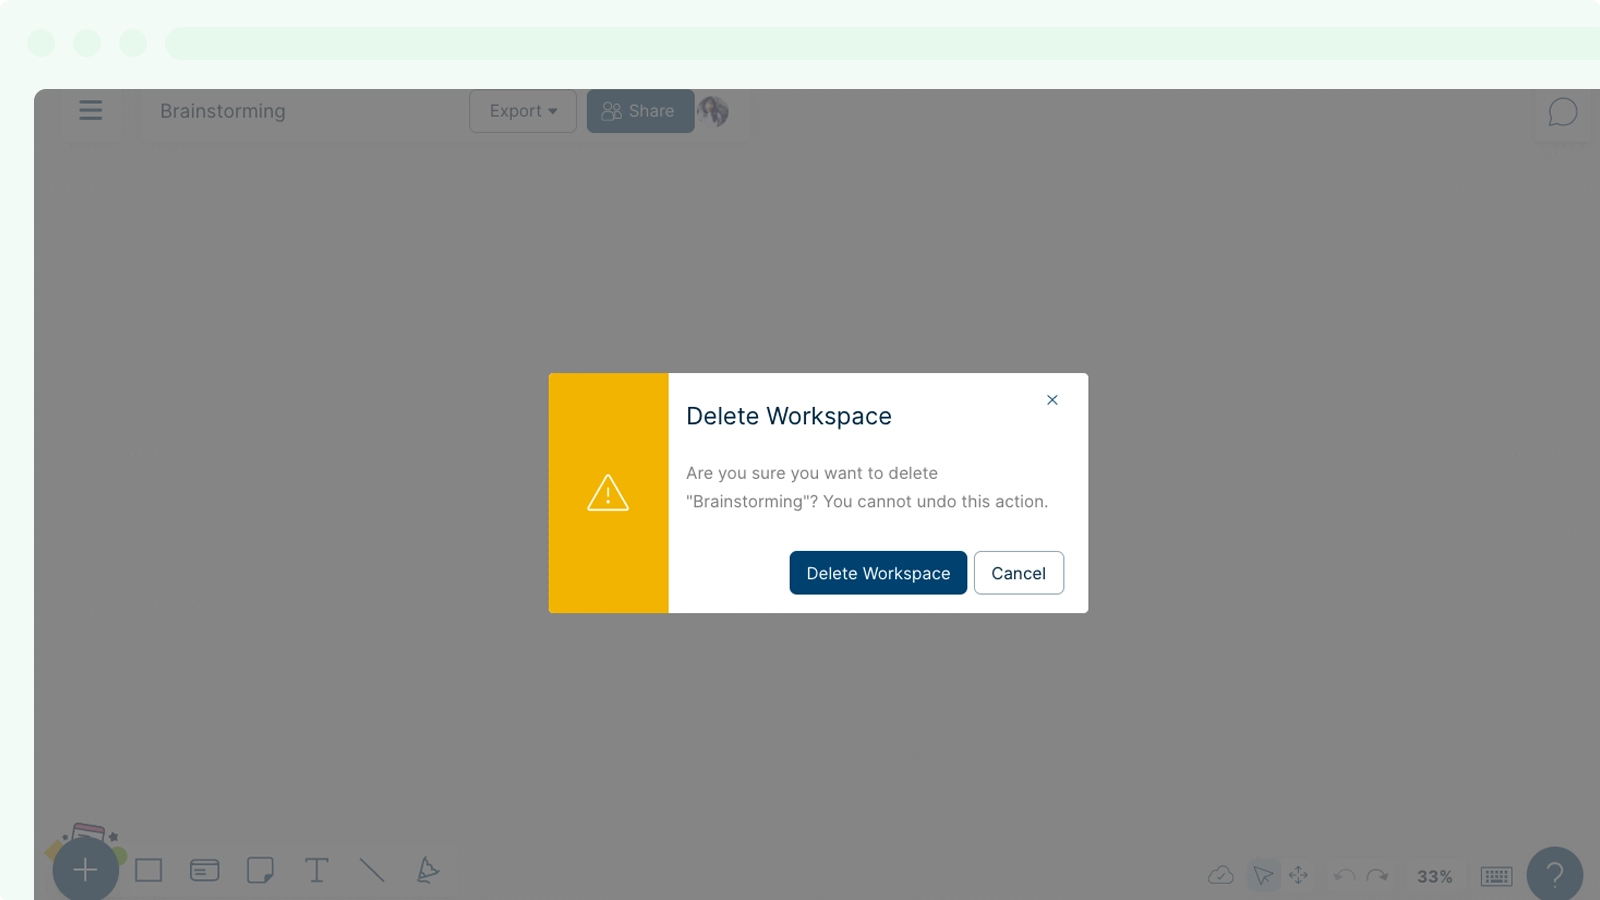
Deleting a Workspace
To delete a workspace:
- Click the icon on the header bar.
- Select the Delete option.
Access Controls
Creately’s collaborative platform gives you complete control over who can access, view, and edit your workspaces.
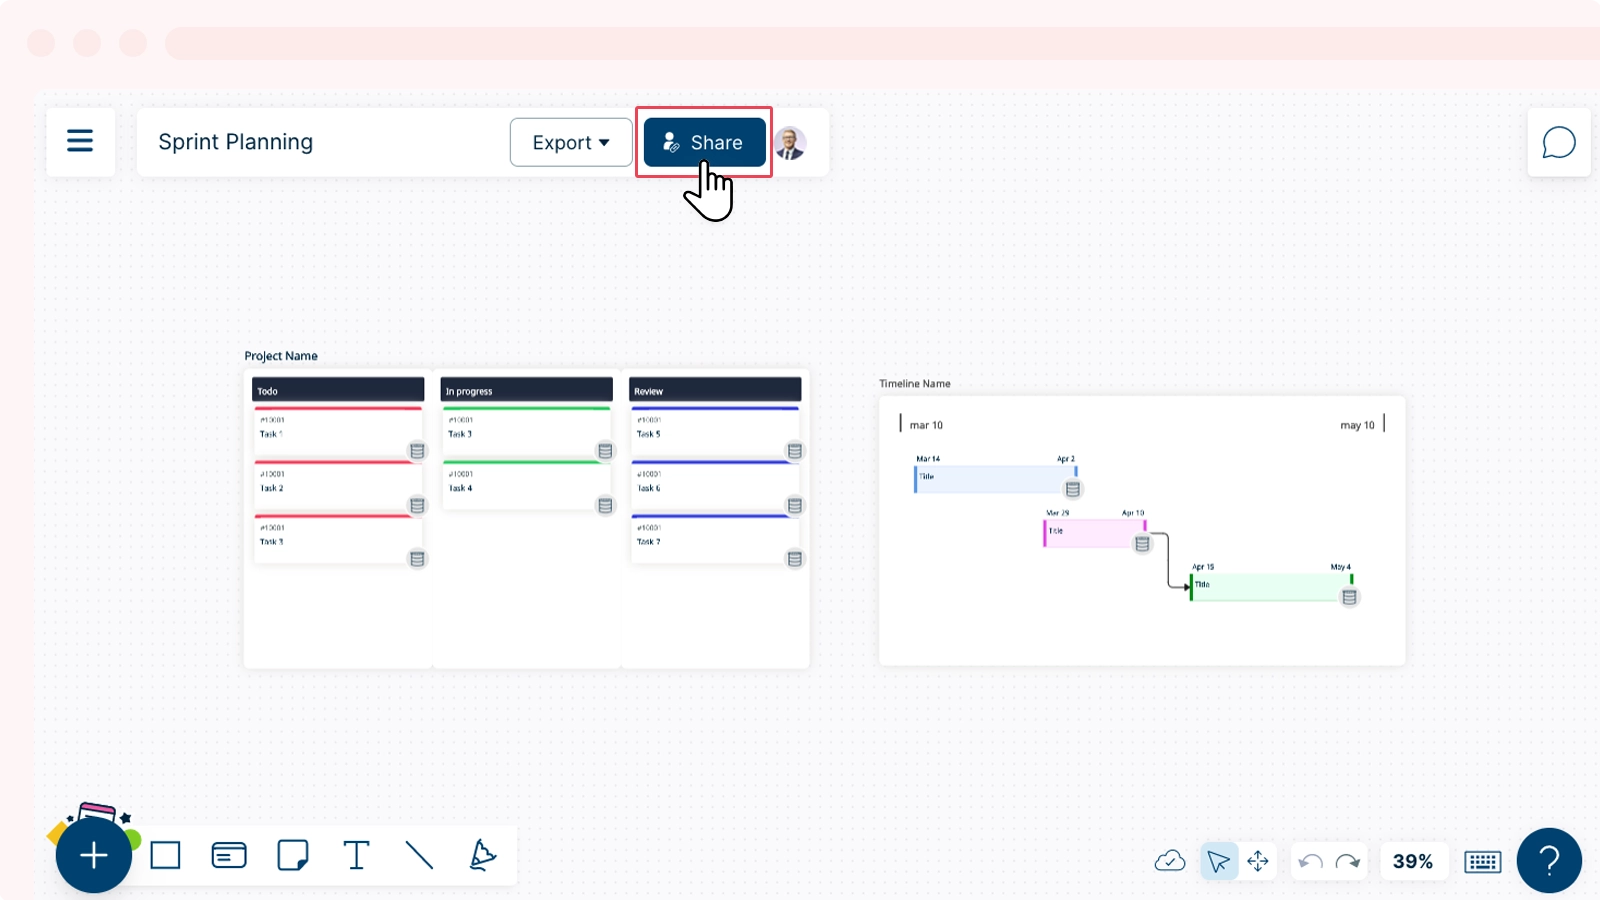
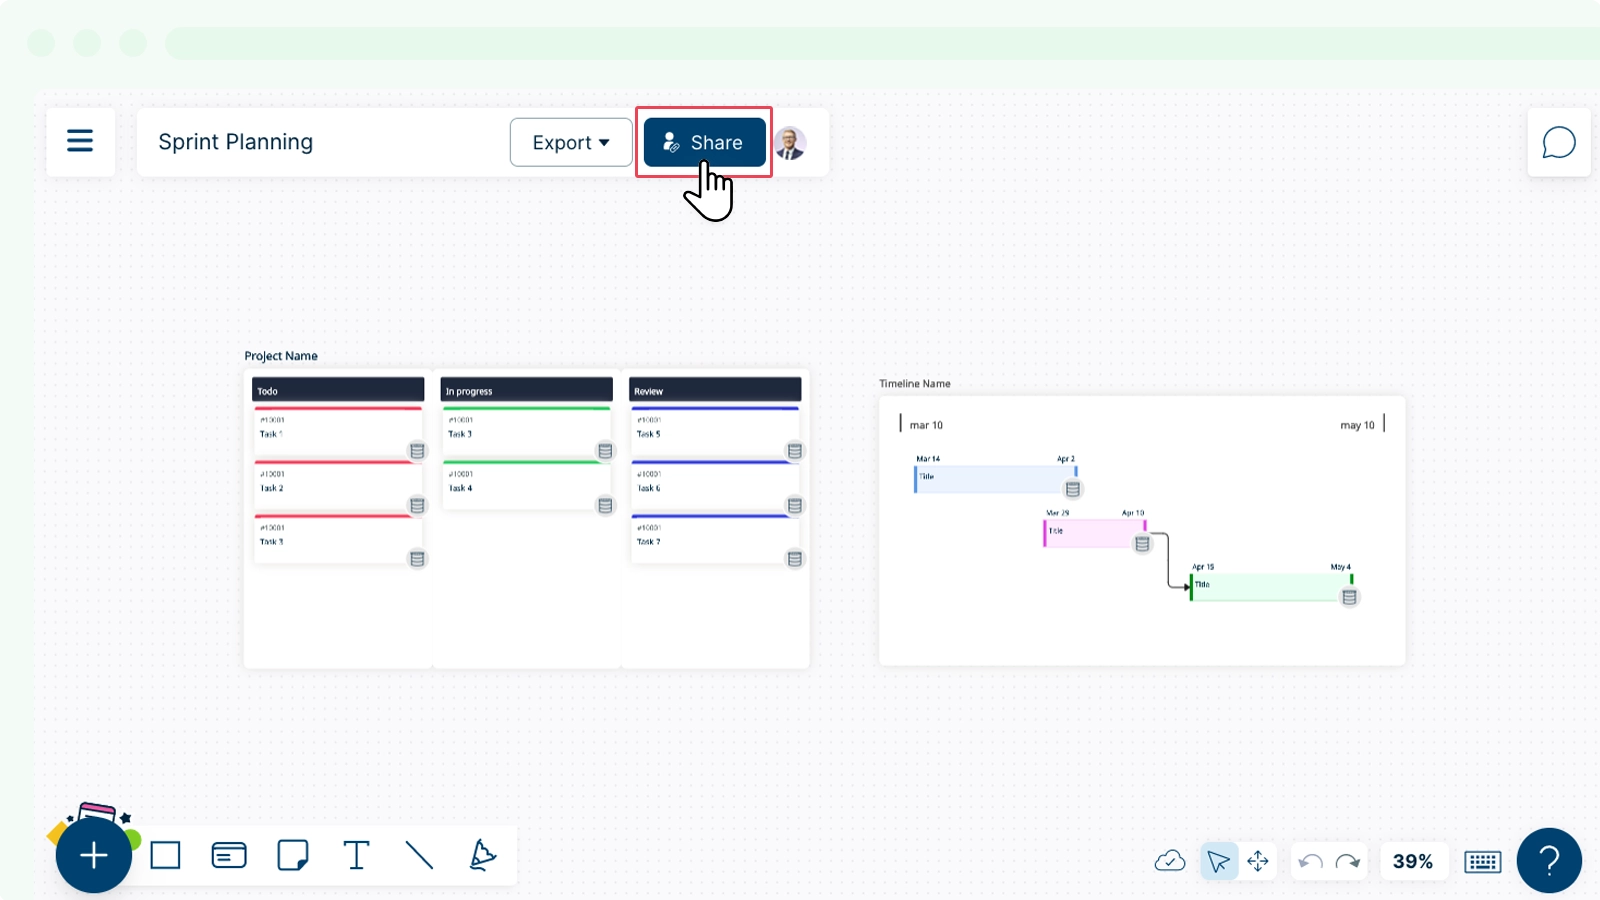
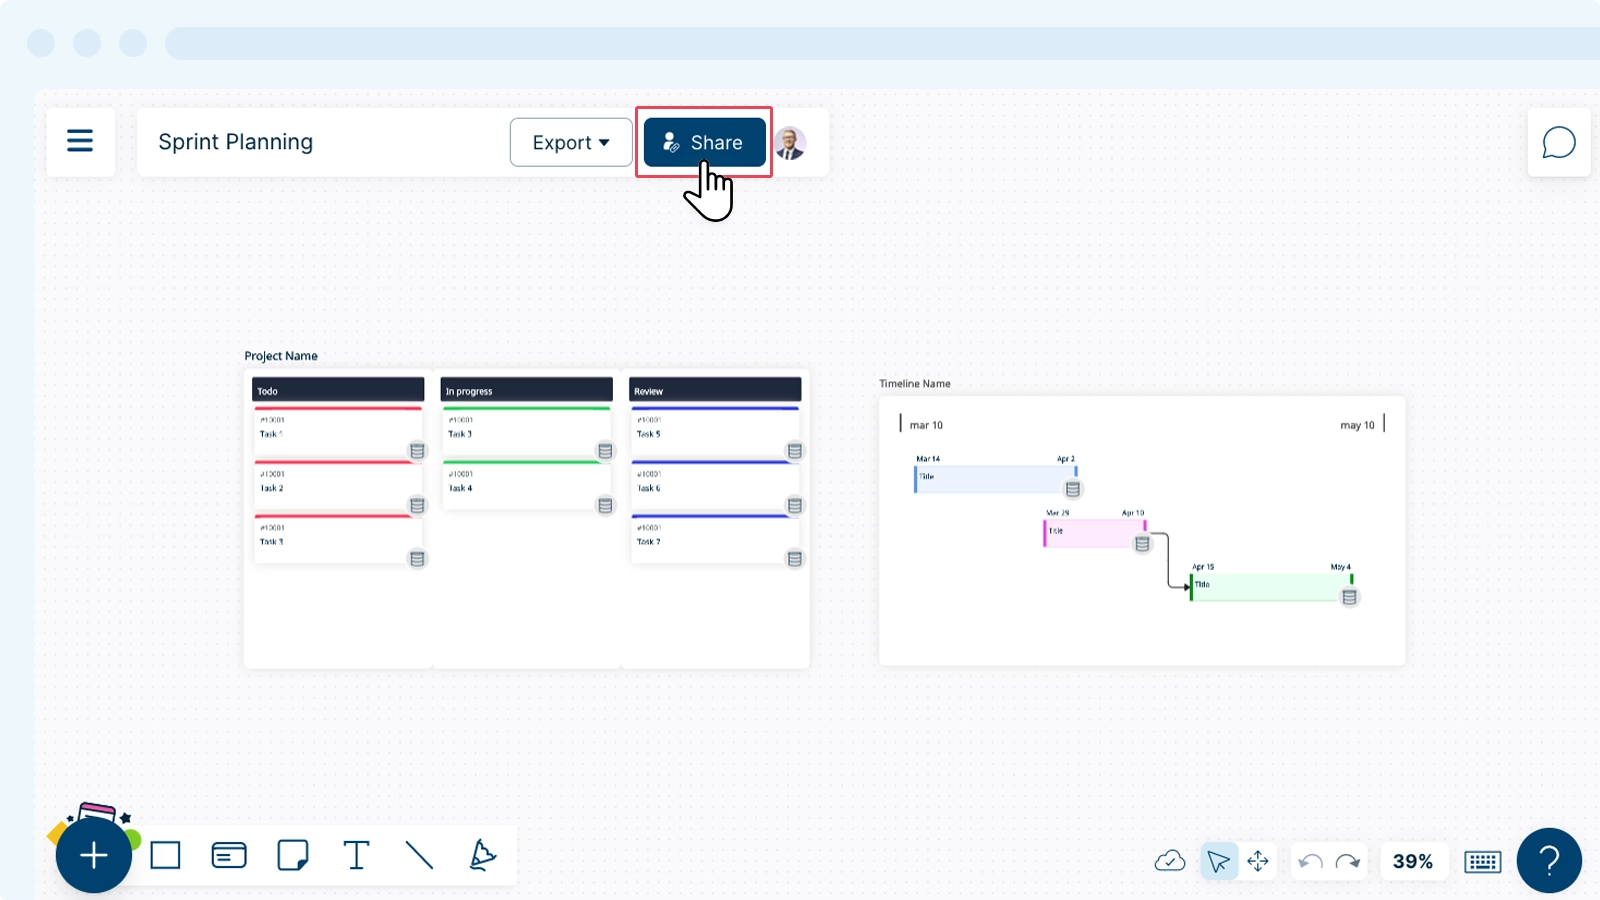
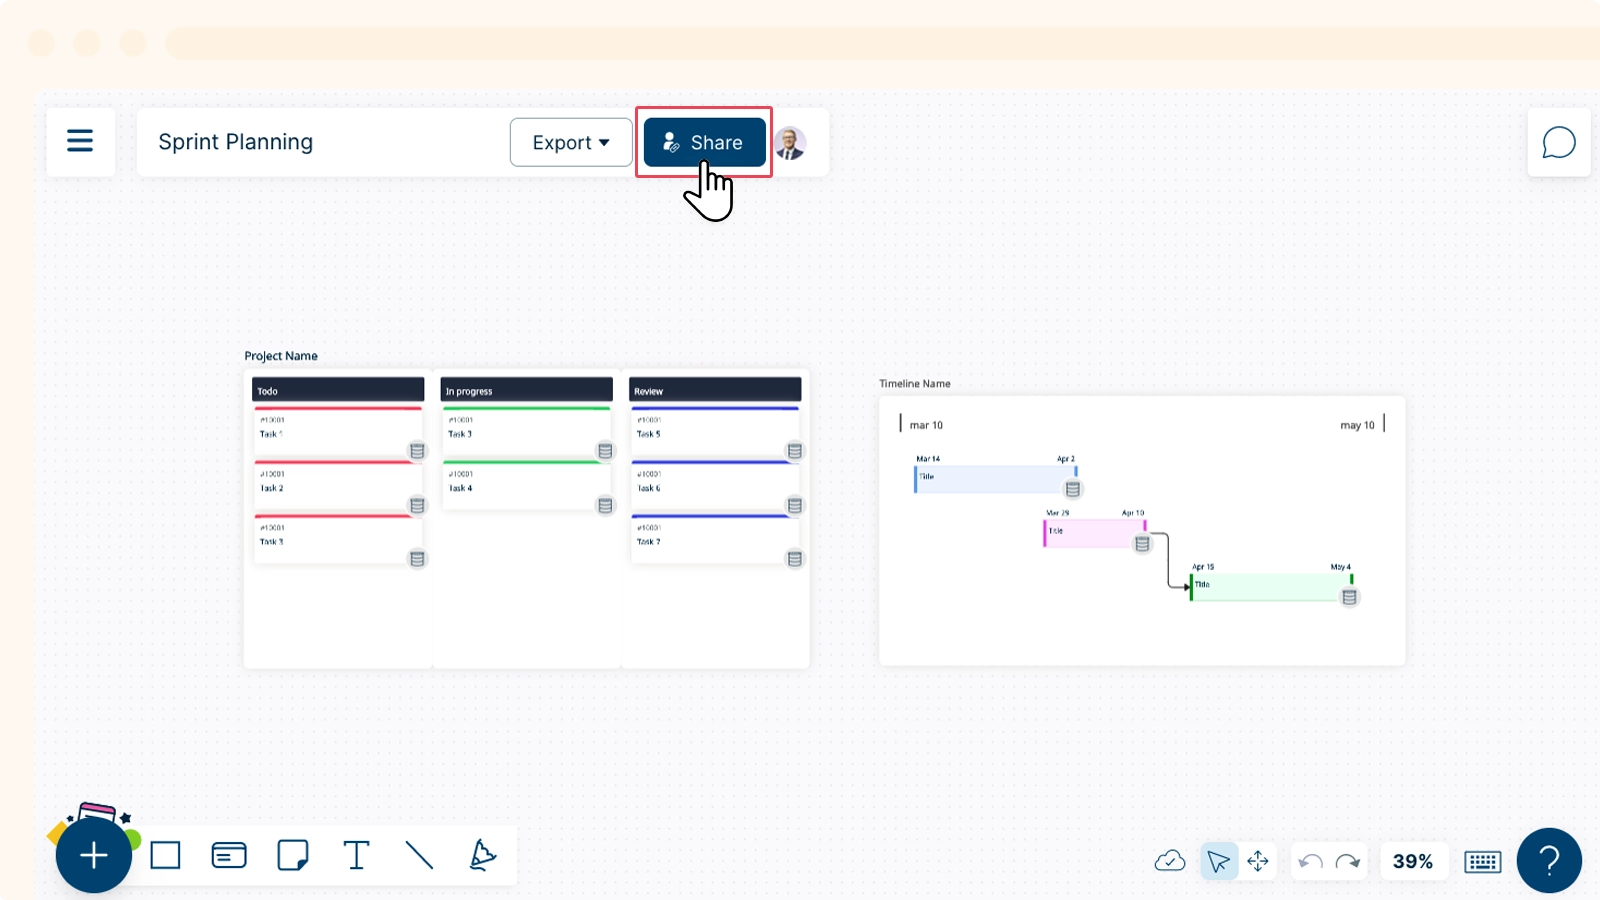
Sharing Workspaces
You can add multiple permission settings to your workspace based on how you want people to interact with them. Do this by selecting the ![]() icon on the header bar.
icon on the header bar.

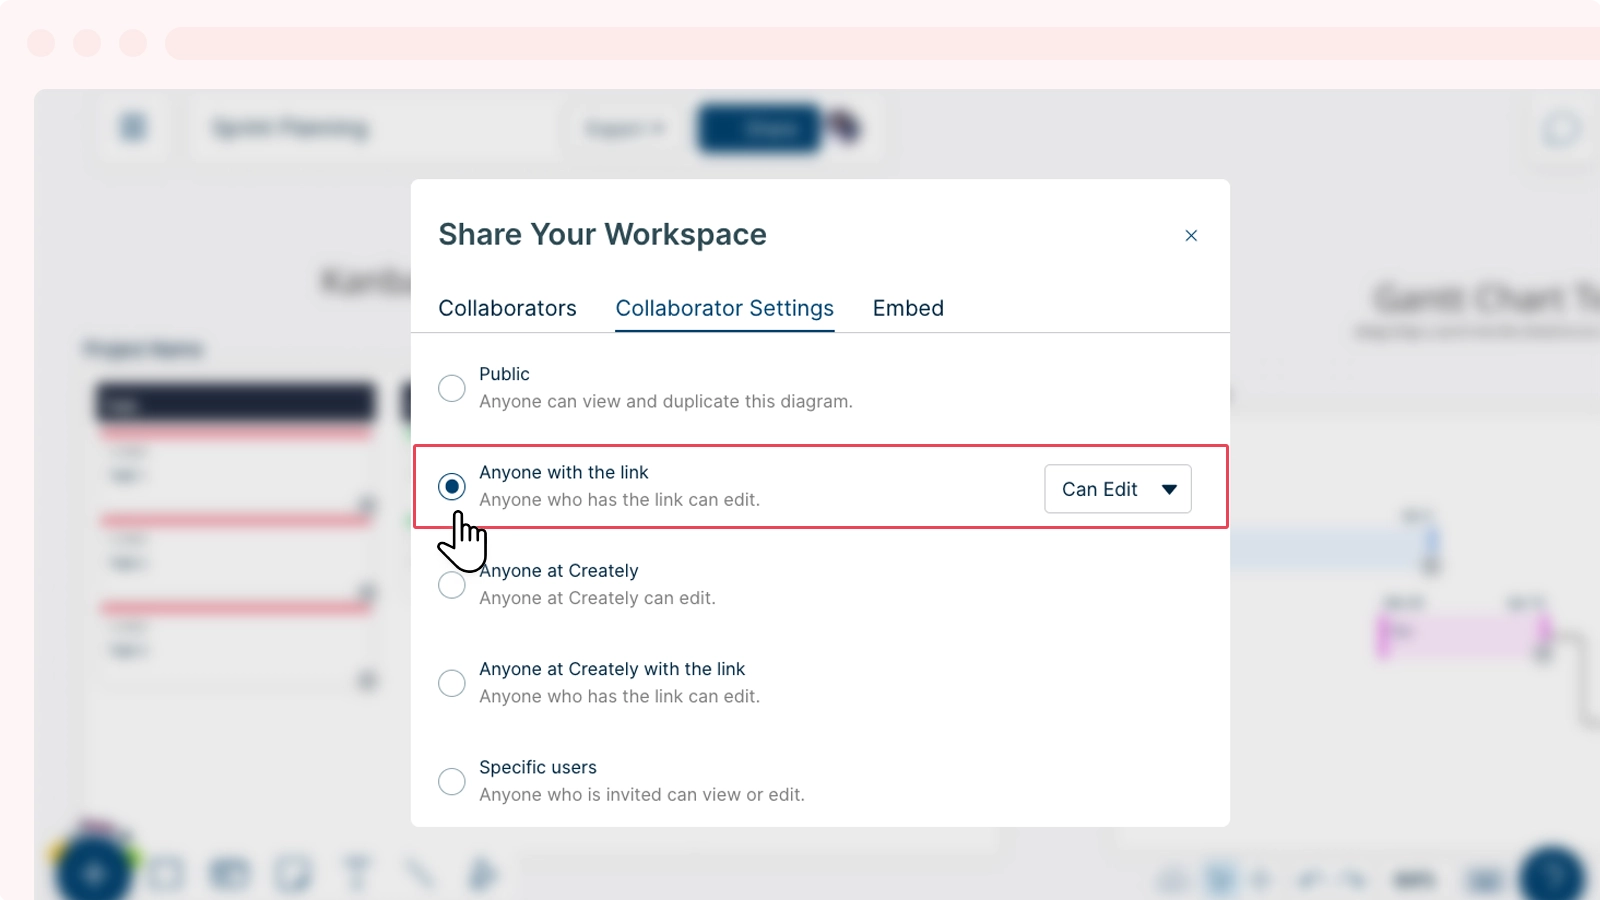
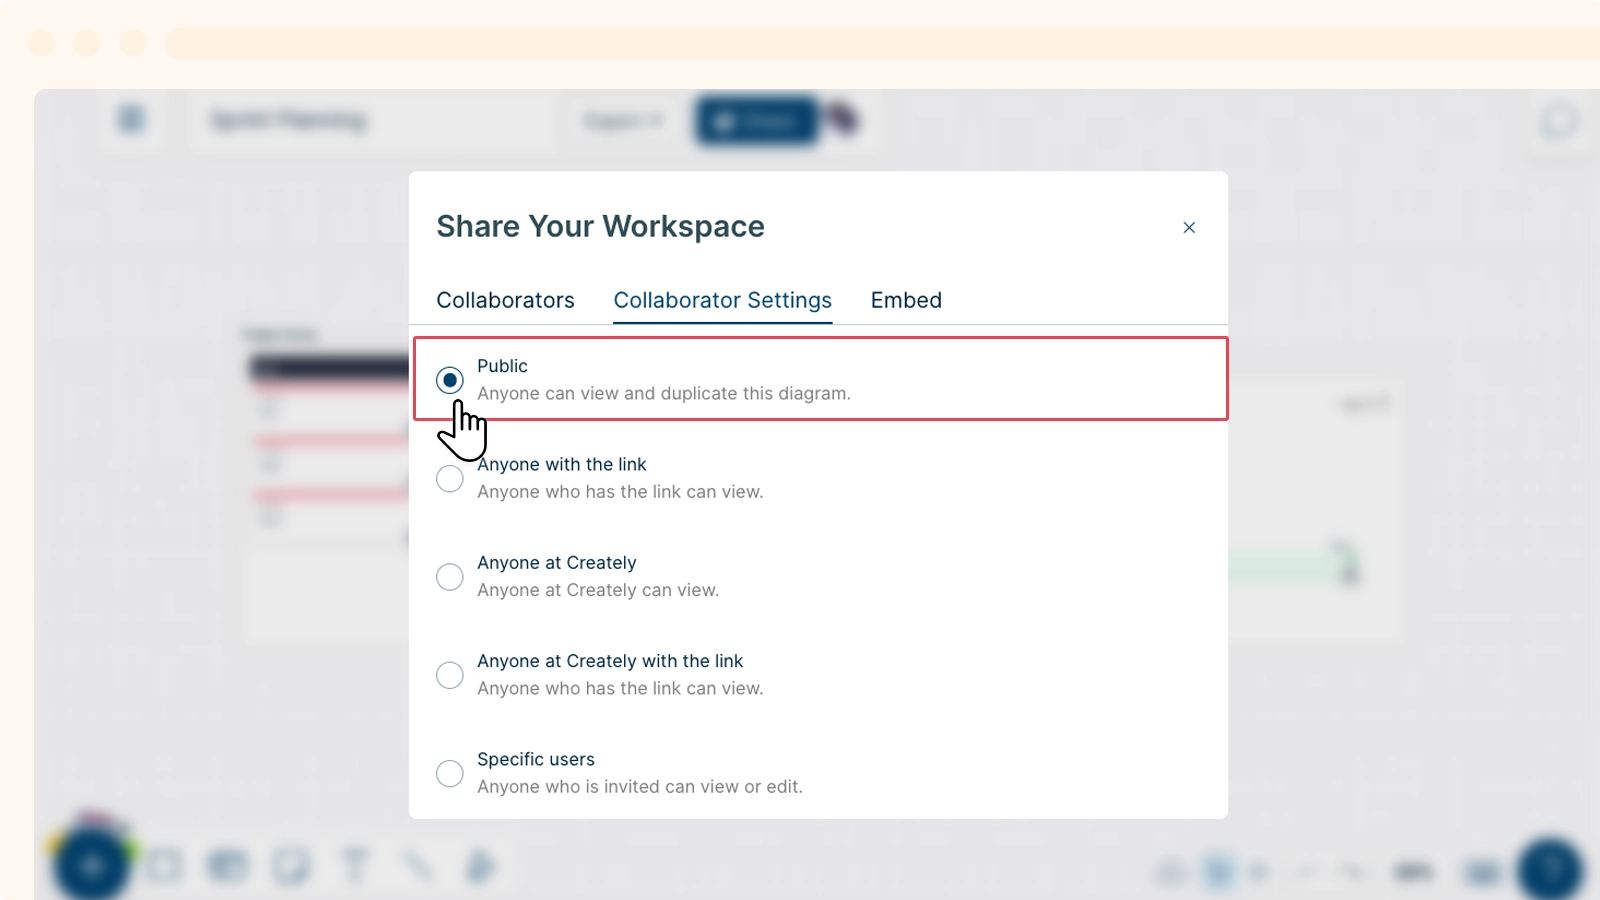
Adding Collaborators with Different Permission Levels
Anyone with the Link
When you enable the Anyone with a link option, you can instantly share a workspace with anyone. You may choose whether you want your collaborator to be able to edit or view the workspace by toggling the Can Edit and Can View settings. Next, copy the URL from the address bar and share it with anyone you would like to invite.
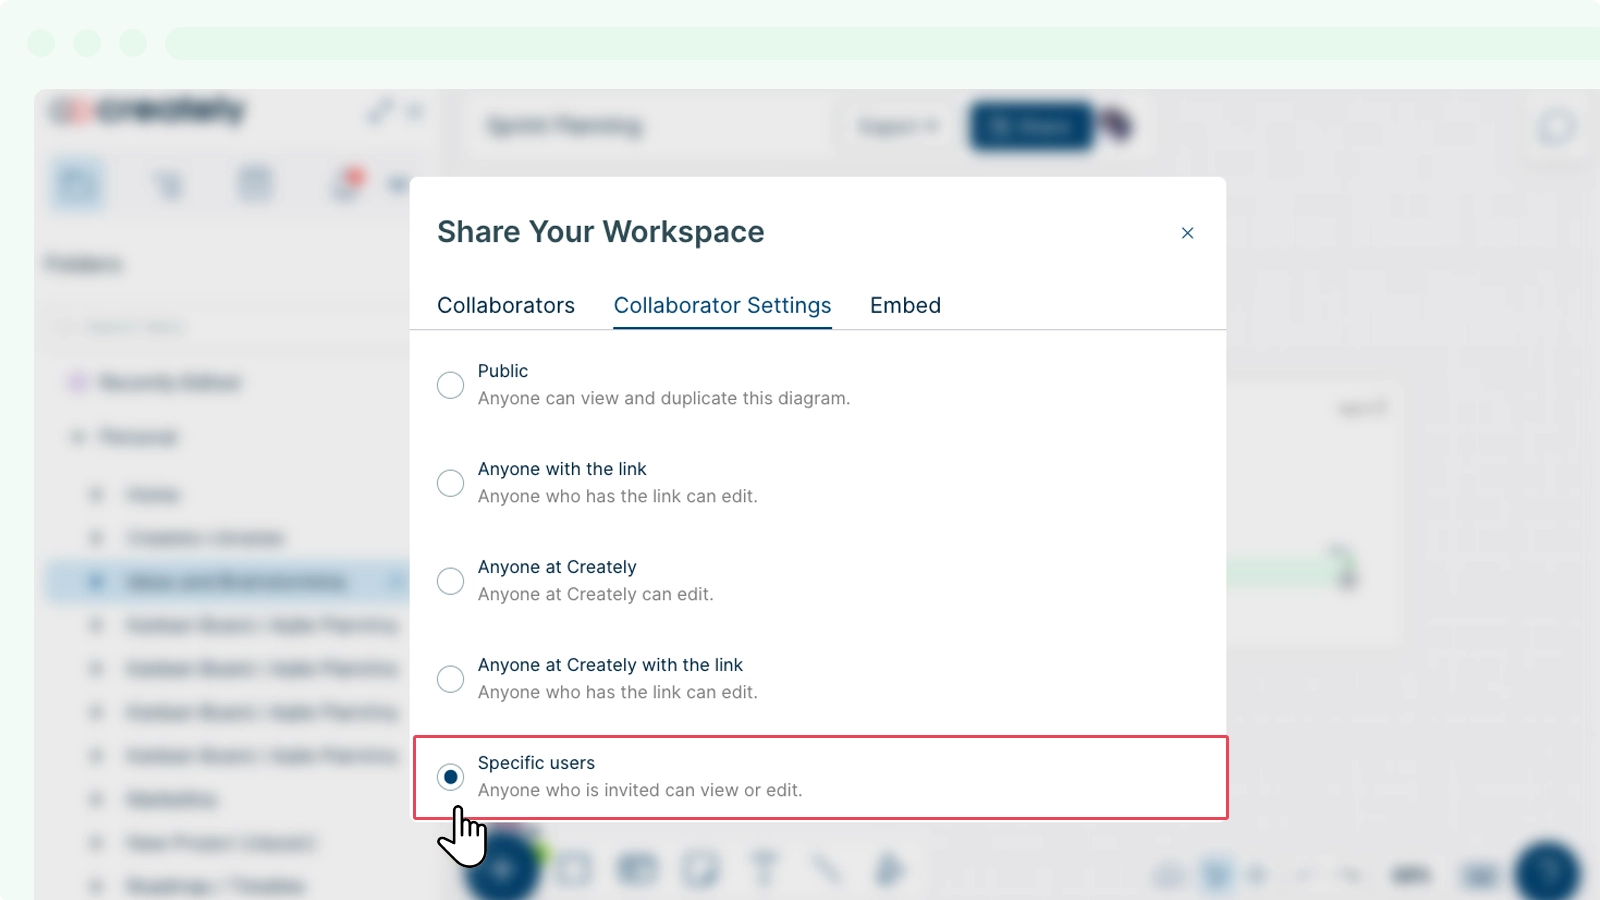
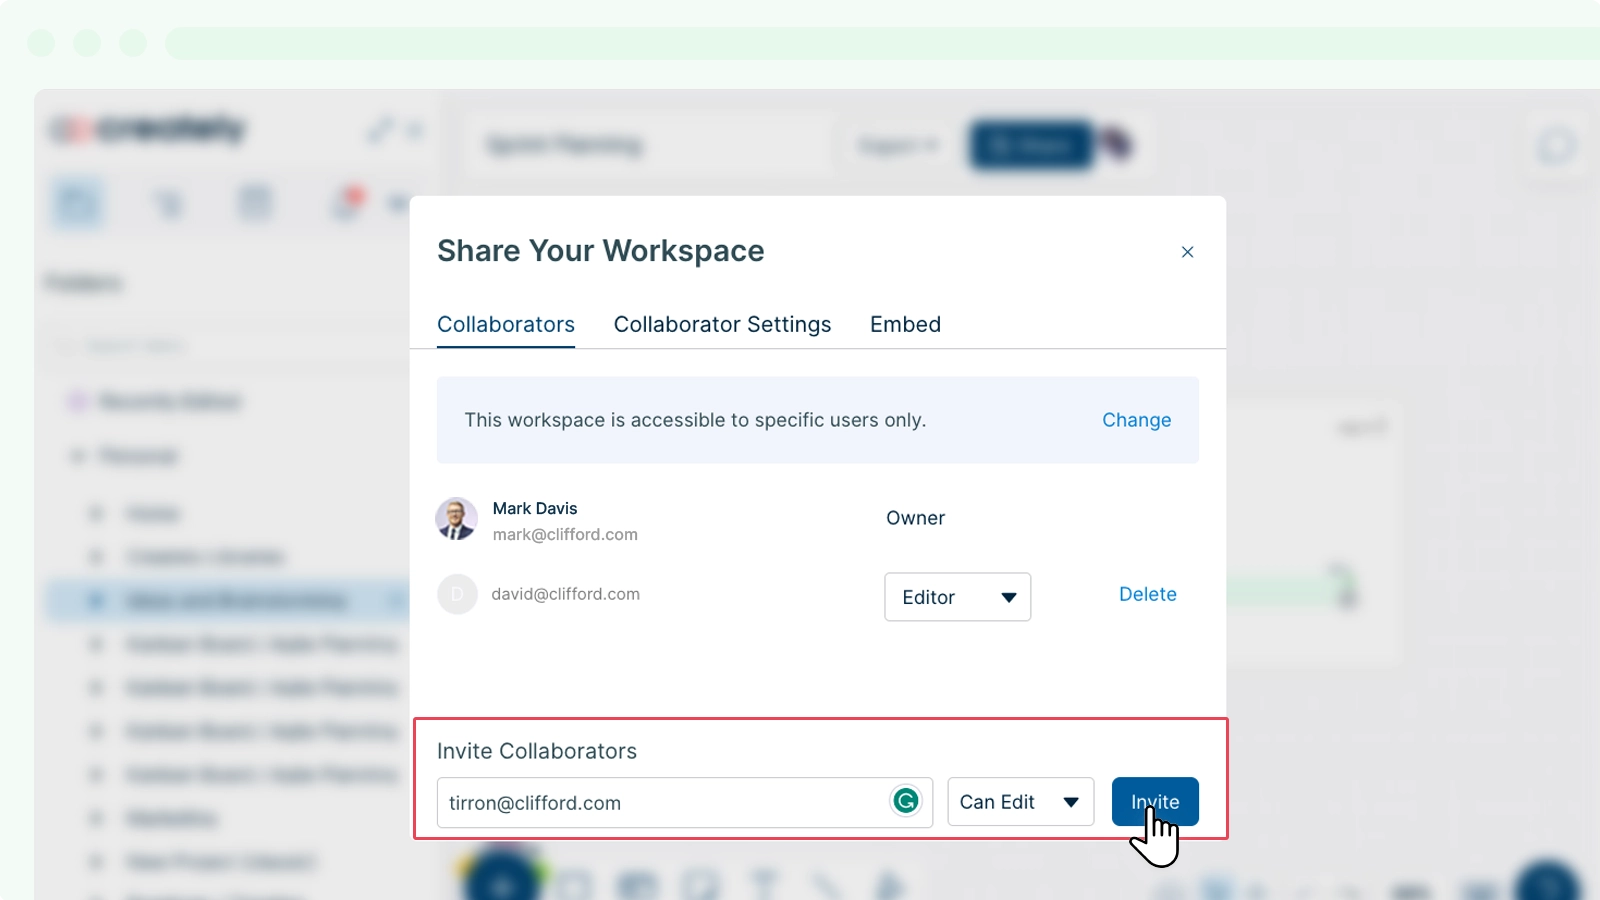
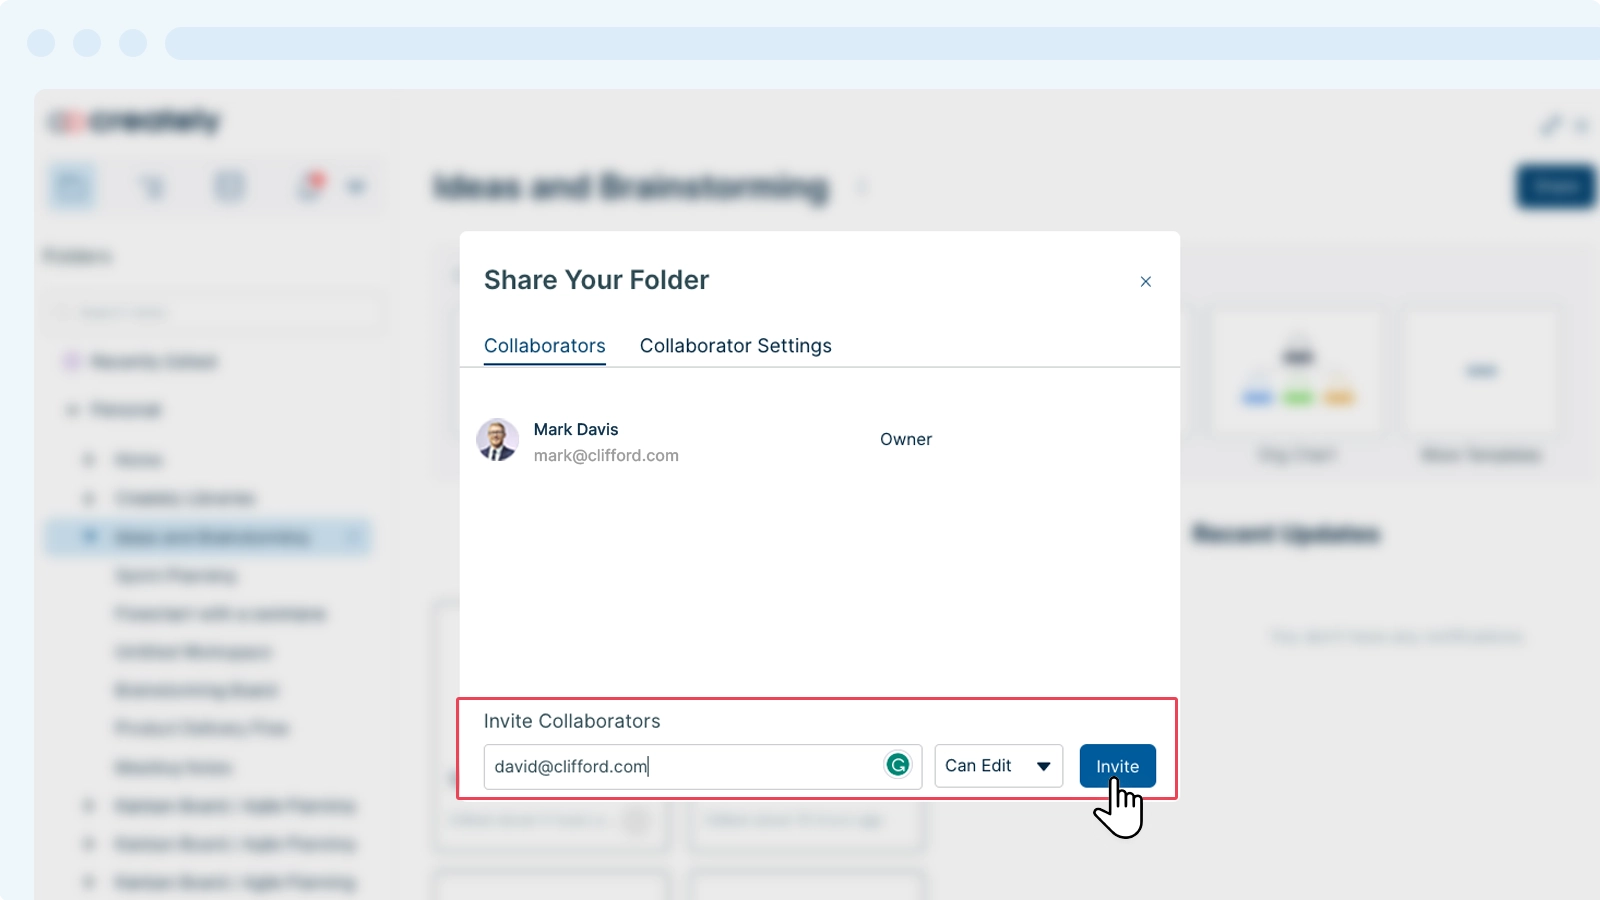
Specific Users
The Specific Users option allows you to invite selected people of your choice to collaborate with you on your workspace. Simply, add the email addresses of the collaborators you would like to share the workspace with and decide on the permission level from the Can Edit and Can View options. Once added, they will be notified with an email to view/edit accordingly.
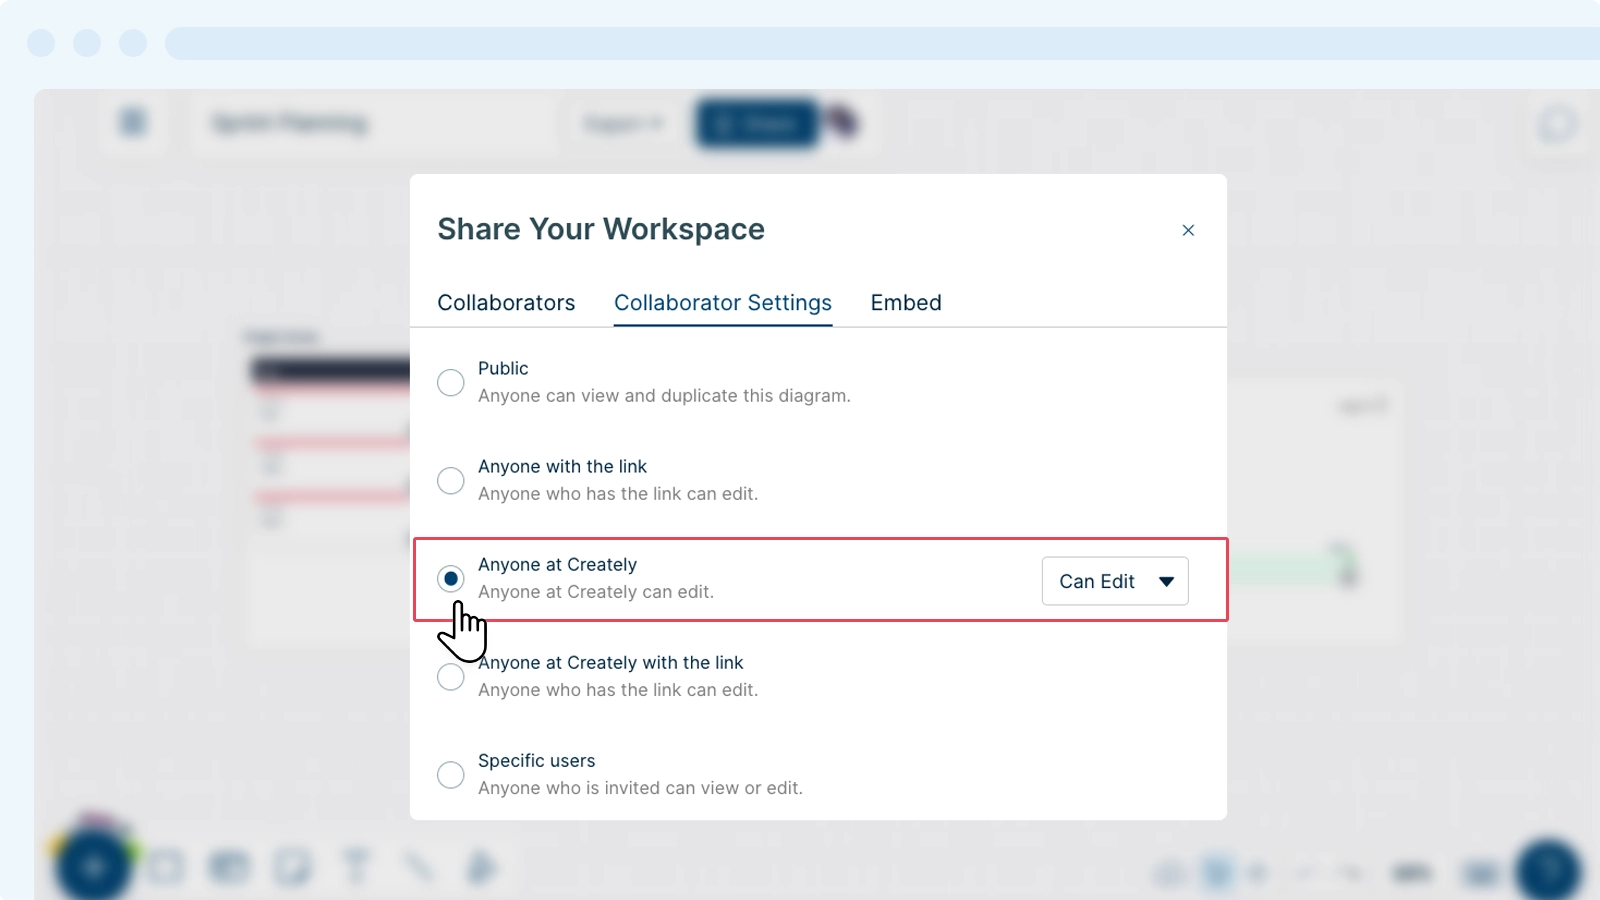
Anyone at Your Organization
If you want to provide access to everyone in your plan, select ![]() → Anyone at [YourOrganizationName]. The workspace will then appear within a folder named after your plan.
→ Anyone at [YourOrganizationName]. The workspace will then appear within a folder named after your plan.
Public
When you make a workspace public it allows anyone on the internet to search, discover and view your workspace.
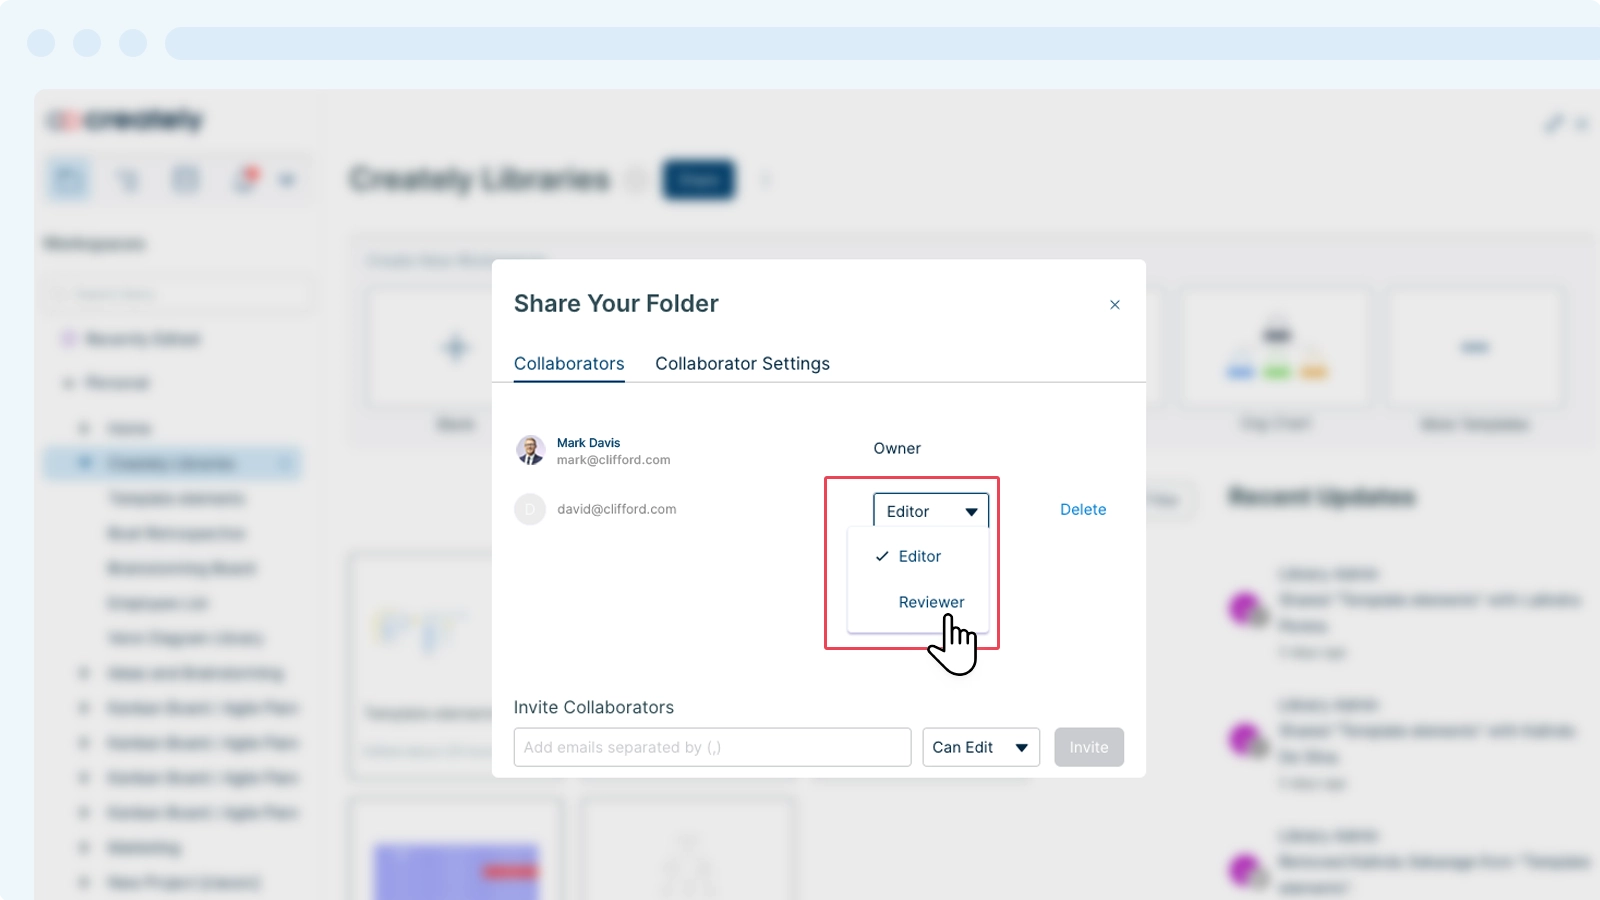
Changing Collaborator Roles of a Folder
You can change a collaborator’s role from editor to reviewer and vice versa.
- Open the folder where you want to change the sharing options.
- Select the
 option.
 - Select the Collaborators tab.
- Now you can change the role of the collaborator from the drop-down list next to the name of the collaborator.
- You can then switch the role from Editor to Reviewer or vice versa.
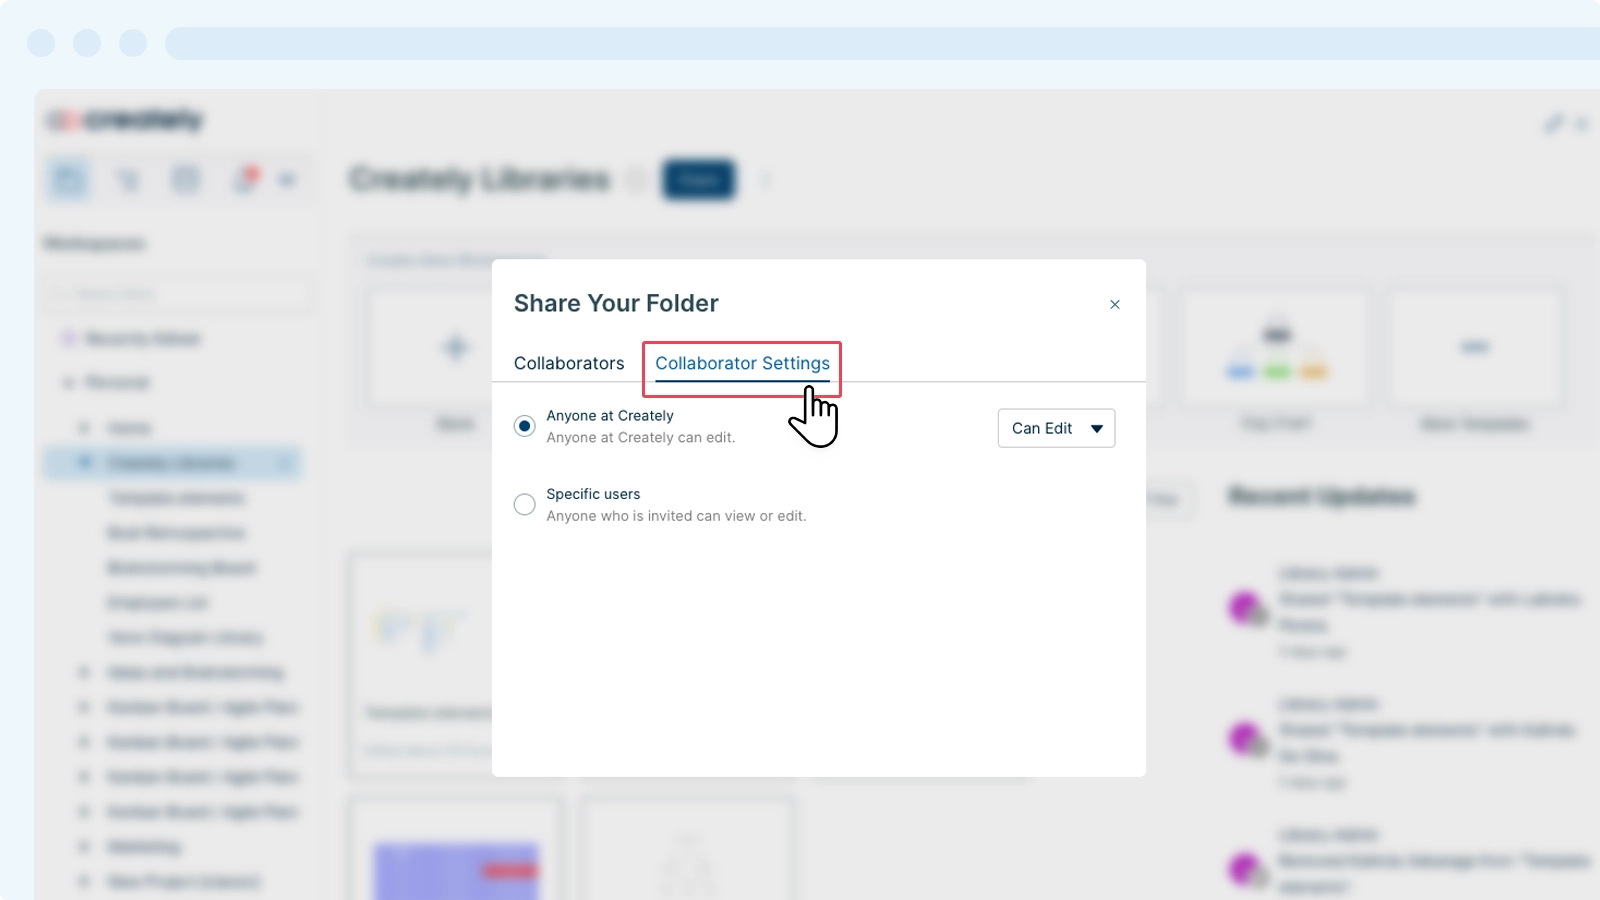
- You can also select the Collaborator Settings tab and change the access setting as follows:
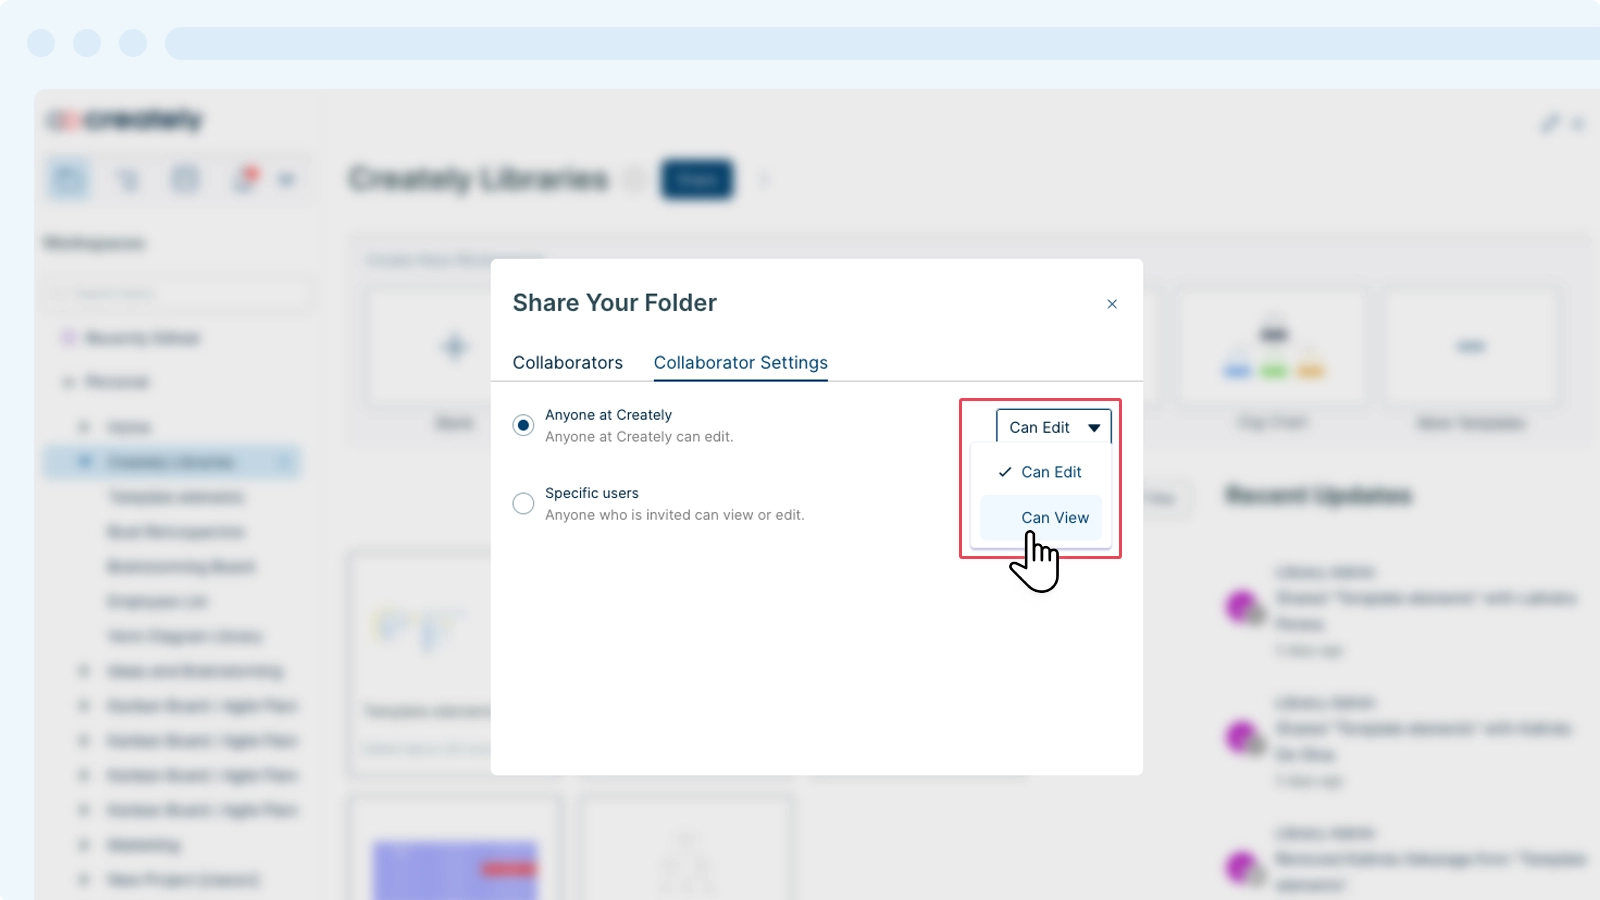
Note: Changing the user role in a folder will affect their role in the workspaces within that folder as well. By default, when you change the collaborator settings of a folder, it automatically changes the privacy level of all the workspaces within the folder.
Inviting Non-Creately Users to a Workspace
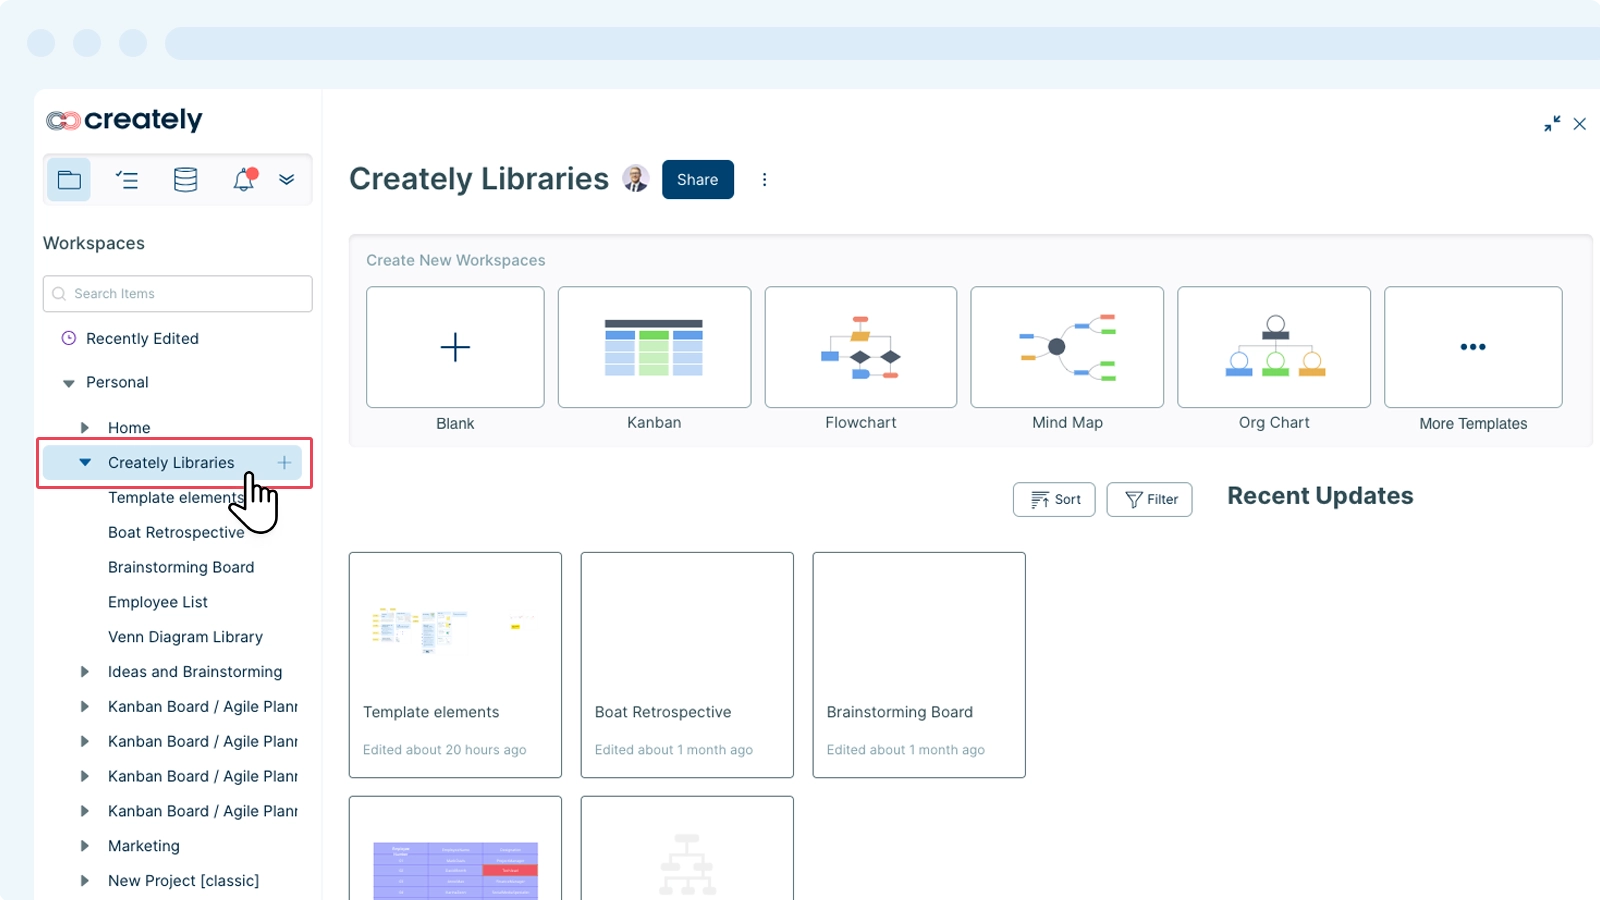
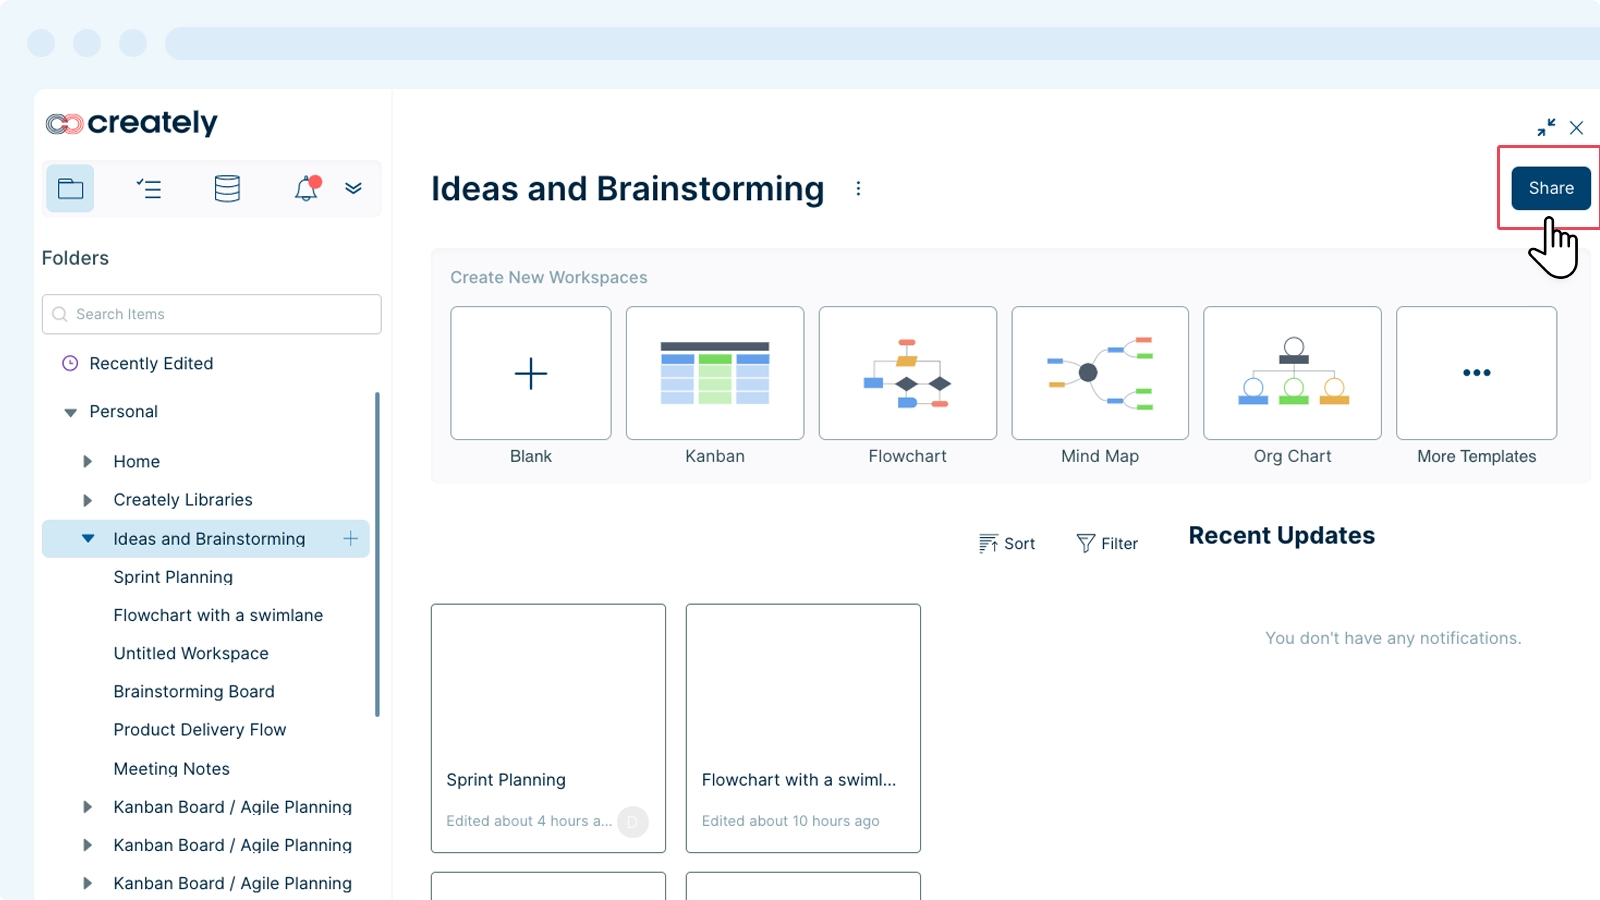
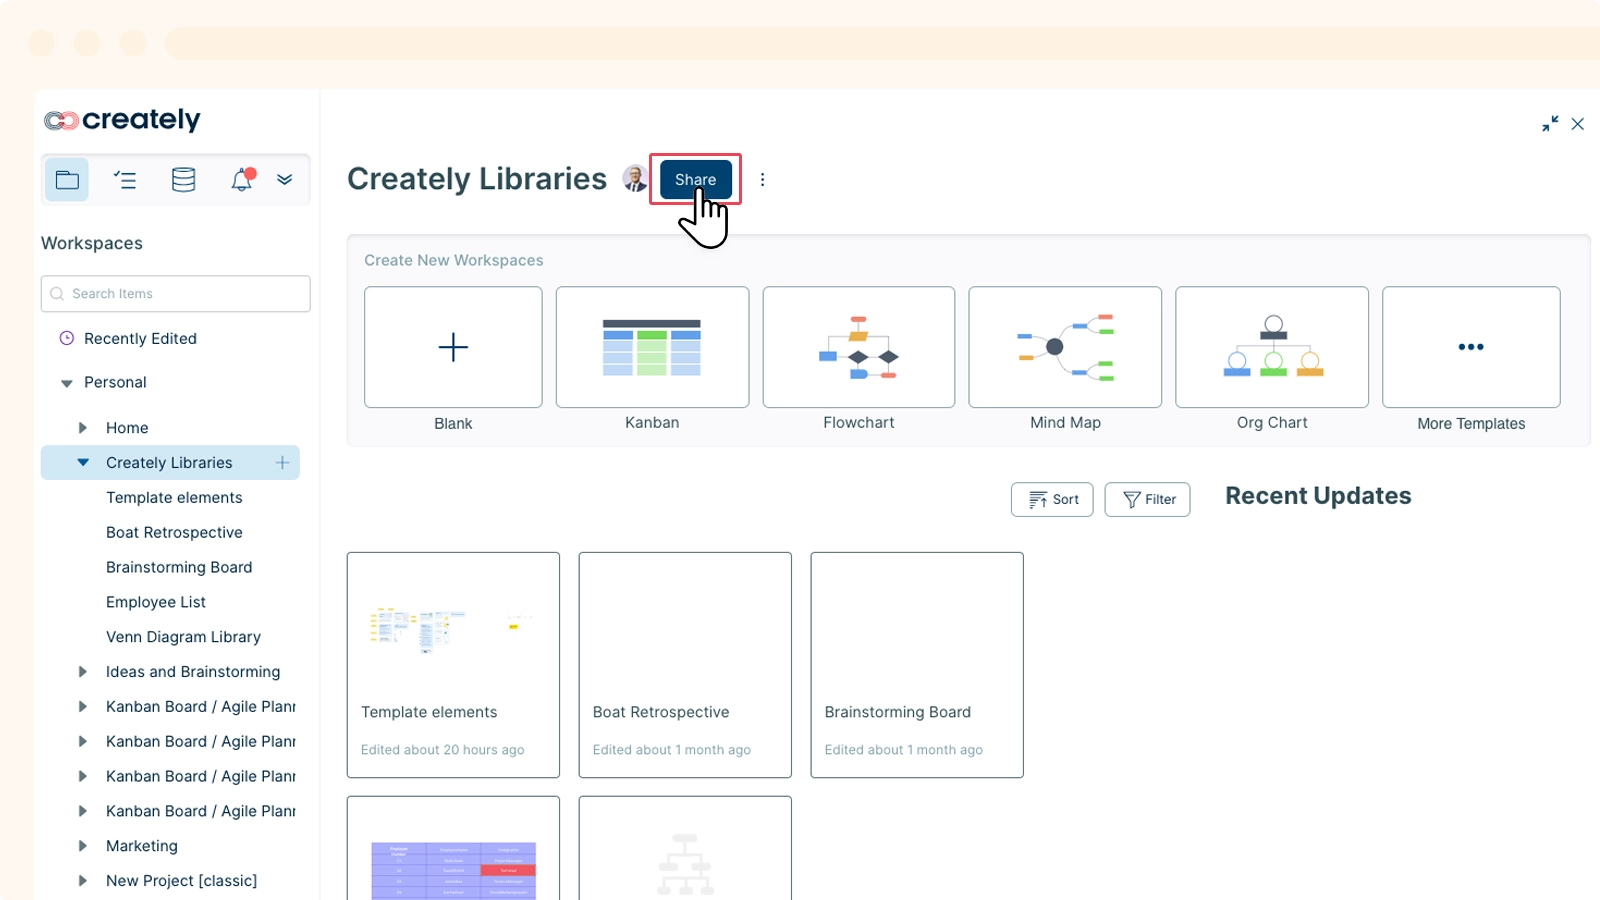
Sharing a Folder
- You can add collaborators to your workspaces directly from the folder panel.
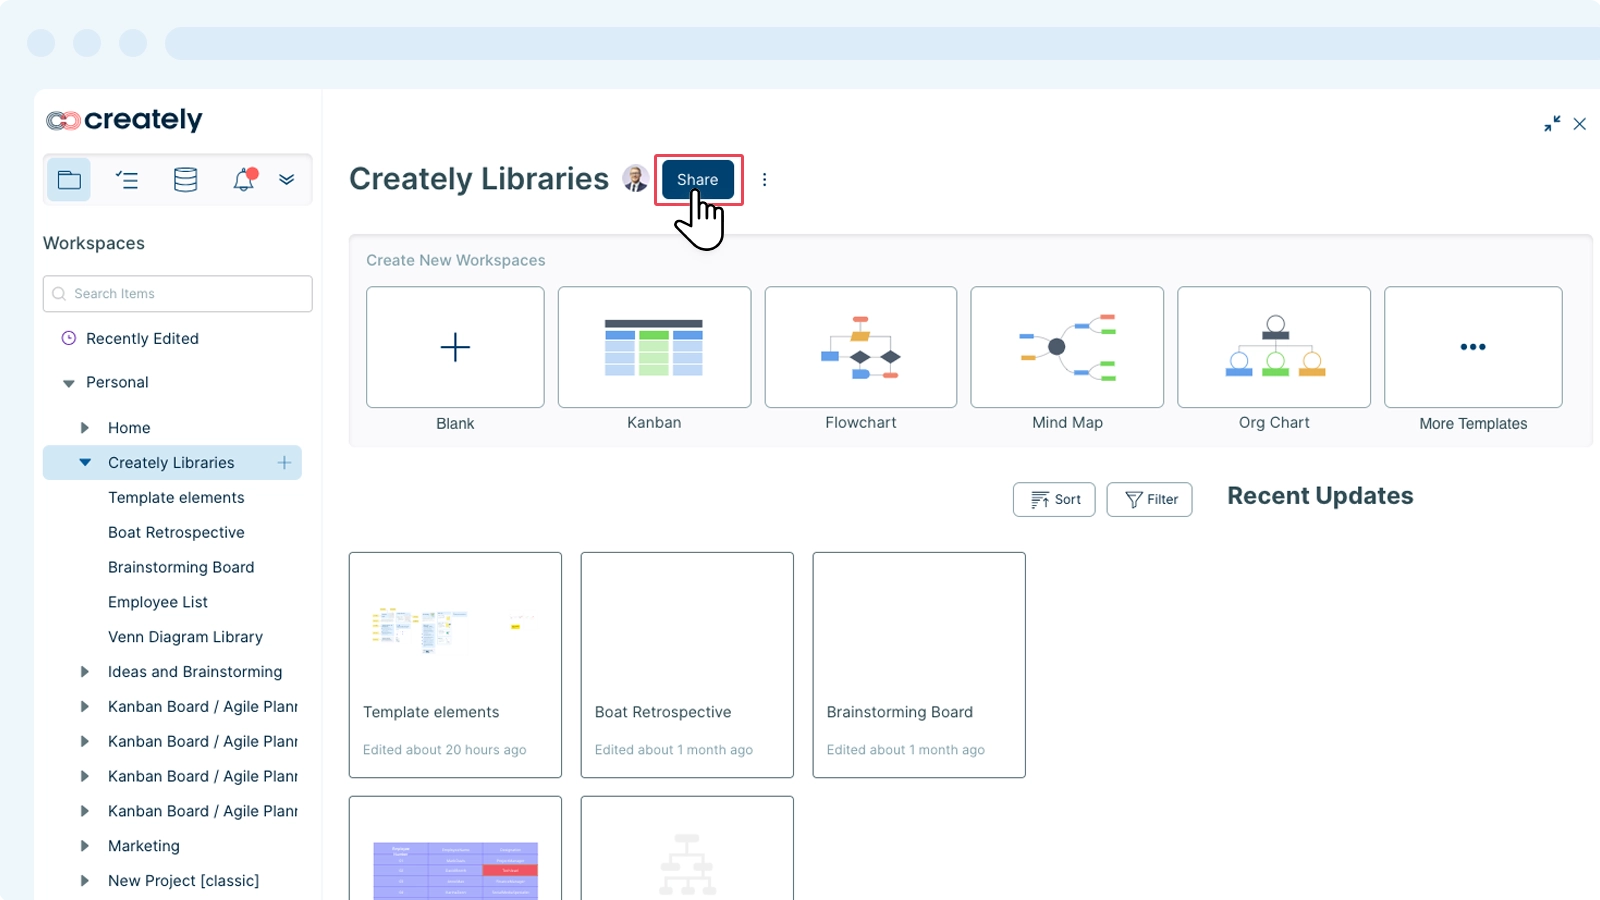
- Select the folder you would like to share.
- Click the option.
- Add the email addresses of the collaborators you would like to invite.
- Select the Invite option.
Note: You cannot share the Home folder and the folders that are shared with you with view only permissions.
Removing Collaborators
- Select the folder.
- Click the option.
- Click the Delete button and next to the collaborator’s name.
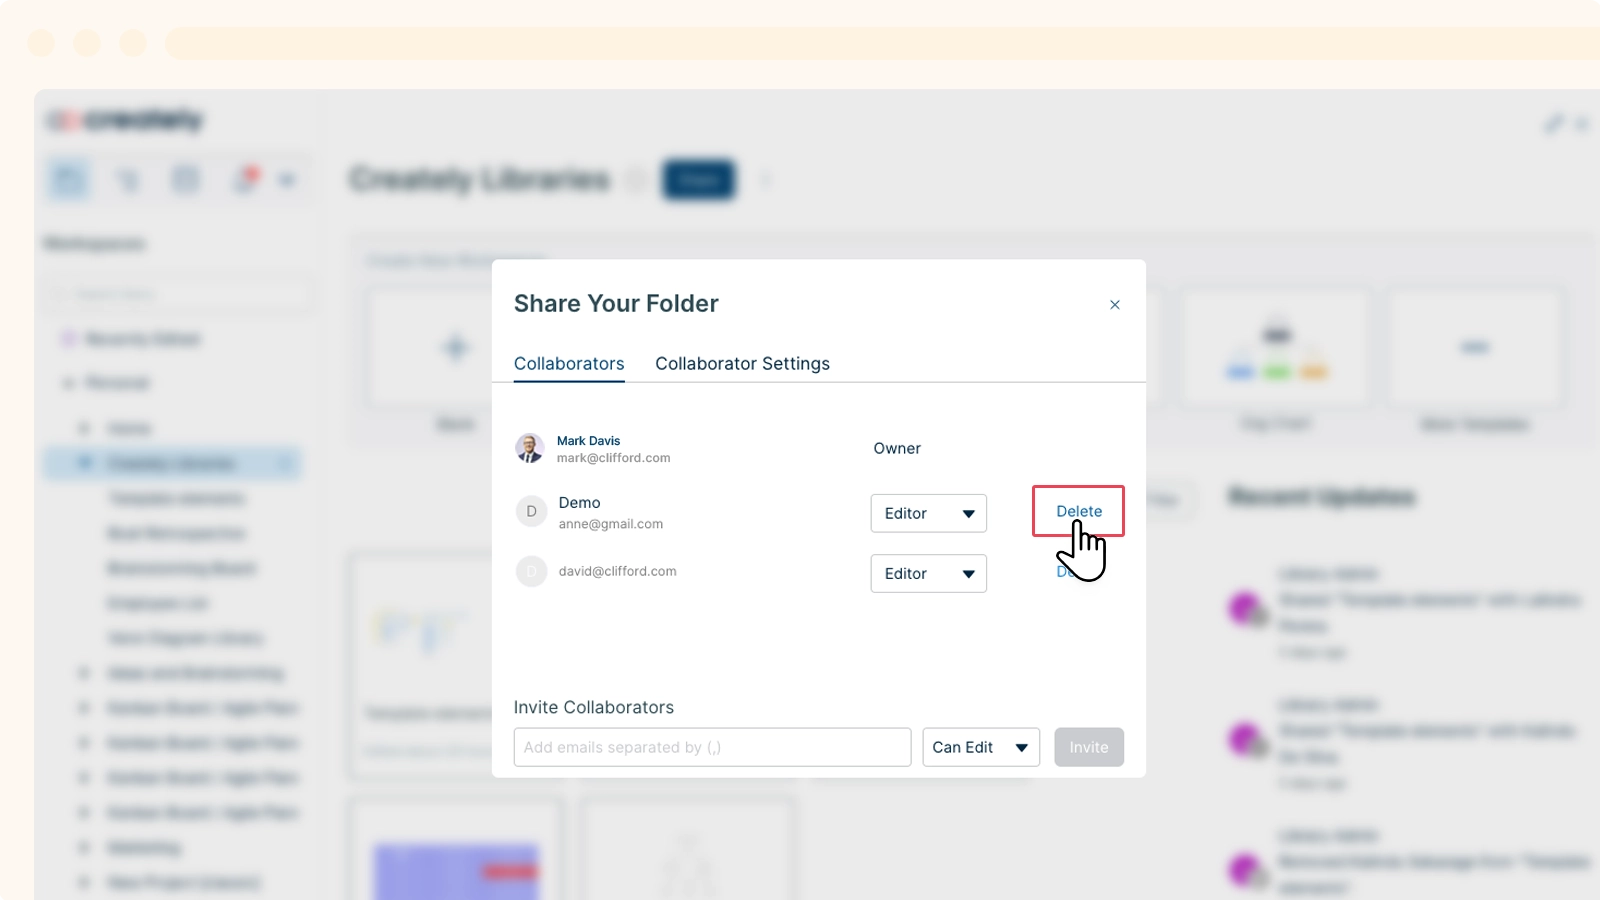
Once done, the collaborator will lose the following capabilities in a folder:
- Automatically removed from accessing the workspaces within the folder. Will no longer have access to edit or view workspaces.
- Folders will not be accessible and/or visible from the list of folders in the folder panel.
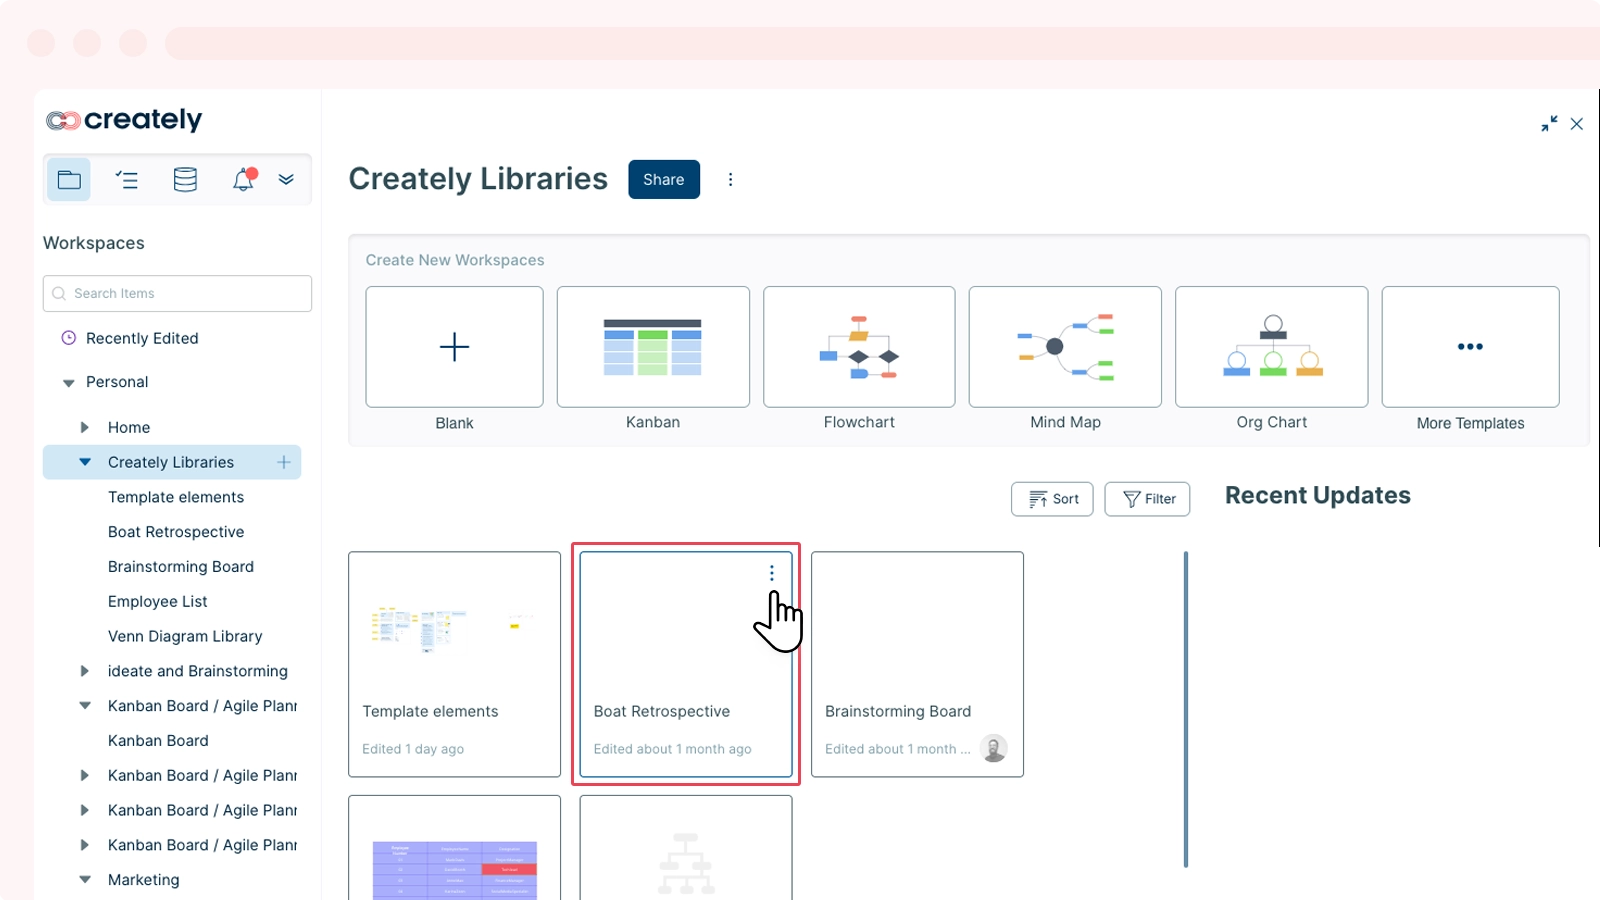
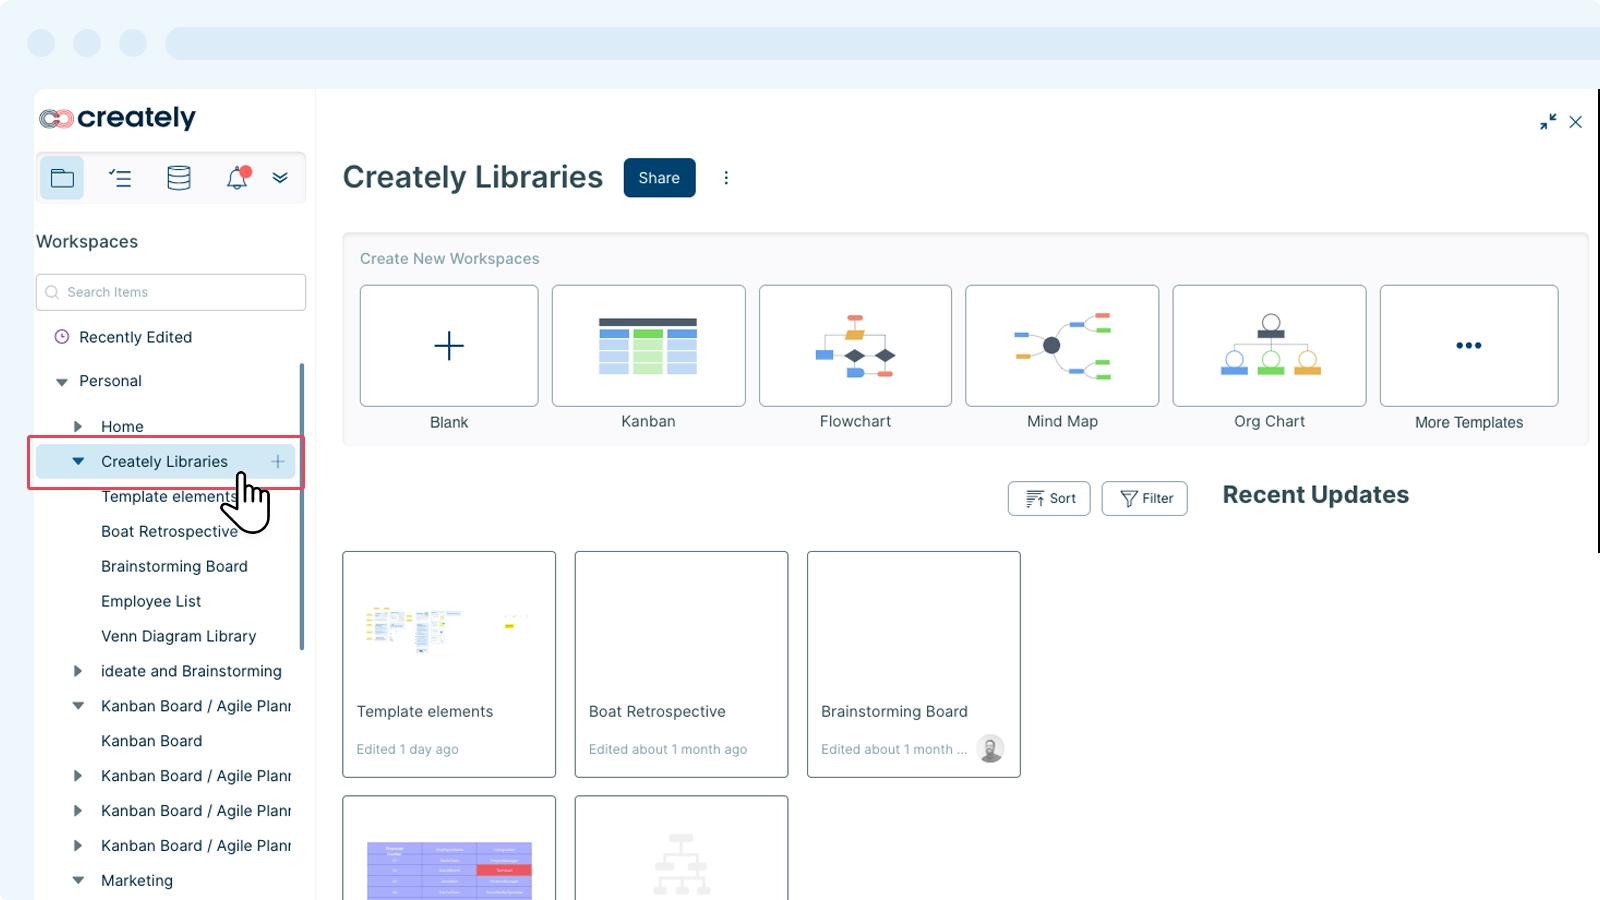
Sorting and Filtering
Easily locate and access workspaces in a folder with advanced sorting and filtering features.
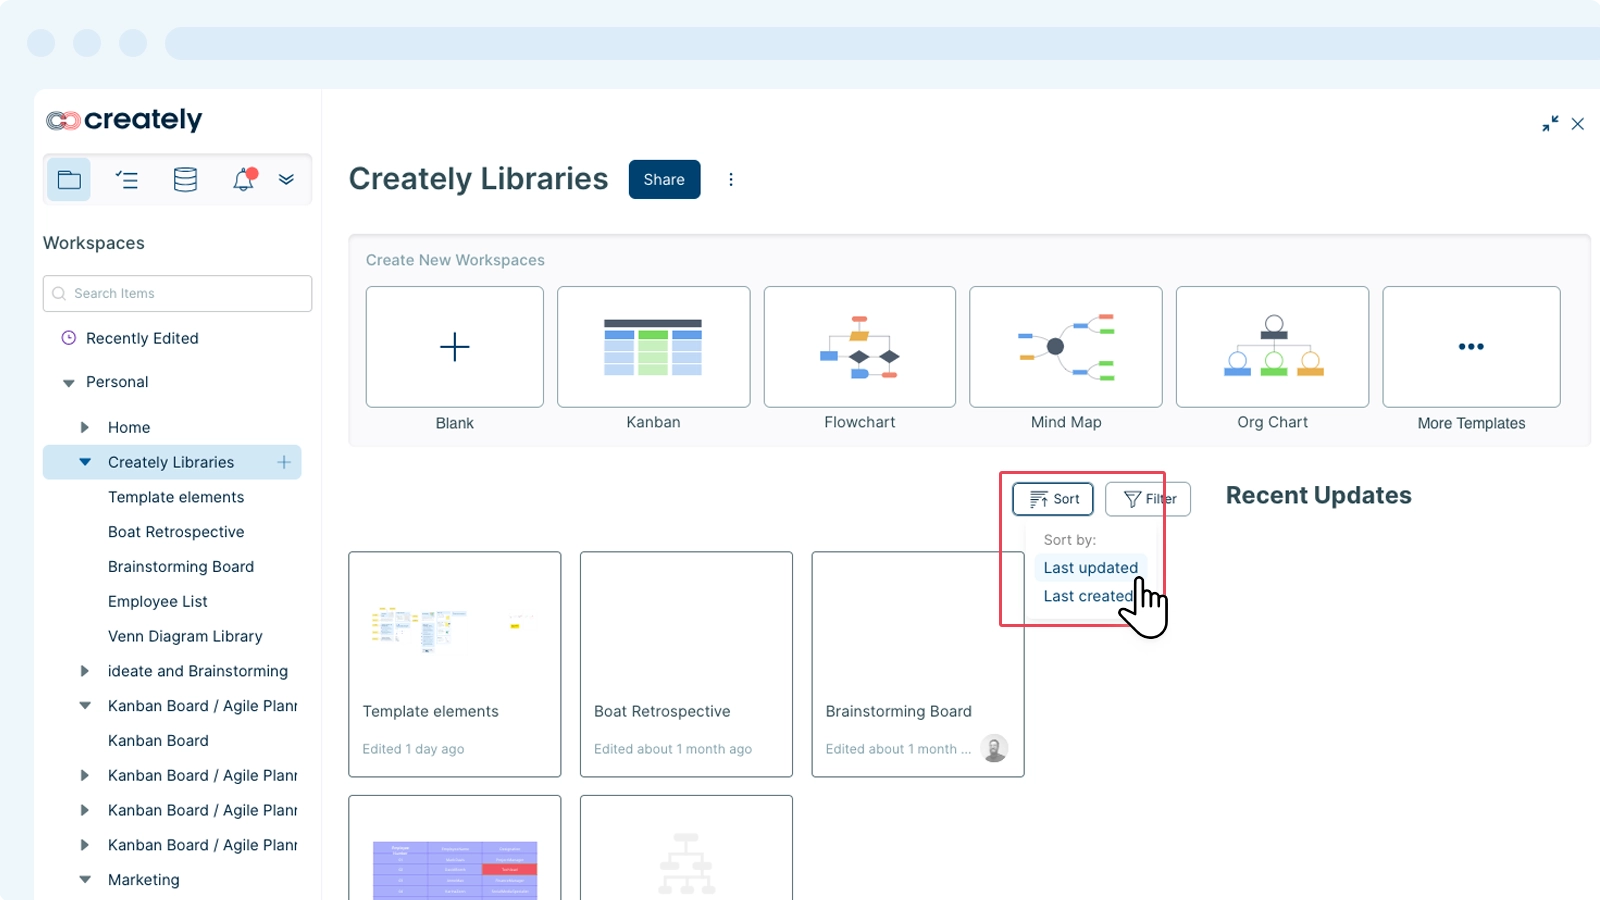
Sorting Workspaces
- Select the folder.
- Select
 .
. - You can now sort the workspaces based on the last updated and last created options.
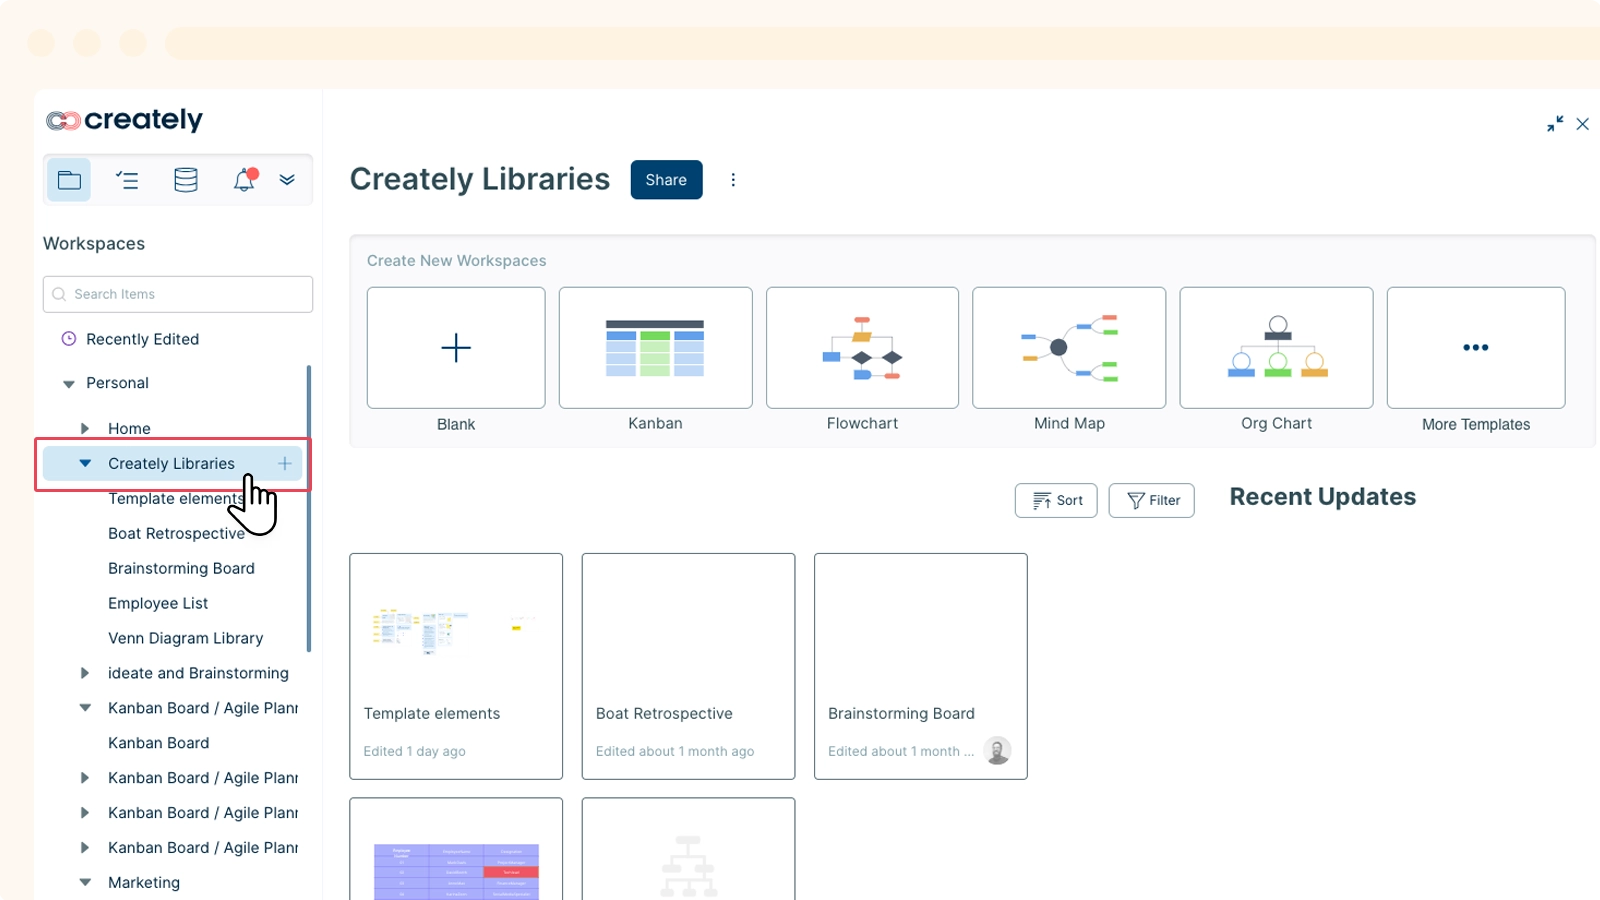
Filtering Workspaces
You can arrange your workspaces based on your preferences for quicker access and reference. To filter workspaces within a folder:
- Select the folder.
- Select
 and select your preferred option.
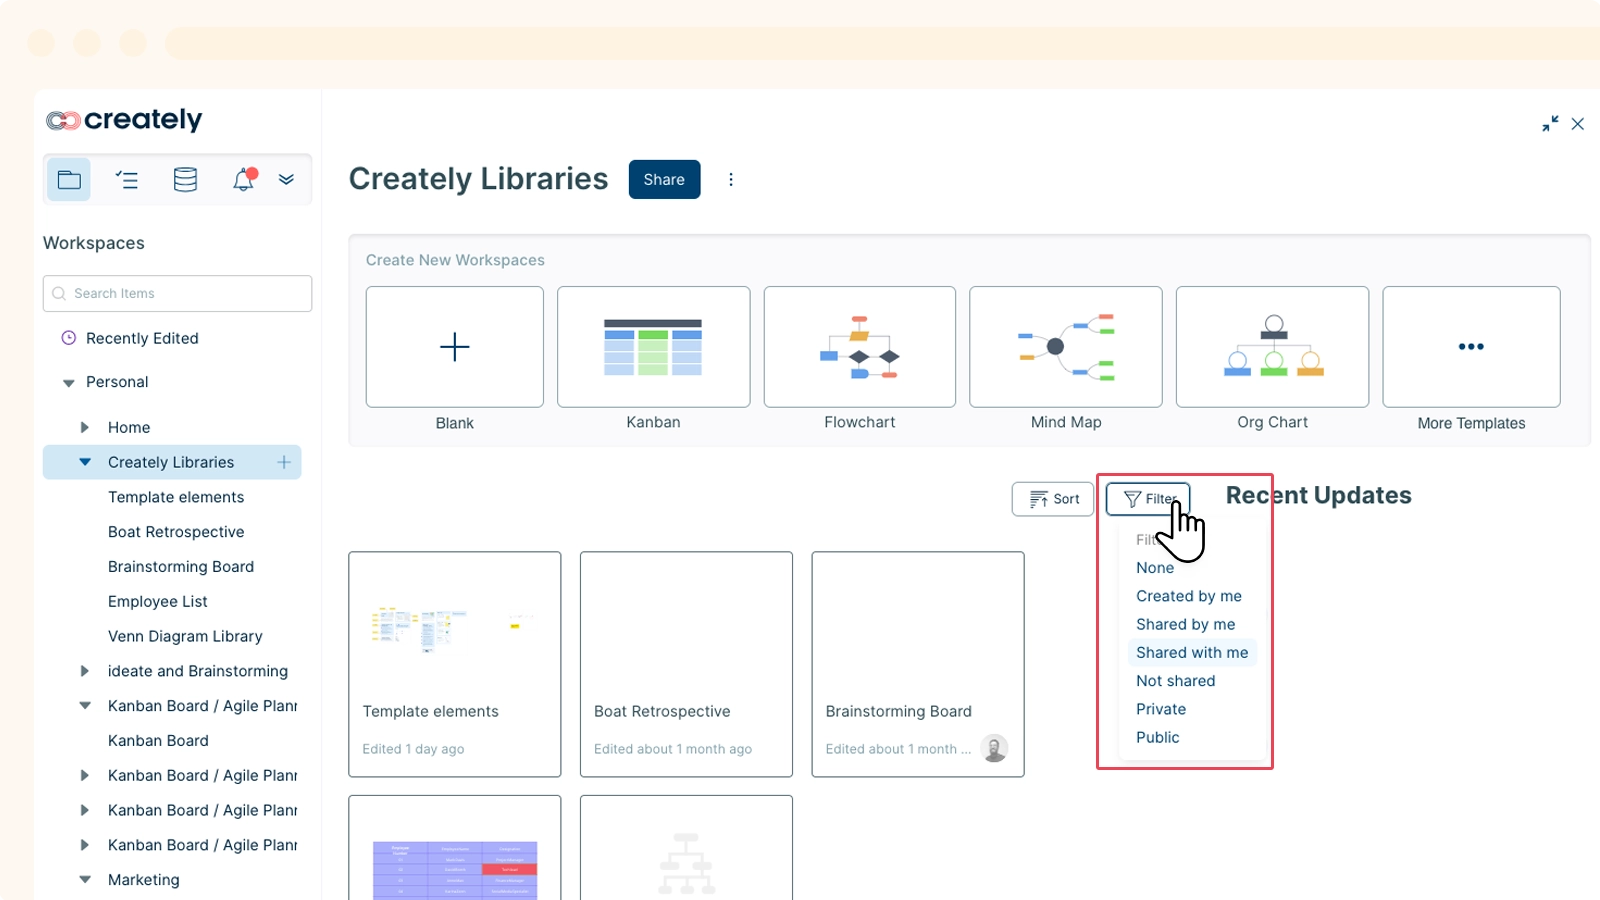
Below is the list of filter options available:
- None - This particular filter only shows you all the available workspaces within the selected folder. This includes workspaces created by you, shared with you, ones that have not been shared and workspaces that are public or private.
- Created by me - This option allows you to filter the workspaces that you have created within the selected folder.
- Shared by me - Filters the workspaces that you have shared within a folder, either among your plan or anyone that you have collaborated with. This could be a workspace that you created or one where you were added as a collaborator with sharing permissions.
- Shared with me - You can use this filter to locate workspaces within a folder that were shared with you, ones shared by your teammates, or anyone who collaborated with you.
- Not shared - Filters the workspaces that were created by you but are not shared with anyone.
- Private- Filters private workspaces within a folder. This includes workspaces that were created by you, shared with you, shared by you and workspaces that you did not share.
- Public - Filters public workspaces within a folder that are created by you or shared with you.
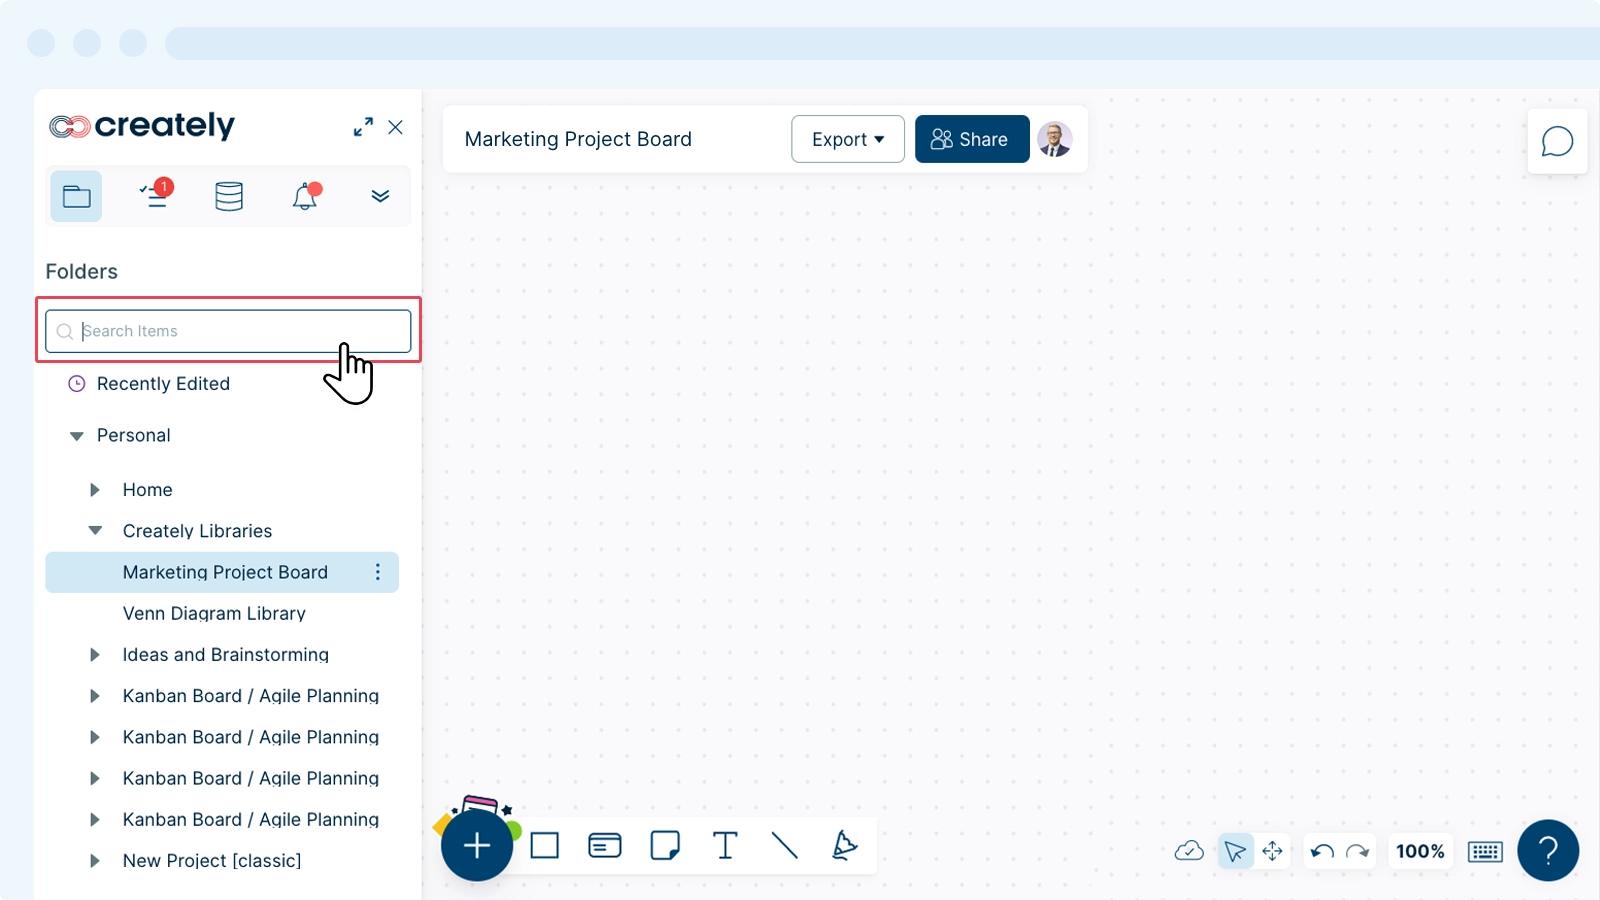
Searching For Workspaces
You can locate your workspace across folders simply by using the search feature. The folder search option enables you to quickly discover any workspaces that you have created or that have been shared with you.
- Go to Main Menu on the top-left corner of the canvas.
- Select the icon.
- Go to the search bar.
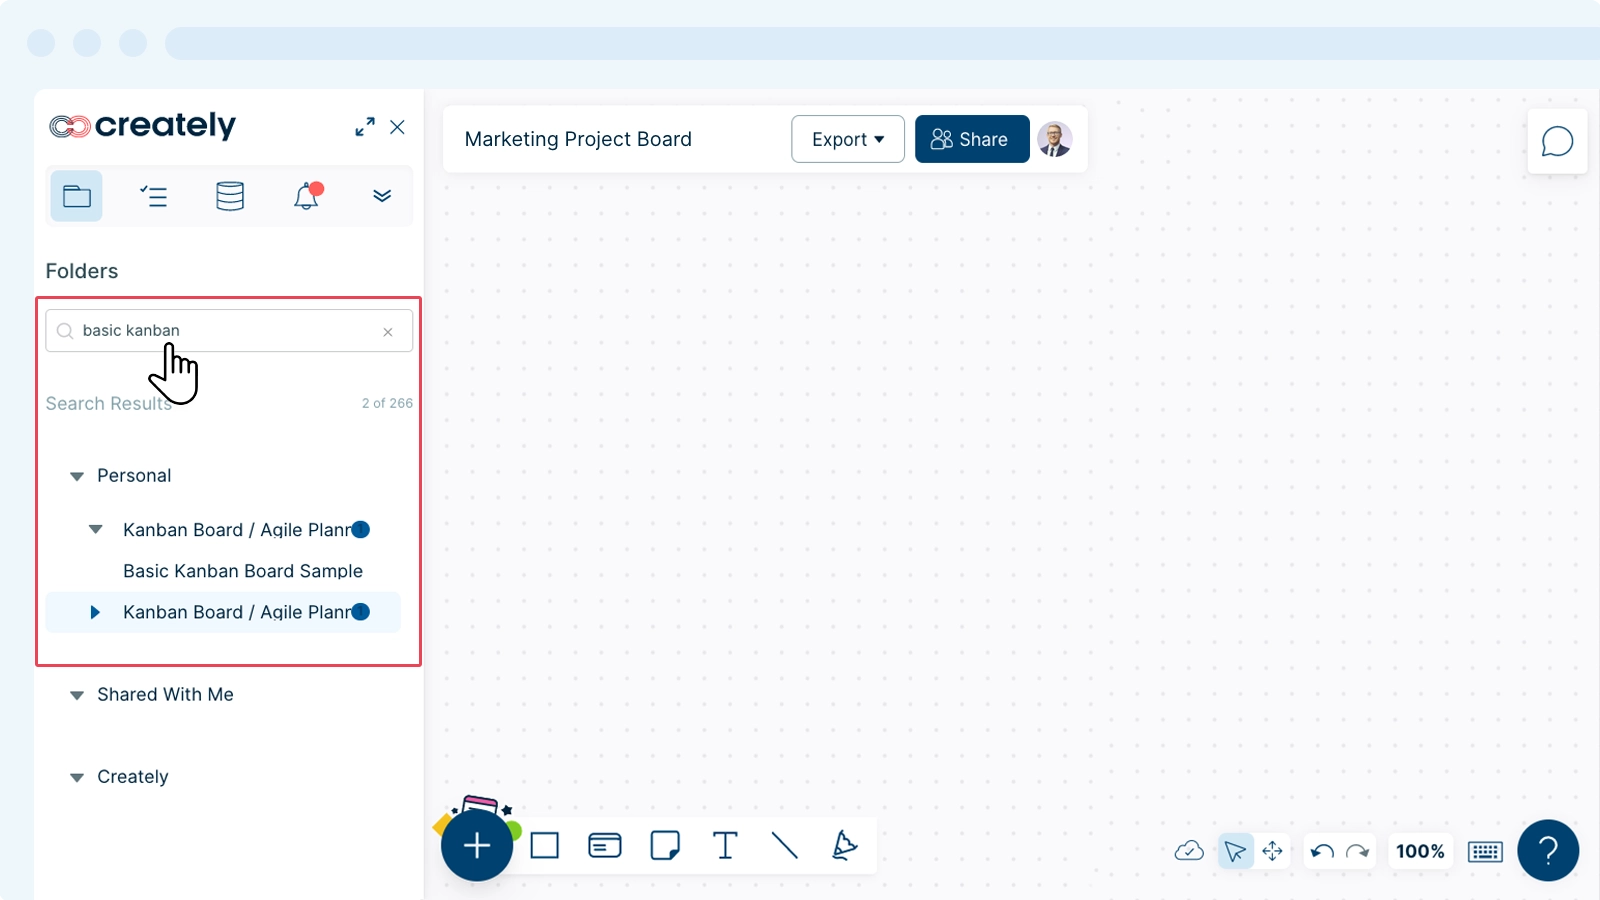
- Type the name or part of the name of the workspace you are looking for.
- You will then get a list of all the folders that contain workspaces that include the keywords you search for.
Workspace Preferences
You can customize your workspace in multiple ways. Here is a quick video on some of the options available.